Grizzly G1183 Instruction Manual
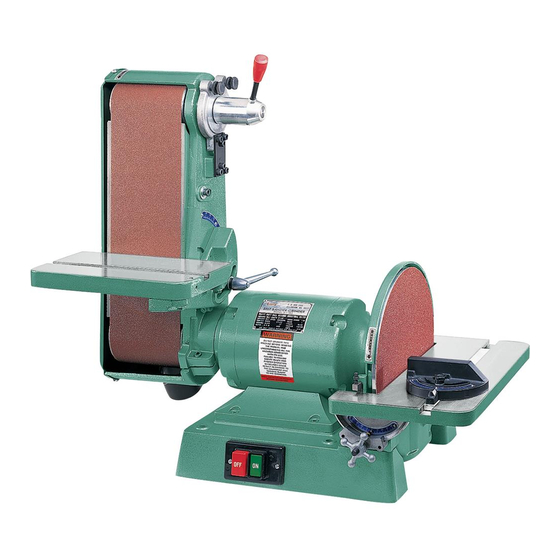
Combination sander
Hide thumbs
Also See for G1183:
- Instruction manual (34 pages) ,
- Parts list (4 pages) ,
- Owner's manual (48 pages)
Table of Contents
Advertisement
Quick Links
Download this manual
See also:
Owner's Manual
Advertisement
Table of Contents

Related Manuals for Grizzly G1183


Summary of Contents for Grizzly G1183
- Page 1 COMBINATION SANDER MODEL G1183/G1276 INSTRUCTION MANUAL COPYRIGHT © 1989 BY GRIZZLY IMPORTS, INC. WARNING: NO PORTION OF THIS MANUAL MAY BE REPRODUCED IN ANY SHAPE OR FORM WITHOUT THE WRITTEN APPROVAL OF GRIZZLY IMPORTS, INC. REVISED APRIL, 1999. PRINTED IN U.S.A.
-
Page 3: Table Of Contents
SAFETY RULES FOR POWER TOOLS ....... .2-3 ADDITIONAL SAFETY INSTRUCTIONS FOR THE SANDER ....4 CIRCUIT REQUIREMENTS 110/220V OPERATION . -
Page 4: Section 1: Safety
G1183/1276 Combination Sander VISITORS... - Page 5 12. SECURE WORK. Use clamps or a vise to hold work when practical. It’s safer than using your hand and frees both hands to operate tool. G1183/1276 Combination Sander 13. DON’T OVERREACH. Keep proper foot- ing and balance at all times. 14. MAINTAIN TOOLS WITH CARE. Keep tools sharp and clean for best and safest performance.
-
Page 6: Additional Safety Instructions For The Sander
Always feed your work AGAINST the direction of rotation. DO NOT operate the sander if the disc or belt are damaged or badly worn. Portions of sandpaper could be ejected from the sander. -
Page 7: Section 2: Circuit Requirements
SECTION 2: CIRCUIT REQUIREMENTS 110/220V Operation The Model G1183/1276 is prewired for 110V, sin- gle phase operation. Figure 1 depicts the typical grounded receptacle which should be used. This machine can be rewired to operate at 220V, how- ever a different plug will need to be installed. -
Page 8: Extension Cords
Extension Cords If you find it necessary to use an extension cord with the Model G1183/1276, make sure the cord is rated Hard Service (grade S) or better. Refer to the chart in the standard safety instructions to determine the minimum gauge for the extension cord. -
Page 9: Section 3: General Information
SECTION 3: GENERAL INFORMATION Commentary Grizzly Industrial, Inc. is proud to offer the Model G1183 6" x 48" – 12" Disc Combination Sander and its slower-speed version, the Model G1276. This saw is a part of Grizzly’s growing family of fine woodworking machinery. -
Page 10: Unpacking
Without the packing materials, filing a freight claim can be difficult. If you need advice regard- ing this situation, please call us. The G1183/1276 is a fairly heavy machine (155 lbs.). DO NOT over-exert yourself while unpacking or moving your machine – get assistance. -
Page 11: Clean Up
G1183/1276 Combination Sander Site Considerations BENCH LOAD The G1183/1276 Combination Sander repre- sents a moderately large weight load in a small footprint. Most commercial or home shop bench- es should be sufficient to carry the weight of the machine. -
Page 12: Section 4: Assembly
Placing the table in position is easier if you swing the belt table so the 45° positive stop bolt is located over the gap in the motor casting cover. -10- Figure 4. Attaching belt table. ® capscrew Figure 5. Installing lock handle. G1183/1276 Combination Sander... -
Page 13: Disc Table
Figure 6. 5. Tighten star knobs to secure the table in position. Figure 6. Attaching disc table. G1183/1276 Combination Sander Belt Lever The belt lever is used for releasing the tension on the idler pulley for belt installation. To attach the... -
Page 14: Section 5: Adjustments
4. If the stop is engaged and the table isn’t quite perpendicular to the belt, adjust the stop by turning the setscrew in or out as needed. See Figure 10. 5. Flip the block back to its former position, then back to 90° to double-check accuracy. G1183/1276 Combination Sander... -
Page 15: Positive Stops
5. Make fine adjustments by turning the setscrew in or out. Secure the checknut. Figure 11. Adjusting disc table stops. G1183/1276 Combination Sander Belt Platen The belt platen should be adjusted out far enough so it is flush with, or slightly higher than the upper roller. -
Page 16: Disc Guard
Figure 13 acts as a stop for the rotation of the belt arm. If it ever becomes necessary to remove the belt arm from the motor, be sure to remove this setscrew to allow the arm housing to be slipped of the motor mounting. G1183/1276 Combination Sander... -
Page 17: Belt Installation
Pull the lever down and slide the new belt onto the rollers and center it. G1183/1276 Combination Sander Belt Tracking Tracking adjustment is conducted as follows: 1. Insure that the upper roller is parallel to the platen (there is no adjustment for the lower roller). - Page 18 Locking Knobs and off very quickly. See if the belt stays centered during this test cycle. If the belt doesn’t remain centered on the rollers, it must be adjusted further. G1183/1276 Combination Sander...
-
Page 19: Table Tilt
60-grit (coarse) material for rough work, and a 150-grit (fine) surface for finish work. See the current Grizzly catalog for prices and ordering informa- tion. Please review all safety rules for sanders and all power tools before attempting operation. -
Page 20: Disc Sanding
To remove a large amount of material quickly from a large surface area, use the belt arm in its horizontal position. 1. Turn the sander on and let it reach its full working speed. 2. Place the workpiece flat on the belt. Be sure to hold the work securely with both hands. -
Page 21: Bevel Sanding
Serious injury could occur. G1183/1276 Combination Sander The most efficient way to get a perfect miter is to " away from cut the workpiece slightly long and sand it to the desired dimension. -
Page 22: Section 7: Maintenance
-20- The tables and other non-painted surfaces on the Model G1183 and G1276 should be protected against rust and pitting. Wiping the sander clean after every use ensures that moisture from wood dust isn’t allowed to trap moisture against bare metal surfaces. - Page 23 NOTES G1183/1276 Combination Sander -21-...
-
Page 24: Section 8: Closure
Grizzly’s policy of continuous improvement, changes may be made at any time with no oblig- ation on the part of Grizzly. Whenever possible, though, we send manual updates to all owners of a particular tool or machine. Should you receive one, add the new information to this manual and keep it for reference. -
Page 25: Wiring Diagram
G1183/1276 Combination Sander -23-... -
Page 26: Machine Data
Customer Service #: (570) 326-3806 • To Order Call: (800) 523-4777 • Fax #: (800) 438-5901 GRIZZLY MODEL G1183 COMBINATION SANDER Design Type... Bench Model Overall Dimensions: Height (Belt arm horizontal) ...14 Height (Belt arm vertical) ...29 Width...16 Length...32 Table (Belt) ...7" x 12 Table (Disc) ...7"... -
Page 27: Machine Data
Customer Service #: (570) 326-3806 • To Order Call: (800) 523-4777 • Fax #: (800) 438-5901 GRIZZLY MODEL G1276 COMBINATION SANDER Design Type ...Bench Model Overall Dimensions: Height (Belt arm horizontal) ...14 Height (Belt arm vertical) ...29 Width...16 Length...32 Table (Belt) ...7" x 12 Table (Disc) ...7"... -
Page 28: Parts Diagrams/Parts Lists
MAIN UNIT PARTS DIAGRAM -26- G1183/1276 Combination Sander... -
Page 29: Parts List
CONTACT PLT, LG, INT PT P1183029 CENTRIFUGAL SWITCH P1183030 LOWER WHEEL P1183031 FLANGE P1183032 1"-8 LH HEX NUT PN01M HEX NUT M6-1.0 mm G1183/1276 Combination Sander PARTS LIST REF# PART# ⁄ " ⁄ "-14 x 1 ⁄ " "-18 x "... - Page 30 NOTES -28- G1183/1276 Combination Sander...
- Page 31 P1183096 BELT SANDER TABLE PW07 FLAT WASHER PB07 HEX BOLT P1183099 DISC SANDER TABLE P1183100 DEGREE SLIDE P1183101 DEGREE SCALE PB07 HEX BOLT G1183/1276 Combination Sander "-16 ⁄ " ⁄ " ⁄ "-20 x ⁄ " ⁄ " ⁄ "...
-
Page 32: Warranty
WARRANTY AND RETURNS Grizzly Industrial, Inc. warrants every product it sells for a period of 1 year to the original purchaser from the date of purchase. This warranty does not apply to defects due directly or indirectly to misuse, abuse, negligence, accidents, repairs or alterations or lack of maintenance. -
Page 33: G1183/1276 Combination Sander
Do you think your purchase represents good value? ___Yes Would you recommend Grizzly Industrial to a friend? ___Yes Would you allow us to use your name as a reference for Grizzly customers in your area? Note: We never use names more than three times. ___Yes Comments:_________________________________________________... - Page 34 FOLD ALONG DOTTED LINE FOLD ALONG DOTTED LINE Send a Grizzly Catalog to a friend: Name_______________________________ Street_______________________________ City______________State______Zip______ GRIZZLY INDUSTRIAL, INC. P.O. BOX 2069 BELLINGHAM, WA 98227-2069 TAPE ALONG EDGES--PLEASE DO NOT STAPLE...
Need help?
Do you have a question about the G1183 and is the answer not in the manual?
Questions and answers