Table of Contents
Advertisement
Quick Links
Advertisement
Table of Contents

Subscribe to Our Youtube Channel
Related Manuals for Aputure Electro Storm XT26


Summary of Contents for Aputure Electro Storm XT26
- Page 1 Electro Storm XT26 Product Manual English...
-
Page 2: Table Of Contents
2. Control Box ..................................07 Setup......................................08 1. Installation and Removal of the XT26 Yoke......................08 2. Disassembly and Installation of Aputure Mount Protection Cover............09 3. Installation and Disassembly of Standard Reflector/Adapter ..............10 4. Installation and Removal of the Barn Doors .......................11 5. Lamp Adjustment.................................13 6. - Page 3 2.2.6 Fan Mode...............................30 2.2.7 Firmware Update............................31 2.2.8 Product Info..............................32 2.2.9 Custom FX..............................34 2.2.10 Language..............................34 2.2.11 Factory Reset .............................35 2.2.12 Accessory Control ............................36 2.2.13 Lead/Follow Mode...........................39 2.3 Presets..................................40 3. Control with DMX Console............................41 3.1 Connect the Lighting Console to the Control Box DMX IN Port ............41 4.
-
Page 4: Introduction
Introduction The Electro Storm XT26 is an ultra-bright LED spotlight with a variable white light engine. The new LED chip design adds green-magenta adjustability while maintaining high light output and spectrum accuracy across the entire dimming range. The light features electronic mounts that enable remote control of zoom, pan and tilt when compatible accessories are paired, through a single header cable between the lamp head and the Control Box that feeds both power and data. -
Page 5: Components List
Components List Please check whether the following items are contained in the package before using the product. Please contact your dealer if there are any missing items. Electro Storm XT26 Lamp Head Removable XT26 Yoke XT26 Control Box ×1 ×1 ×1... -
Page 6: Product Overview
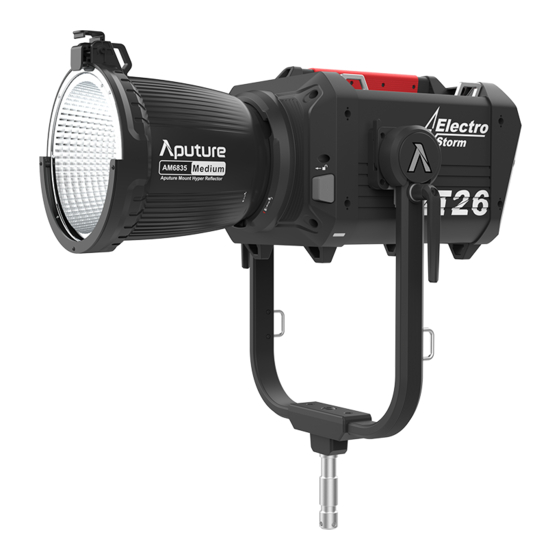
Product Overview 1. Lamp Anti-Rotate 3/8"-16 Threaded Holes Barn Doors Latch Carrying Handle Safety Chain Brackets Yoke Release Lever Medium-Angle Standard Reflector Mount Release Button Removable XT26 Yoke Tilt Lock Handle Safety Chain Bracket 28mm Junior Pin Header Cable Port Lamp Head Rear Handle... -
Page 7: Control Box
2. Control Box Carrying Handle Tie-off Point Select Knob Control Display Menu Button Light Mode Button DC 48V IN Preset Button Back Button DC 48V IN Power Button AC IN Antenna Positions Header Cable Port 3/8" Thread ×4 USB-A DMX IN Quick Release Plate DMX OUT LAN1... -
Page 8: Setup
Setup 1. Installation and Removal of the XT26 Yoke ① Installation of XT26 Yoke Insert the XT26 Yoke's Junior Pin into a rigid Junior Receiver and lock in place. Align the lamp head with the quick release plates on both sides and install until locked. ②... -
Page 9: Disassembly And Installation Of Aputure Mount Protection Cover
Disassembly of protection cover Installation of protection cover *ᅠ Make sure to remove the Aputure Mount Protection Cover before using the device. Install the Aputure Mount Protection Cover for transport and storage. -
Page 10: Installation And Disassembly Of Standard Reflector/Adapter
3. Installation and Disassembly of Standard Reflector/Barn Doors Adapter Press the Mount Release Button and insert and rotate the Standard Hood/Adapter until it locks in place; reverse to remove. Installation of Standard Reflector Removal of Standard Reflector... -
Page 11: Installation And Removal Of The Barn Doors
Installation of Barn Doors Adapter Removal of Barn Doors Adapter 4. Installation and Removal of the Barn Doors With Barn Doors Adapter... - Page 12 With Standard Reflector...
-
Page 13: Lamp Adjustment
5. Lamp Adjustment The lamp angle can be adjusted by loosening the disc brake handles. 6. Installation and Disassembly of Control Box Dolly ① Unfold the Control Box Dolly ② Lift the Control Box and install it into the quick release mechanism of the dolly... - Page 14 ③ To remove the Control Box from the dolly, press the release button and lift up on the Control Box ④ Fold and store the dolly...
-
Page 15: Connection Of Lamp With The Control Box
7. Connection of Lamp with Control Box... -
Page 16: Power Supply Connections
8. Power Supply Connections AC power supply DC power supply Note: 1. DC power cable needs to be purchased separately. 2. The connected DC power supply needs to support 3200W (48V/67A). -
Page 17: Operating Instructions
Operating Instructions 1. Power On/Off Connect the power supply and press the power button on the Control Box to turn on/off Silent : 100% : 5600K 27 00K 6500K G/M- 0.5 G/M +0.5 : Note: If your fixture has Studio Mode "ON", the Control Box will power on whenever power is supplied to it. 1.1 Status Indicator Icons Lead/Follow Mode: Leader Sidus Bluetooth... -
Page 18: Light Mode
2.1 Light Mode Press the “Light Mode” button and enter the menu interface, which consists of CCT and FX. 2.1.1 CCT Adjust the Color Temperature (2700K-6500K) and the Green/Magenta level (-0.50 thru +0.50). LIGHT MODE Silent : 100% : 5600K 27 00K 6500K G/M- 0.5... -
Page 19: Settings
2.2 Settings Press "MENU" to access the interface of the various settings. Choose between: Output Settings, High-Speed Mode, Dimming Curve, Control System, Studio Mode, Fan Mode, Update, Product Info, Custom FX, Language, Factory Reset, Accessory, Lead/Follow Mode. MENU MENU MENU MENU Output Settings High-Speed Mode... -
Page 20: High-Speed Mode
(3) Max Power Settings: When you utilize the indoor power supply cable, this function will be unlocked; you can also release the indoor power supply limitation manually. Output Settings Max Power Settings 45℃ Constant Output 800W Max Output Power Max Power Settings 550W 1600W Remove... -
Page 21: Dimming Curve
The following Dimming Curves are available: Linear, Logarithmic, S-Curve and Exponential. Dimming Curve Linear S-curve 2.2.4 Control System Electro Storm XT26 is equipped with four remote control options: DMX, Sidus BT, CRMX and Ethernet (Art-Net/sACN). Only one control option can be used at a time. Control System DMX Mode Bluetooth... -
Page 22: Dmx
2.2.4.1 DMX In DMX Mode, you can choose the following options. (1) DMX Status Screen–displays information including: DMX Address, CRMX reception strength, DMX Profile in use, the next available address after this light and its accessories total DMX footprint. DMX Mode DMX : 001 Next Add :009 DMX Status Screen... - Page 23 (4) DMX Loss Behavior: ① Hold Last Settings – holds the last control levels after the DMX signal is lost; ② Black Out – black out after the DMX signal is lost; ③ Fade to Black – fade to black over 60 seconds after the DMX signal is lost; ④...
-
Page 24: Sidus Bt
DMX Profile Extension DMX Mode DMX Loss Behavior Motorized Accessory DMX Profile Function configuration DMX Profile Extension Note: On/Off the extension function DMX Termination requires recalculating the DMX channel ! *ᅠ The motorized F14 Fresnel and the Motorized Yoke are sold separately. (7) DMX Termination: DMX Mode DMX Termination... -
Page 25: Crmx
(2) Use Sidus BT Reset to allow your Sidus Link device to connect with a previously paired fixture. If Sidus BT fails to reset, a "Reset Failed" warning will pop up before returning to the Sidus BT Reset display. Bluetooth Reset Reset successfully Bluetooth Bluetooth Status... - Page 26 (1) When CRMX is ON/Enabled, the fixture will listen for it's previously linked Transmitter. If the fixture is currently unlinked, it will listen for a Transmitter link signal and link to any new CRMX link signal. DMX : 001 Next Add :009 Profile 1 : 8CH CCT 8-bit Linking...
-
Page 27: Ethernet
Signal intensity Receiving CRMX data DMX : 001 Next Add :012 Receiving CRMX, but no DMX data is present Linked, but no TX is present Profile 1 :11CH CCT & RGB 8bit. 2.2.4.4 Ethernet You can set IP and control protocol (Art-Net/sACN) here. Control System Ethernet DMX Mode... - Page 28 b. Manual Set IP: Manually set the IP Address, Subnet Mack, and the Gateway IP Address. IP Settings IP Settings State: Manual Set IP IP Address 2 49 IP Address Subnet Mask 2 49 255.255.255.1 Subnet Mask Gateway 255.255.255.1 55 104 Gateway 255 104 MAC Address:...
- Page 29 b. Art-Net Universe: set the Art-Net Universe Art-Net & sACN Settings Art-Net Universe State: Art-Net Only Art-Net Universe:32767 327 7 sACN Universe:32769 c. Net Sub Uni: set the Art-Net Net, Sub-Net and Universe Art-Net Universe Art-Net & sACN Settings State: Art-Net Only Art-Net Universe:32767 Sub-Net...
-
Page 30: Studio Mode
2.2.5 Studio Mode Press Select to turn ON/OFF Studio Mode. When the studio mode is enabled (ON), the fixture will power on when connected to live power. When studio mode is disabled (OFF), press the power button to power on the fixture. Studio Mode Studio Mode 2.2.6 Fan Mode... -
Page 31: Firmware Update
2.2.7 Firmware Update You can upgrade the firmware by inserting a USB flash drive with the latest firmware into the USB port of the control box .The current firmware version is also listed in this interface. NOTE: The fixture can also be updated via Sidus Link with Sidus BT turned ON and a Wi-Fi internet connection on your Sidus Link device. -
Page 32: Product Info
2.2.8 Product Info The Hardware Version, lamp temperature, Fixture Orientation (when utilizing the Motorized Yoke), and the Fixture Run Time (LED Engine Hours) can all be checked in the Product Info interface. (1) Hardware Version: display the hardware versions of the Driver and Controller Product Info Hardware Version Hardware Version... - Page 33 (4) Fixture Run Time: total LED engine hours and total system hours Product Info LED Engine Hours Hardware Version Total Hours 800h Temperature System Hours Fixture Orientation Total Hours 1000h Fixture Run Time (5) Failure information: If the fixture fails, a pop-up window will appear to indicate an error. Errors can be divided into two categories: a.
-
Page 34: Custom Fx
2.2.9 Custom FX 10 custom FXs can be saved for each type of FX. The suffix “NO FX” shows no FX is saved and the suffix “Untitled” shows the FX is saved. Custom FX Picker FX Picker FX Music FX *ᅠ... -
Page 35: Factory Reset
2.2.11 Factory Reset Select "YES" if you wish to Factory Reset the fixture. Select "NO" to cancel. You may also long press the Menu button for 3 seconds for a quick Factory Reset shortcut. Factory Settings: Light Mode: CCT Intensity: 50% CCT: 5600K Language: English Fan Mode: Smart... -
Page 36: Accessory Control
2.2.12 Accessory Control A Motorized Fresnel, Motorized Yoke, and other Aputure-Mount Accessories can be purchased sepa- rately. In the Accessory interface, information about the accessories can be found and settings for the accessories can be adjusted. Accessory Motorized Fresnel Motorized Yoke... - Page 37 Edit and reset motion limits in this interface. Caution is recommended when adjusting and resetting limits. b. When using an accessory that does not utilize the Aputure Mount system, the user can manually select the Accessory from the provided list to populate the motion limitations of the Motorized Yoke.
- Page 38 Tilt Limit Non-Aputure acc. NO 3 confirm (3) Optical Accessories: When utilizing an Optical Aputure-Mount Accessory, the type of accessory can be viewed in the "Optical Accessories" window. The following accessories are available: narrow-angle standard reflector, medium-angle standard reflector, wide-angle standard reflector and barn door adapter...
-
Page 39: Lead/Follow Mode
2.2.13 Lead/Follow Mode In this interface, you can set your fixtures as either the Leader or the Follower (Leader/"OFF"). The Leader automatically sends its settings to the Follower fixtures for synchronization. Batch upgrades of the firmware from a USB drive in the Leader's port is also possible. Lead / Follow Mode Lead / Follow Mode Follow Mode... -
Page 40: Presets
2.3 Presets 10 Light Mode Presets can be saved. Choose your settings within the CCT, Adv. HSI, RGB, XY, Source or Gel light modes. Then press the PRESET button to open the Preset interface. Select the Preset number to open, replace or delete the Preset. -
Page 41: Control With Dmx Console
3. Control with DMX Console 3.1 Connect the Lighting Console to the Control Box DMX IN Port OUTPUT DMX512 OUTPUT DMX512 Daisy Chain... -
Page 42: Dmx Control Operation
4. DMX Control Operation Electro Storm XT26 supports several DMX profiles. Please download the DMX channel table on the official website (https://aputure.cn) to view detailed configurations. 5. Downloading the Sidus Link APP You may search Sidus Link in the APP Store or Android market to download the professional control software to control compatible Aputure fixtures. -
Page 43: Product Specifications
Lamp with yoke 457*497*684mm Control Box 283.5*262*550mm XT26 Yoke 591*88*497mm Medium-angle standard reflector 306*266*252mm Barn doors 282*303*40mm Size (length X width X height) Barn doors adapter 303*263*87mm AC power cord Head cable 165*165*34mm Aputure Mount protection cover 439*470*1054mm(unfolded) Control Box Dolly 200*470*703mm(folded) - Page 44 Control Box Dolly 7.22kg *ᅠ Lamp failure due to water ingress voids the user warranty. *ᅠ If Electro Storm XT26 is used under heavy rain, the use angle of the lamp recommended is shown in the following figure: +45° -45°...
-
Page 45: Photometric Data
Photometric Data Normal mode (HyperSync) Distance of 2M Bare Reflector Reflector Reflector spot spot spot Fresnel Fresnel lamp at 50° at 35° at 20° 50° 36° 19° at 18° at 50° 2700K 13070 42500 83300 5520 12130 23370 103500 24840 3200K 15880 51400... - Page 46 Normal mode (HyperSync) Distance of 3M Bare Reflector Reflector Reflector spot spot spot Fresnel Fresnel lamp at 50° at 35° at 20° 50° 36° 19° at 18° at 50° 2700K 6210 18720 36300 107300 2630 5820 11420 52100 12520 3200K 7460 22350 44100...
- Page 47 Normal mode (HyperSync) Distance of 5M Bare Reflector Reflector Reflector spot spot spot Fresnel Fresnel lamp at 50° at 35° at 20° 50° 36° 19° at 18° at 50° 2700K 2552 7070 12720 36200 1030 2178 4150 20450 5080 3200K 3080 8360 15360...
- Page 48 Normal mode (HyperSync) Distance of 7M Bare Reflector Reflector Reflector spot spot spot Fresnel Fresnel lamp at 50° at 35° at 20° 50° 36° 19° at 18° at 50° 2700K 3360 6210 17930 1152 2157 10660 2750 3200K 1086 4050 7530 21630 1399...
-
Page 49: Safety Instructions
9. Do not immerse this fixture in water or any other liquid to avoid electric shock. 10. Do not disassemble the fixture to avoid the risk of fire or electric shock. Contact cs@aputure.com or take the lighting fixture to qualified service personnel when service or repair is required. Incorrect reassembly may cause electric shock when the lighting fixture is in use. - Page 50 fixture. We recommend only using the original Aputure cable accessories. Please note that any malfunctions caused by using unauthorized accessories are not covered by the warranty. The user may pay for service and maintenance. When hanging the fixture overhead, always ensure an extra safety measure has been attached -such as...
-
Page 51: Fcc Declaration Of Conformity
FCC Declaration of Conformity Changes or modifications to this product that are not expressly approved by the manufacturer are prohibited and voids the user warranty. ATTENTION This equipment has been tested and found to comply with the limits for a Class B digital device, pursuant to Part 15 of the FCC Rules. -
Page 52: Disclaimer
Users undertake to be responsible for their behaviors and the consequences accordingly. Aputure will not be responsible for all losses arising from users’ operation of this product not in accordance with the User’s Manual.
Need help?
Do you have a question about the Electro Storm XT26 and is the answer not in the manual?
Questions and answers