Advertisement
Quick Links
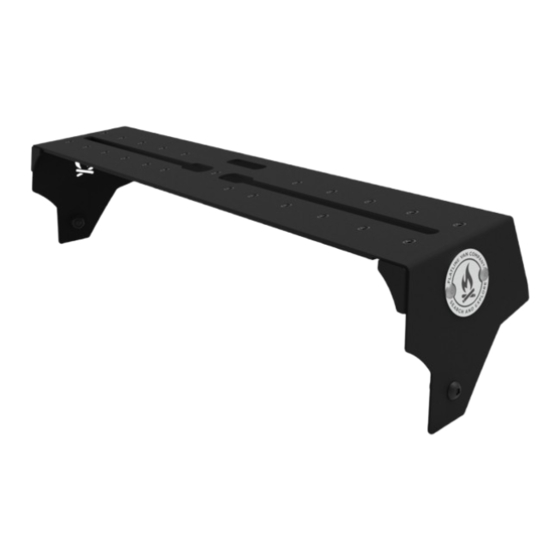
S PRI NTER VAN D AS H MOU NT
SP1012 B
INSTALLATION
GUIDE
F L AT L I N E VA N C O • S U P P O R T @ F L AT L I N EVA N C O . C O M • 8 8 8 - 6 6 7- 5 5 7 6
TOOLS REQUIRED
(NOT INCLUDED)
+
POWER DRILL
+
T20 TORX
+
7/32" DRILL BIT
+
10MM WRENCH OR SOCKET
+
MARKER
+
5/32" ALLEN WRENCH
+
FLATHEAD SCREWDRIVER
+
AUTO PANEL REMOVAL TOOLS
INSTALL INFO
TIME TO INSTALL THIS PRODUCT: 30-45 MINUTES
Additional help is suggested for a few of the install steps.
BEFORE YOU START
Please inspect the product and packaging upon
delivery to ensure there are no issues and that
all parts and hardware are accounted for.
Contact us ASAP if anything is missing at:
support@flatlinevanco.com
0 1
Advertisement

Summary of Contents for FVC SP1012B
- Page 1 INSTALLATION GUIDE S PRI NTER VAN D AS H MOU NT SP1012 B TOOLS REQUIRED (NOT INCLUDED) POWER DRILL T20 TORX 7/32” DRILL BIT 10MM WRENCH OR SOCKET MARKER 5/32” ALLEN WRENCH FLATHEAD SCREWDRIVER AUTO PANEL REMOVAL TOOLS INSTALL INFO TIME TO INSTALL THIS PRODUCT: 30-45 MINUTES Additional help is suggested for a few of the install steps.
-
Page 2: Before You Start
BEFORE YOU START All Flatline Van Co products must be properly assembled and secured before attaching to your vehicle. Improper attachment could result in an automobile accident, and could cause serious bodily injury or death to you or to others involved. You are responsible for assembling and securing Flatline Van Co products to your vehicle, checking the mounting points and attachments prior to use, and regularly inspecting the products for wear and or damage. -
Page 3: Package Contents
PACKAGE CONTENTS DASH MOUNT QTY: 1 F L AT L I N E VA N C O • S U P P O R T @ F L AT L I N EVA N C O . C O M • 8 8 8 - 6 6 7- 5 5 7 6... - Page 4 HARDWARE 10-24 X 0.5 BUTTON HEAD HEX #10 SCREW FLAT WASHER 10-24 NYLON LOCKNUT DRIVE SCREW QTY: 26 QTY: 2 QTY: 2 F L AT L I N E VA N C O • S U P P O R T @ F L AT L I N EVA N C O . C O M • 8 8 8 - 6 6 7- 5 5 7 6...
- Page 5 INSTALL TOOLS REQUIRED FOR THIS STEP: MARKER STEP | 01 LAYOUT AND INSTALL PREP 1.1 Position the Dash Mount: Dry fit the Dash Mount over the Radio (FIG 1). Ensure it sits in the correct position with the side mounts properly aligned (FIG 1-3). 1.2 Mark Drill Holes: Use a Sharpie to mark the side holes for drilling (FIG 2+3) .
- Page 6 AUTO PANEL REMOVAL TOOLS TOOLS REQUIRED FOR THIS STEP: MARKER STEP | 02 REMOVE DASH COMPONENTS 2.1 Remove Air Vents: Remove the Dash Mount (FIG 4) and both Air Vents that sit inside the Radio Bezel. You can use plastic Auto Panel Removal Tools (FIG 5) to gently pry the around the housing until it releases (FIG 6).
- Page 7 AUTO PANEL REMOVAL TOOLS TOOLS REQUIRED FOR THIS STEP: STEP | 02 REMOVE DASH COMPONENTS 2.2 Remove Radio: Pry around the perimeter of the Radio (FIG 8) to release the clips that hold the Radio to the Radio Bezel. The top edge has a series of small “teeth” that you can incrementally pry to loosen (FIG 9);...
- Page 8 AUTO PANEL REMOVAL TOOLS TOOLS REQUIRED FOR THIS STEP: STEP | 02 REMOVE DASH COMPONENTS 2.3 Remove Radio Bezel: Using an Auto Panel Pry Tool, carefully remove the Radio Bezel by working around the edge to loosen the clips holding it in place (FIG 12). The center clip along the bottom edge requires some manipulation to release (FIG 13).
- Page 9 POWER DRILL TOOLS REQUIRED FOR THIS STEP: 7/32” DRILL BIT 10MM WRENCH OR SOCKET 5/32” ALLEN WRENCH STEP | 03 DASH MOUNT ASSEMBLY 3.1 Drill Holes for Sidearms: Drill out the marked mount holes along the Radio Bezel using a 7/32” Drill Bit (FIG 15). 3.2 Reinstall Radio Bezel: Reinstall Radio Bezel back into place and ensure all clips are snug.
- Page 10 T20 TORX TOOLS REQUIRED FOR THIS STEP: STEP | 04 INSTALL DASH MOUNT 4.2 Reinstall Radio and Vents: Clip the Radio back into place (FIG 19) and reinstall the two removed screws inside the vent holes of the dash (FIG 20). Find the Top Side of the Air Vents (FIG 21) and proceed to pop them back into place.
- Page 11 5/32 “ ALLEN WRENCH TOOLS REQUIRED FOR THIS STEP: STEP | 04 INSTALL DASH MOUNT 4.3 Thread in Mounting Screws (Optional): If you aren’t mounting any accessories right away, you can either stow away the mounting screws or thread them in for ease-of- access.
- Page 12 FVC (and see) from you! Head to the products and following along and we will make it right. FVC is product page and click “Leave a company of van and outdoor with your adventures. Tag us Review.”...


Need help?
Do you have a question about the SP1012B and is the answer not in the manual?
Questions and answers