Advertisement
Quick Links
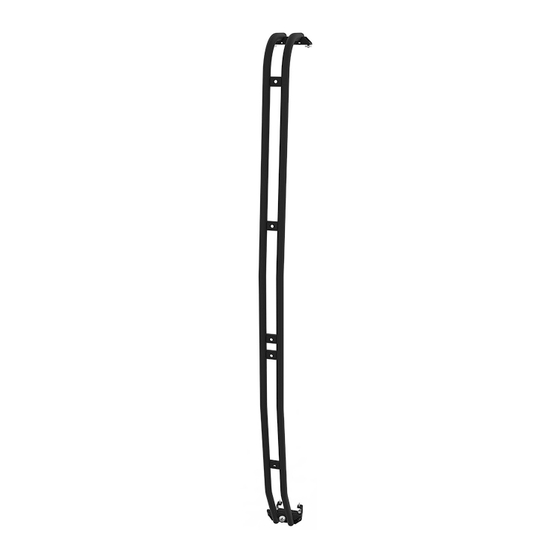
S PRI NTER VAN S URF POL E
SP1110 B
INSTALLATION
GUIDE
F L AT L I N E VA N C O • S U P P O R T @ F L AT L I N EVA N C O . C O M • 8 8 8 - 6 6 7- 5 5 7 6
TOOLS REQUIRED
(NOT INCLUDED)
+
TAPE MEASURE
+
IMPACT DRIVER
+
9/16" SOCKET
+
3/8" SOCKET
+
7/32" ALLEN WRENCH
+
5/32" ALLEN WRENCH
INSTALL INFO
TIME TO INSTALL THIS PRODUCT: 1 HOUR
Additional help is suggested for a few of the install
steps.
BEFORE YOU START
Please inspect the product and packaging upon
delivery to ensure there are no issues and that all
parts and hardware are accounted for.
Contact us ASAP if anything is missing at:
support@flatlinevanco.com
0 1
Advertisement

Related Manuals for FVC SP1110B


Summary of Contents for FVC SP1110B
- Page 1 INSTALLATION GUIDE S PRI NTER VAN S URF POL E SP1110 B TOOLS REQUIRED (NOT INCLUDED) TAPE MEASURE IMPACT DRIVER 9/16” SOCKET 3/8” SOCKET 7/32” ALLEN WRENCH 5/32” ALLEN WRENCH INSTALL INFO TIME TO INSTALL THIS PRODUCT: 1 HOUR Additional help is suggested for a few of the install steps.
-
Page 2: Before You Start
BEFORE YOU START All Flatline Van Co products must be properly assembled and secured before attaching to your vehicle. Improper attachment could result in an automobile accident, and could cause serious bodily injury or death to you or to others involved. You are responsible for assembling and securing Flatline Van Co products to your vehicle, checking the mounting points and attachments prior to use, and regularly inspecting the products for wear and or damage. -
Page 3: Package Contents
PACKAGE CONTENTS TOP WELDMENT BOTTOM WELDMENT SURF POLE HANGAR BAYONET BRACKET QTY: 1 QTY: 1 QTY: 1 QTY: 2 F L AT L I N E VA N C O • S U P P O R T @ F L AT L I N EVA N C O . C O M • 8 8 8 - 6 6 7- 5 5 7 6... - Page 4 HARDWARE 1/4 X 1 HEX HEAD WITH 3/8-16 X 0.75 BUTTON HEAD 3/8 SCREW BELLEVILLE SEALING WASHER DRILLING SPRINTER RAIL NUT HEX DRIVE SCREW SPRING LOCK WASHER SCREW QTY: 2 QTY: 2 QTY: 2 QTY: 4 1/4-20 X 0.75 FLANGED 3/8-16 X 1 SQUARE NECK 3/8 SCREW FLAT 3/8-16 NYLON INSERT...
- Page 5 Steps, Water Tanks, etc.) See FIG 1 for key areas that will need accessed. 1.2 FVC Products Compatibility: The Surf Pole is designed to be mounted alongside our Side Steps (FIG 2) and is compatible with each of our roof racks (FIG 3) except the Standard Rack.
- Page 6 TOOLS REQUIRED FOR THIS STEP: 5/32” ALLEN WRENCH STEP | 02 SURF POLE ASSEMBLY 2.1 Install Bayonets to Bottom Weldment: Find the Bottom Weldment and insert Bayonets as shown in FIG 4. Secure using (4) 1/4-20 x 0.75 Flanged Button Head Hex Drive Screws and Loctite.
- Page 7 7/32” ALLEN WRENCH TOOLS REQUIRED FOR THIS STEP: STEP | 03 SURF POLE FITTING 3.1 Roof Rail Nuts: Slide in Rail Nuts to desired location of install along the Roof Rail (FIG 8+9). 3.2 Attach Surf Pole: Loosely secure Surf Pole to Rail Nuts using (2) 3/8-16 x 0.5”...
- Page 8 STEP | 04 SURF POLE ALIGNMENT 4.1 Align Pole to Secondary Mounting Point: Whether you are using an FVC Side Ladder (FIG 12) or a secondary Surf Pole (FIG 13), measure to ensure that the distance between mounting points is square from the top to the bottom.
- Page 9 9/16” SOCKET STEP | 05 SURF POLE INSTALL 5.1a Direct Mount to FVC Side Steps: Loosen the 3/8-16” Bolts holding the Driver Side Step Weldment to your Hangar Brackets and Side Braces (FIG 14). Remove the Bolts holding the Joining Plate to the Weldment and replace using the supplied Surf Pole Hangar Bracket and existing hardware (FIG 15).
- Page 10 TOOLS REQUIRED FOR THIS STEP: IMPACT DRIVER 3/8” SOCKET 9/16” SOCKET STEP | 05 SURF POLE INSTALL 5.1b Mount to Pinch Seam: Loosen the 3/8-16” Bolts holding the Driver Side Step Weldment to your Hangar Brackets and Side Braces (FIG 16). Slide in the Surf Pole Hangar Bracket into place and drive (2) 1/4-20”...
- Page 11 IMPACT DRIVER TOOLS REQUIRED FOR THIS STEP: 9/16” SOCKET 7/32” ALLEN WRENCH STEP | 05 SURF POLE INSTALL 5.3 Surf Pole to Hangar Bracket Mount: Attach your Surf Pole to the installed Surf Pole Hangar Bracket as shown (FIG 18) using the provided 3/8-16”...
- Page 12 FVC (and see) from you! Head to the products and following along and we will make it right. FVC is product page and click “Leave a company of van and outdoor with your adventures. Tag us Review.”...
Need help?
Do you have a question about the SP1110B and is the answer not in the manual?
Questions and answers