
Related Manuals for FVC SP1001B


Summary of Contents for FVC SP1001B
- Page 1 Installation Guide Step Extension SP1001B FLATLINE VAN CO • SUPPORT@FLATLINEVANCO.COM • 888-667-5576...
- Page 2 All Flatline Van Co products must be properly assembled and secured before attaching to your vehicle. Improper attachment could result in an automobile accident, and could cause serious bodily injury or death to you or to others involved. You are responsible for assembling and securing Flatline Van Co products to your vehicle, checking the mounting points and attachments prior to use, and regularly inspecting the products for wear and or damage.
- Page 3 THANK YOU! ARE YOU EXCITED ABOUT YOUR NEW STEP EXTENSION? HERE ARE A FEW THINGS TO TOOLS DO BEFORE BEGINNING THE INSTALLATION PROCESS-- • PLEASE INSPECT THE PRODUCT TO ENSURE THERE WAS NO DAMAGE INCURRED DURING SHIPPING. • IF THERE IS DAMAGE TO REPORT, PLEASE CONTACT OUR CUSTOMER SERVICE DEPARTMENT AS SOON AS POSSIBLE.
-
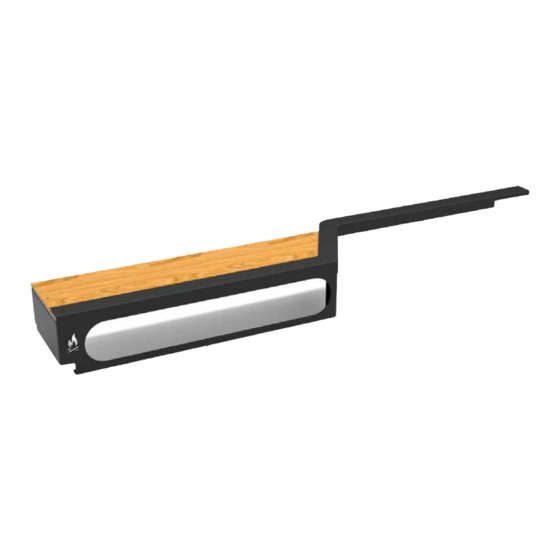
Page 4: Package Contents
PACKAGE CONTENTS FLOORING EXTENSION FLOOR SUPPORT EXTENSION QTY - 1 QTY - 1 SUPPORT BRACKET STEP EXTENSION TRIM QTY - 1 QTY - 1 FLATLINE VAN CO • SUPPORT@FLATLINEVANCO.COM • 888-667-5576... - Page 5 HARDWARE #6 X 0.375 FLAT HEAD UNDERCUT #8 X 0.625 FLAT HEAD 6-32 X 0.625 FLAT HEAD 6-32 NYLON INSERT PHILLIPS DRIVE SCREW DRILLING SCREW PHILLIPS DRIVE SCREW LOCKNUT QTY - 12 QTY - 7 QTY - 8 QTY - 8 FLATLINE VAN CO •...
-
Page 6: Let's Get Started
LET’S GET STARTED! FIRST, GRAB THE FLOOR SUPPORT EXTENSION AND POSITION IT IN THE LEFT CORNER OF YOUR STEP. IT’S A GOOD IDEA TO DRY FIT THE FLOORING EXTENSION PIECE TO ENSURE YOU’RE POSITIONED CORRECTLY, AS WELL AS THE TRIM PIECE. THEN, SCREW THE FLOOR SUPPORT EXTENSION DOWN TO YOUR STOCK PLASTIC STEP USING 4 OF THE #8 X 0.625 FLAT HEAD DRILLING FIGURE 1... - Page 7 DETAIL A ONCE YOU HAVE THE SUPPORT EXTENSION SECURED; GRAB THE WOOD FLOORING EXTENSION ALONG WITH THE SUPPORT BRACKET AND BOLT THEM TOGETHER WITH 3 OF THE 6-32 X 0.625 FLAT HEAD PHILLIPS DRIVE SCREWS AND 6-32 NYLON INSERT LOCKNUTS. SNUG THESE DOWN AND PROCEED TO NEXT STEP.
- Page 8 FIGURE 3 TAKE THE FLOORING EXTENSION THAT YOU JUST ASSEMBLED AND LAY IT DOWN ON TOP OF THE FLOOR SUPPORT EXTENSION. INSERT 2 OF THE 6-32 X 0.625 FLAT HEAD PHILLIPS DRIVE SCREWS IN THE LOCATIONS INDICATED ON THE RIGHT IN FIGURE 3 TO ENSURE ALIGNMENT OF THE PRE-DRILLED HOLES.
- Page 9 AFTER SECURING THE SUPPORT BRACKET TO THE SHEET METAL OF THE VAN; YOU CAN NOW FINISH SECURING THE FLOORING EXTENSION TO THE FLOOR SUPPORT EXTENSION USING THE REMAINDER OF THE 6-32 X 0.625 FLAT HEAD PHILLIPS DRIVE SCREWS AND 6-32 NYLON INSERT LOCKNUTS. SNUG THESE DOWN TIGHT TO PREVENT SQUEAKS IN THE FLOOR.
- Page 10 LAST STEP IS TO SCREW DOWN THE TRIM PIECE USING THE #6 X 0.375 FLAT HEAD UNDERCUT PHILLIPS DRIVE SCREWS. MAKE SURE YOUR TRIM PIECE IS BUTTED UP TIGHT TO THE EXTENSION ON ALL FACES, AND FITS APPROPRIATELY WITH THE TRIM AND BODY PIECES OF YOUR VAN BEFORE YOU BEGIN SCREWING IT DOWN.
- Page 11 CUSTOMER SUPPORT If you are having any issues with your product, please reach out, and we will make it right. FVC is a company of van and outdoor enthusiasts that design and use our own products, so we want you to be as stoked on your new parts as we are! @flatlinevanco...
Need help?
Do you have a question about the SP1001B and is the answer not in the manual?
Questions and answers