Table of Contents
Advertisement
Quick Links
Advertisement
Table of Contents

Related Manuals for TRENDnet TEW-658BRM


Summary of Contents for TRENDnet TEW-658BRM
-
Page 2: Table Of Contents
Table of Contents Product Overview ..........................6 Features ............................6 Package Contents ..........................6 Hardware Overview ......................... 7 Front Panel ........................7 Rear Panel ........................8 Wireless Performance Considerations ....................9 Installation ............................10 Connect the Power ........................10 Connect the Computer ........................10 Wired Connection ...................... - Page 3 Wireless Settings ..........................29 Basic Setting ........................... 29 Security Setting ..........................30 WEP ..........................30 WPA (TKIP) ........................31 WPA2 (AES) ........................32 Local Network ..........................33 LAN ..............................33 DHCP Setting ............................34 DHCP Server ........................... 34 DHCP Relay ........................35 DHCP Reserved Address ....................
- Page 4 Firewall ............................... 50 MAC Filter ............................50 IP Filter ............................50 URL Filter ............................52 To Filter a URL ....................... 52 To Filter Keyword ......................52 DOS Protection ..........................53 Domain Blocking ..........................54 To Block Domains ......................54 DMZ ..........................54 SPI Settings ........................
- Page 5 TR069 Settings ..........................73 TR069 CA IMPORT .......................... 74 Init Script ............................74 SysLog ..............................75 Log Rules Setting ..........................75 E-mail Log Periodically ........................76 Time Schedule ............................ 77 Firmware Upgrade ..........................77 Configuration Backup/Restore ......................78 Ping ..............................79 Diagnostics ............................
-
Page 6: Product Overview
Product Overview Thank you for choosing Trendnet Wireless N ADSL2 Modem Router. This Modem Router combines the functionality of an ADSL modem and Internet gateway in one. It allows you to access the Internet and share resources such as printers, scanners, and files, via a wireless connection or through one of the Ethernet ports. -
Page 7: Hardware Overview
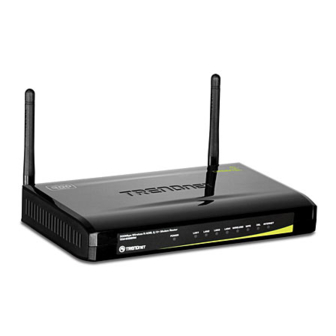
Hardware Overview Front Panel No. LED Description Solid GREEN – Indicates normal operation. • Power LED Solid RED – Indicates malfunction. • Off – The device is powered off. • Solid GREEN – Connected but no activity. • LAN 1, 2, 3, 4 Flashing GREEN –... -
Page 8: Rear Panel
Rear Panel Ports / Description Buttons DSL port Connects to the DSL line using the RJ-11 cable. WPS button Press to search for devices that support Wi-Fi Protected Setup (WPS). Press and hold this button for 5 seconds to restore your device to its Reset button original factory default setting. -
Page 9: Wireless Performance Considerations
Wireless Performance Considerations There are a number of factors that can impact the range of wireless devices. 1. Adjust your wireless devices so that the signal is traveling in a straight path, rather than at an angle. The more material the signal has to pass through the more signal you will lose. -
Page 10: Installation
Installation Make sure that all devices are powered off before starting installation. Installation Diagram Connect the Power 1. Connect the power adapter to the power port of your Modem Router. 2. Plug the power adapter to a wall outlet or a power strip. NOTE: ... -
Page 11: Connect The Dsl
Repeat the above steps to connect other computers to the Modem Router via Ethernet connection. To connect more than four computers, use a hub or switch. Connect one end of an RJ-45 cable to the hub or switch and the other end to the computer. Connect the DSL 5. -
Page 12: Configure The Computer
Configure the Computer This section will guide you on how to configure your computer according to the operating system you are using. Windows 95 / 98 / ME, see below. • Windows 2000, see page 13. • Windows XP, see page 13. -
Page 13: Windows 2000
Windows 2000 If you are using Windows 2000, follow the instructions below to configure your computer. 1. Click Start > Settings > Control Panel > Network and Dial-up Connections. 2. Double-click Local Area Connection. 3. Click Properties. 4. On the network components list, make sure that Internet Protocol (TCP/IP) is checked. -
Page 14: Windows Vista
Windows Vista If you are using Windows Vista, follow the instructions below to configure your computer. 1. Click Start > Control Panel > Network and Internet Connections > Network Connections. 2. Right-click Local Area Connection, then click Properties. 3. On the General tab, make sure that Internet Protocol (TCP/IP) is checked. -
Page 15: Log In To The Modem Router
Log In to the Modem Router Use the web-based utility to configure your Modem Router. Note the following default settings before accessing the web-based utility. SSID TRENDnet658 Channel Auto 802.11 Mode 802.11 b+g+n mixed mode Security Disable IP Address 192.168.10.1 VPI/VCI for ATM 8/35 DSL Line Mode Auto-detect TCP/IP Address... -
Page 16: Setup Wizard
Setup Wizard After you log in, the Setup Wizard appears on the screen. It is recommended to follow the wizard if are setting up the network and configuring the Modem Router for the first time. 1. Select a PVC (Permanent Virtual Circuit), then click Next. It is recommended to use the default setting, PVC0, when setting up the Modem Router for the first time. - Page 17 3. Select a network protocol. Click Next to continue. The information required on the next page vary depending on the network protocol you selected here. 4. The following is a PPPoE example. a. Enter the connection Name, User Name, and User Password. Re-type the password in the Confirm Password field.
- Page 18 5. Select whether to enable or disable wireless connection. From this point, you can also change the SSID with a name that you can easily remember. Click Next to continue. 6. Select the Security Mode, Authentication Type, and Encryption, and enter a passkey.
-
Page 19: Menu
Menu Use the main menu, located on the left panel of the screen, to manually configure your Modem Router. Click a menu item, then a submenu to display the page on the screen. For submenus with more options, move the mouse cursor over the submenu to view the options. -
Page 20: Internet Settings
provided by your ISP. The default VPI is 8. VCI — Enter the Virtual Channel Identifier (VCI)) setting provided by your ISP. The default VCI is 36. Encapsulation — Select LLC (Logical Link Control) or VCMUX (Virtual Circuit Multiplexing), according to your ISP. ATMQoS —... -
Page 21: Protocol
Protocol This section varies depending on the selected network protocol. PPPoE (RFC-2516 PPP over Ethernet) If you select PPPoE (Point-to-Point Protocol over Ethernet), the screen below is displayed. State of Connection — Select whether to enable or disable this connection. IPMode of Connection —... - Page 22 User Password — Enter the password provided by your ISP. Re-enter the password in the Confirm Password field. Max MRU — This is the maximum rate of cells that you can receive. If provided by your ISP, enter the rate in the field. Otherwise, leave this field to its default setting. DNS Enabled —...
-
Page 23: Pppoa (Rfc-2364 Ppp Over Atm)
PPPoA (RFC-2364 PPP over ATM) If you select PPPoA (Point-to-Point Protocol over ATM), the screen below is displayed. State of Connection — Select whether to enable or disable this connection. IPMode of Connection — Select the connection mode, options are: Dynamic: Select Dynamic if the IP address can be automatically obtained •... -
Page 24: Ipoa (Rfc-1483 Routed)
DNS Server 1 and DNS Server 2 — If provided by your ISP, enter the DNS server. Otherwise, leave these fields blank. Connection Trigger — You can configure how you want your Modem Router to connect and terminate the Internet connection. Options are: OnDemand: Enables the Modem Router to cut off the Internet connection •... -
Page 25: Dynamic Ip Address
State of Connection — Select whether to enable or disable this connection. Name — Enter your desired connection name. NAT — Select whether to enable or disable NAT (Network Address Translation). Enable this setting to share one WAN IP address with multiple computers on your network. - Page 26 State of Connection — Select whether to enable or disable this connection. Name — Enter your desired connection name. NAT — Select whether to enable or disable NAT (Network Address Translation). Enable this setting to share one WAN IP address with multiple computers on your network.
-
Page 27: Static Ip Address
Static IP Address If you select Static IP Address, the screen below is displayed. State of Connection — Select whether to enable or disable this connection. Name — Enter your desired connection name. NAT — Select whether to enable or disable NAT (Network Address Translation). Enable this setting to share one WAN IP address with multiple computers on your network. -
Page 28: Bridge Mode
Bridge Mode If you select Bridge mode (RFC-1483 Bridged), the screen below is displayed. State of Connection — Select whether to enable or disable this connection. Name — Enter your desired connection name. CIP (RFC-1577) If you select CIP (RFC-1577 Classic RP/ARP over ATM), the screen below is displayed. State of Connection —... -
Page 29: Wireless Settings
ICMP Reply Enable — Check this box to enable ICMP (Internet Control Message Protocol) messages to be sent back to the host that sent the message. Proxy ARP Enable — Check this box to enable proxy ARP function. Click the Apply button to save your changes or click the Cancel button to discard your changes. -
Page 30: Security Setting
Wireless Mode — Select the wireless mode to limit the type of wireless devices that can connect to the network. Options are: 802.11b only: Only 802.11b wireless devices can connect to the network. • 802.11g + 802.11b: Only 802.11g and 802.11b wireless devices can •... -
Page 31: Wpa (Tkip)
Shared Key — Requires users to enter the same WEP key to exchange data • with other wireless devices. Encryption Strength — Select 64bit to enter or generate a 10-character key or select 128bit to enter or generate a 26-character key. Key Format —... -
Page 32: Wpa2 (Aes)
Group Rekey Time — Enter the number of seconds to elapse until the Modem Router prompts for the key again. Click the Apply button to save your changes or click the Cancel button to discard your changes. WPA2 (AES) Select WPA (Wi-Fi Protected Access) using AES (Advanced Encryption Standard) for better encryption. -
Page 33: Local Network
Authentication Type — Select an authentication type. Options are: PSK: Select to use a passphrase for authentication. • If you select PSK, enter a passphrase in the Confirmed Passphrase field. EAP: Select to use Extensible Authentication Protocol (EAP). This should •... -
Page 34: Dhcp Setting
DNS Relay — Select whether to enable or disable the DNS relay function. Check this box to request automatic assignment of a DNS, then enter the Primary DNS Server and the Secondary DNS Server in the DHCP Setting screen below. DHCP Setting This section allows you to configure your Modem Router to use the Dynamic Host Configuration Protocol (DHCP). -
Page 35: Dhcp Relay
IP Pool Starting Address — Enter the lowest range of IP address to assign. The default value is 192.168.10.101. IP Pool Ending Address — Enter the highest range of IP address to assign. The default value is 192.168.10.200. Subnet Mask — Enter the subnet mask. The default value is 255.255.255.0. IPRouters —... -
Page 36: Dhcp Reserved Address
Click the Apply button to save your changes or click the Cancel button to discard your changes. DHCP Reserved Address This section lists the DHCP reserved addresses on your network. If your Modem Router is set as the DHCP server, your Modem Router can reserve a particular IP address to a specific device. -
Page 37: Time And Date
Time and Date The Time and Date page allows you to manually configure the time and date of your network or to synchronize with a Network Time Protocol (NTP) server. To access the Time and Date page, click SETUP > Time and Date. Time Zone —... -
Page 38: Advanced
To manually set the time and date of your network, select the Year, Month, Day, Hour, Minute, and Second from their corresponding drop-down lists. Click the Set Time button to apply the changes. Advanced The Advanced menu configurations greatly affect the operating performance of your Modem Router. -
Page 39: Mbssid Settings
Fragment Threshold — Fragment threshold refers to the maximum size of a packet before data is fragmented into multiple packets. The default and recommended value is 2346 bytes. If you experience a high packet error rate, you may slightly adjust the value. Setting the fragment threshold too low may result in poor network performance. -
Page 40: To Set Mac Filter
Name (SSID) — Select the SSID from the drop-down list. To Set MAC Filter Do the following to deny or allow a device to access to the wireless network. 9. Select the MAC Restrict Mode. Options are: Disable: No restriction. •... -
Page 41: Basic Setting
Click Advanced > Advanced Wireless > WPS Setting or click the WPS Setting button. Basic Setting Enable WPS — Check this box to enable the WPS function. Device Password (PIN) — Displays the PIN password. To generate a new PIN, click the Generate New PIN button. -
Page 42: Multi-Wan
Multi-WAN DSL Auto Scan This page allows you to scan your DSL line for available VPI/VCI. To access the DSL Auto Scan page, click Advanced > Multi-WAN > DSL Auto Scan or click the DSL Auto Scan button. VPI/VCI Scanning Click the Scan button to start scanning your DSL line for available VPI/VCI. -
Page 43: Ip/Ppp Config
IP/PPP Config This page allows you to create multiple Wide Are Networks (WAN) and manually add an IP or a PPP connection. To access the IP/PPP Config page, click Advanced > Multi-WAN > IP/PPP Config or click the WAN Config button. To add an IP or PPP connection, do the following: 18. -
Page 44: Advanced-Lan
Advanced-LAN This page allows you to add multiple LAN IP addresses. To access the Advanced-LAN page, click Advanced > Advanced-LAN. Config Spanning Tree Spanning Tree Enable — Check this box to enable spanning tree. Click the Apply button to save your changes or click the Cancel button to discard your changes. -
Page 45: Rip Settings
Check a corresponding box to select the option. To reset the ADSL settings, click the Reset button. Click the Apply button to save your changes or click the Cancel button to discard your changes. RIP Settings A Routing Information Protocol (RIP) is an Internet protocol that is used to share routing information table with other routing devices on the local and wide area network. -
Page 46: Nat
Virtual Server A virtual server allows remote devices accessing the Web or FTP services via a public IP address be redirected to local servers in the LAN. Depending on the requested service (TCP/UDP port number), your Modem Router redirects the external service request to the appropriate server in the LAN. -
Page 47: Port Trigger
Time Schedule — Select a schedule when to use the virtual server or click the New Time Schedule button to create a new schedule. Click the Apply button to save your changes or click the Cancel button to discard your changes. Port Trigger This page displays the port trigger settings on your network. -
Page 48: Alg
Click the Apply button to save your changes or click the Cancel button to discard your changes. Application Layer Gateway (ALG) consists of a security component that augments NAT or a firewall. Your Modem Router allows NATs to support address and port translation for certain application layer protocols such as FTP, SNMP, and others. -
Page 49: Vpn Passthrough
Click the Apply button to save your changes or click the Cancel button to discard your changes. VPN Passthrough This page allows you to control VPN tunnels using IPSEC, PPTP, and L2TP protocols to pass through your Modem Router. To access the VPN Passthrough page, click Advanced > NAT > VPN Passthrough or click the VPN Setting button. -
Page 50: Firewall
Firewall MAC Filter This page allows you to set up a list of MAC addresses which will be allowed or restricted to access the Internet. To access the MAC Filter page, click ADVANCED > Firewall > MAC Filter or click the MAC Filter button. - Page 51 The table lists the existing filter rules. To edit an entry, click the corresponding icon. To delete an entry, click the corresponding button. To add a filter, click the Add button. The IP Filter Config screen is displayed. IP Filter — Check this box to enable IP filtering. Filter Name —...
-
Page 52: Url Filter
URL Filter This page allows you to deny network devices to access specific URLs or URLs that contain specific keywords. To access the URL Filter page, click ADVANCED > Firewall > URL Filter or click the URL Filter button. URL Filter — Check this box to enable URL filtering. Show Redirect Page —... -
Page 53: Dos Protection
32. Select the time to implement the URL filter or click the New Time Schedule button to create a new schedule. 33. Click the Add button of the Add Keyword Rule. The entry is listed on the URL LIST table. To delete an entry, click the corresponding button. -
Page 54: Domain Blocking
Dos Protection Option — Check the appropriate boxes to enable protection from SYN flood, FIN flood, UDP flood, ICMP flood, SMURF, IP spoofing, and others. Enter the flood count numbers or retain the default values if you are unsure about them. Check the Apply button to save and activate DoS protection or click the Cancel button to discard your changes. -
Page 55: Spi Settings
DMZ — Check this box to enable DMZ. DSL Interface — Select the DSL interface to activate DMZ from the drop-down list. DMZ Host IP Address — Enter the IP address of the computer to set as the DMZ host. Check the Apply button to save and activate DMZ. -
Page 56: Packet Filter
Packet Filter Filters & Rules This page allows you to create packet filters and rules. These filters are used to check each data that passes within your network. If the packet data does not meet the requirements, the packet is either dropped or rejected. To access the Filters &... -
Page 57: Rules
Rules After creating filters, click the Add button to set the rules on how to implement the filters. Filter Key — Select the filter to assign the rule. Enable — Check this box to enable this rule. Protocol — Select a protocol from the drop-down list. Options are TCP, UDP, or ICMP. -
Page 58: Statistics
Destination Start Port and Destination End Port — Enter the starting and ending port range of the destination of the packets. ICMP Type — Select an ICMP type from the drop-down list. If the selected type is met, the filter is implemented. Click the Apply button to save and activate the rule or click the Cancel button to discard your changes. -
Page 59: Multicast
Gateway — Enter the gateway. Interface name — Select the interface to implement the routing. Click the Apply button to save and activate the static route or click the button to discard your changes. Multicast Internet Group Management Protocol (IGMP) manages members of groups of devices, called IP multicast groups. -
Page 60: Igmp Proxy
IGMP Proxy IGMP proxy enables your Modem Router to forward multicasts traffics between LAN and WAN networks. Select IGMP Proxy Version and DSL Interface. Enter values for IGMP Query Interval, Robust Count, IGMP Last Member Query Interval, IGMP Robustness, Query Response Interval, and Group Live Delay Time. If you are unsure about them, leave the default values. -
Page 61: Ethernet Setting
Connection Name — Select a connection from the drop-down list. Use Dynamic DNS Service — Check this box to register this account to the DNS server. Service Provider — Select a service provider from the drop-down list. NOTE: Additional charges may be incurred depending on the selected ... -
Page 62: Port Mapping
Check the Enable box of the LAN interface to enable the port. Select the LinkMode from the drop-down list. Options are: Auto, 10Half, 10Full, 100Half, and 100Full. Check the FlowCntrl box of the LAN interface to enable flow control. Click the Apply button to save your changes. Port Mapping Port mapping allows you to group interfaces for traffic control. - Page 63 Port Mapping — Check this box to enable port mapping. To Create New Groups 37. Click the New button. An empty group appears on the table. 38. Click the radio button to select the empty group. 39. Add members to the group. To do so, select an interface from the Available Interfaces panel.
-
Page 64: Quality Of Service (Qos)
Quality of Service (QoS) Quality of Service (QoS) is a network standard that assigns the priorities of traffic that passes through your Modem Router. This ensures that demanding real-time applications, such as video streaming, are given priority over other data. Queue Management This page allows you to enable QoS and choose Differentiated Services Code Point (DSCP) markings to automatically mark incoming traffic without reference to a... -
Page 65: Queue Classification
The table displays QoS queue configurations. To edit an entry, click the corresponding icon. To delete an entry, click the corresponding icon. To configure QoS queue entries, click the Add button. Name — Enter a QoS queue entry name. Enable — Check this box to enable this queue. Interface —... - Page 66 the specified conditions in the classification rule must be satisfied for the rule to take effect. To access the Queue Classification page, click ADVANCED > Quality of Service > Queue Classification or click the QoS Classification button. The table displays QoS queue classification rules. To edit an entry, click the corresponding icon.
-
Page 67: Qos Status
You can classify traffic based on ingress interface, Ether type, packet length, source or destination MAC address/ MAC Mask, or a combination of them. Select an option or enter the values on the fields that you want to use for the criteria. Otherwise, leave the fields empty. -
Page 68: Snmp
To access the UPnP page, click ADVANCED > UPnP. UPnP — Check this box to enable the UPnP feature. UPnP LOG — Check this box to log UPnP status. TR064 — Check this box to enable TR064. UPnP WAN Interface — Select the interface to implement UPnP. Click the Apply button to save and apply the settings. -
Page 69: Maintenance
System Contact — Enter the contact person or contact information for your Modem Router. System Name — Enter an assigned name for your Modem Router. System Location — Enter an assigned location for your Modem Router. Public Community and Private Community — Enter a public and private community name. -
Page 70: Remote Management
Click the Apply button to save your changes or click the Cancel button to discard your changes. Remote Management This page allows you to enable remote devices to manage your Modem Router using the Hypertext Transfer Protocol (HTTP), Command-Line Interface (CLI), and File Transfer Protocol Daemon (FTPD). -
Page 71: Ftpd Management
Click the Apply button to save your changes or click the Cancel button to discard your changes. FTPD Management Check the FTPD Enable box to allow network administrators to upgrade the firmware or restore configurations using the FTP. Keep old session — Check to retain the old session. Click the Apply button to save your changes or click the Cancel button to discard your changes. -
Page 72: Tr069 Setting
Wan Interface — Select the interface from the drop-down list. Status — Select whether to enable or disable remote access of the device. Remote IP — Enter the IP address of the remote device. Remote IP Mask — Enter the IP mask of the remote device. ... -
Page 73: Tr069 Settings
TR069 Settings Enable — Check this box to enable TR069. Use Interface — Select the interface to implement TR069. ACS URL Address — Enter the URL of the Auto-Configuration Server (ACS) ACS User Name — Enter the user name of your Modem Router when connecting to the ACS. -
Page 74: Tr069 Ca Import
Periodic Inform — When enabled, your Modem Router will send remote procedure calls (RPC) to the ACS server at system startup and will continue sending RPCs periodically. When disabled, your Modem Router will send RPCs to the ACS server at system startup only. -
Page 75: Syslog
48. Click the Browse button. 49. Browse for the file, then click the Open button. 50. Click the Import Script button. To show the scripts on your computer, click the Show Start/End Script button. To delete the scripts on your computer, click the Delete button. SysLog This page allows you to enable and configure system logs such as device status, events, and activities. -
Page 76: E-Mail Log Periodically
51. Select Module and Facility. 52. Select Severity level. emerg is the highest level while debug is the lowest level. 53. Select Location: Remote Server or Mail. 54. The succeeding fields may vary depending on the selected location. Enter the necessary information accordingly. -
Page 77: Time Schedule
60. Click the Apply button to save your changes or click the Cancel button to discard your changes. Time Schedule This page allows you create desired time schedule. To access the Time Schedule page, click MAINTENANCE > Time Schedule. To create a new schedule, do the following: 61. -
Page 78: Configuration Backup/Restore
Click the Browse button and browse for the file. Click the Apply button to start firmware upgrade. NOTE: Do not turn off or press the Reset button on your Modem Router while firmware upgrade is in progress. This may cause the system to crash. Configuration Backup/Restore This page allows you to save a backup of your current settings, revert settings to a backup point, or restore the default factory settings. -
Page 79: Ping
69. A warning message appears, click the OK button to continue. NOTE: Restoring to factory defaults may take some time. Do not turn off your Modem Router. Ping Once you have configured your Modem Router, it is recommended to ping the network devices to verify their connection. -
Page 80: Diagnostics
Diagnostics This page allows you to test the connectivity of the physical and protocol layers on the WAN side. To access the Diagnostics page, click MAINTENANCE > Diagnostics. To start the test, select the DSL Interface from the drop-down list, and then click the Test button. -
Page 81: Status
Status The Status menu provides the current status and settings of your Modem Router. Summary This page displays the summary of the system, DSL link, ATM PVC, Internet connection, LAN, and wireless ports status. To access the Summary page, click STATUS > Summary. ADSL Info This page displays the status of your DSL line. -
Page 82: Logs
Click the Refresh button to refresh the information.LAN Clients This page displays the clients connected on your network. To access the LAN Clients page, click STATUS > LAN Clients. Click the Refresh button to refresh the information. Logs This page allows you to view, clear, and backup system logs. To access the Logs page, click STATUS >... -
Page 83: Routing Table
Click the Clear History button to delete old logs. Click the Backup Logs button to save a backup of the logs. Click the |< << >> >| buttons to scroll through the logs. Click the Refresh button to refresh the information. Routing Table This page displays the destination routes commonly accessed by your network. -
Page 84: Traffic Data Interface
Traffic Data Interface The table lists the available interfaces on your network. Check the State box of the interface to view its traffic. You may check more than one interface. Traffic Bandwidth Interval Interval — Enter the interval of refreshing the traffic bandwidth. Traffic Bandwidth Meter This table lists the current traffic. -
Page 85: Statistics > Dsl Statistics
Statistics > DSL Statistics This page displays the transmission and reception statistics of the DSL line. To access the DSL Statistics page, click STATUS > Statistics > DSL Statistics or click the DSL Statistics button. Click the Refresh button to refresh the information. -
Page 86: Appendix
Appendix Regulatory & Safety Information Wireless LAN, Health and Authorization Radio frequency electromagnetic energy is emitted from Wireless LAN devices. The energy levels of these emissions however are far much less than the electromagnetic energy emissions from wireless devices like for example mobile phones. Wireless LAN devices are safe for use frequency safety standards and recommendations. -
Page 87: Fcc (Federal Communications Commission) Statement
FCC (Federal Communications Commission) Statement his equipment has been tested and found to comply with the limits for a Class B digital device, pursuant to Part 15 of the FCC Rules. These limits are designed to provide reasonable protection against harmful interference in a residential installation. This equipment generates, uses and can radiate radio frequency energy and, if not installed and used in accordance with the instructions, may cause harmful interference to radio communications. -
Page 88: Ce Statement
CE statement Europe – EU Declaration of Conformity This device complies with the essential requirements of the R&TTE Directive 1999/5/EC. The following test methods have been applied in order to prove presumption of conformity with the essential requirements of the R&TTE Directive 1999/5/EC: EN60950-1: 2006 Safety of Information Technology Equipment EN 50385: 2002... -
Page 89: Part 68 Statement
This equipment may not be used on coin service provided by the telephone company. Connection to party lines is subject to state tariffs. Contact information for service center in case of problems as below: Company: TRENDnet, Inc. Address: 20675 Manhattan Place, Torrance, CA90501 U.S.A Tel: (310)961-5500 Fax: (310)961-5511... - Page 90 TRENDnet tímto prohlašuje, že tento TEW-658BRM je ve shodě se Česky [Czech] základními požadavky a dalšími příslušnými ustanoveními směrnice 1999/5/ES. Undertegnede TRENDnet erklærer herved, at følgende udstyr Dansk TEW-658BRM overholder de væsentlige krav og øvrige relevante [Danish] krav i direktiv 1999/5/EF.
- Page 91 TRENDnet declara que este TEW-658BRM está conforme com os Português [Portuguese] requisitos essenciais e outras disposições da Directiva 1999/5/CE. TRENDnet izjavlja, da je ta TEW-658BRM v skladu z bistvenimi Slovensko [Slovenian] zahtevami in ostalimi relevantnimi določili direktive 1999/5/ES. TRENDnet týmto vyhlasuje, že TEW-658BRM spĺňa základné...
-
Page 92: Specifications
Specifications Hardware Standards IEEE 802.3u, IEEE 802.11b, IEEE 802.11g, IEEE 802.11n Complies with ADSL standards - ANSI T1.413 Issue2 - G.992.1 (G.dmt, Annex A) RJ-11 Port - G.992.2 (G.lite) (ADSL line Complies with ADSL2 standard Interface) - G.992.3 (G.dmt.bis) Complies with ADSL2+ standard - G.992.5 Annex A VC and LLC Multiplexing Bridged/Routed Ethernet over ATM (RFC1483/2684) - Page 93 Consumption Dimension (L x W x 201 x 116 x 31 mm (8 x 4.6 x 1.2 in.) Weight 301 g (10.6oz) Operation: 0° ~ 40°C (32°F ~ 104°F) Temperature Storage: -10° ~ 70°C (14°F ~ 158°F) Humidity Max. 95% (non-condensing) Certifications CE, FCC Wireless...
-
Page 94: Limited Warranty
If a product does not operate as warranted during the applicable warranty period, TRENDnet shall reserve the right, at its expense, to repair or replace the defective product or part and deliver an equivalent product or part to the customer. The repair/replacement unit’s warranty continues from the original date of purchase. - Page 95 Download section and look for the desired TRENDnet product to access to the GPL Code or LGPL Code. These codes are distributed WITHOUT WARRANTY and are subject to the copyrights of the developers. TRENDnet does not provide technical support for these codes.
Need help?
Do you have a question about the TEW-658BRM and is the answer not in the manual?
Questions and answers