Table of Contents
Advertisement
Quick Links
Advertisement
Table of Contents

Related Manuals for TRENDnet TFM-560U - 56 Kbps Fax


Summary of Contents for TRENDnet TFM-560U - 56 Kbps Fax
-
Page 2: Table Of Contents
ABLE OF ONTENTS ABOUT THIS GUIDE .................. 3 INTRODUCTION..................4 ..................5 ACKAGE ONTENTS ................5 YSTEM EQUIREMENTS ..................6 ENERAL EATURES ..................... 7 RODUCT HARDWARE INSTALLATION ..............8 ................. 8 ETWORKING PPLICATION ................9 NSTALLING THE ODEM SOFTWARE INSTALLATION ............. 10 Installing Modem in Windows 98 ............ -
Page 3: About This Guide
BOUT THIS UIDE This manual provides instructions and illustrations on how to use your USB 2.0 Modem, including: Chapter 1, Introduction, provides the general information on the modem. Chapter 2, Hardware Installation, describes the hardware installation procedure for the modem. Chapter 3, Software Installation, helps you to install the driver for the modem. -
Page 4: Introduction
NTRODUCTION Congratulations on purchasing your TFM-560U High Speed USB 2.0 Data/Fax/Voice Modem. The TFM-560U High Speed USB 2.0 Fax Modem delivers fast access to the Internet with more efficient upload and download speeds. The V.92/V.44 standard modem offers the highest possible data transfer rates and reliable fax transmissions. -
Page 5: Package Contents
Package Contents Unpack the package and check all the items carefully, and be certain that you have: ♦ One TFM-560U ♦ One Multi-language Quick Installation Guide. ♦ One Utility CD-ROM with User’s Guide ♦ One AC Power Adapter suitable for your country’s electric power service. -
Page 6: General Features
General Features Compliant with USB 2.0 and USB 1.1 Specifications Compliant with V.92, V.90, V.44 Standards Supports V.44 and V.92 Quick Connect, PCM Upstream and Modem-On Hold Features Up to 56Kbps Data Download Speed and 48Kbps Data Upload Speed Hosts Signal Processing for both controller and data -pump Voice/Telephone Answering Machine support via Sound Card Video Phone ready (Interface to H.324 Video Conferencing Support) -
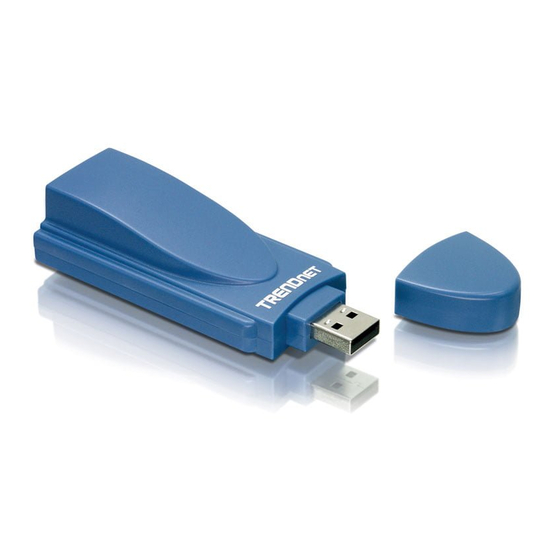
Page 7: Product View
Product View This section describes the externally visible features of the modem. Front View Rear View - 7 -... -
Page 8: Hardware Installation
ARDWARE NSTALLATION Networking Application The following diagram explains the application of your modem. - 8 -... -
Page 9: Installing The Modem
Installing the Modem Follow these steps for a trouble-free start of your USB 2.0 Modem operations. 1. Turn the computer on. 2. Find an available USB 1.1/2.0 port of PC. 3. Plug the modem into the USB port carefully until the modem is properly seated. -
Page 10: Software Installation
OFTWARE INSTALLATION This chapter describes the software utilities for the USB2.0 Modem. Installing Modem in Windows 98 1. After you complete the modem hardware installation and turn on your PC, Windows system will automatically detect your new added devices. Windows system will prompt you with an Add New Hardware Wizard. - Page 11 2. Insert the Modem Driver CD-ROM into the CD-ROM drive, run F:\driver\Win98\Setup.exe (“F” represents the CD-ROM drive) Click OK. 3. And then, a prompt screen will ask you to ensure to install the modem driver. Click OK. The setup utility will copy the files to windows system.
- Page 12 click OK to continue 5. Click Browse to specify F:\Driver\Win98 directory, then click 6. If there is no error message while the system is installing, your modem has been set up properly and functionally. - 12 -...
-
Page 13: Uninstalling Modem In Windows 98
Uninstalling Modem in Windows 98 1. Open Control Panel window, then click Add/Remove Programs icon. 2. Choose Agere Systems Usb Soft Modem device in stall/Uninstall tab, then click on Add/Remove - 13 -... - Page 14 3. Click Yes to ensure to remove Agere Systems Usb Soft Modem device and its drivers. 4. Click Yes to restart your computer for all of the changes to take effect. - 14 -...
-
Page 15: Installing Modem In Windows Me
Installing Modem in Windows ME 1. After you complete the modem hardware installation and turn on your PC, Windows system will automatically detect and install your new added devices. Windows system will prompt you with an Add New Hardware Wizard. Click Cancel. 2. -
Page 16: Uninstalling Modem In Windows Me
3. And then, a prompt screen will ask you to ensure to install the modem driver. Click OK. The setup utility will copy the files into windows system. If there is error message while the system is installing, your modem has been set up properly and functionally. Uninstalling Modem in Windows ME Open Control Panel window, then click on Add/Remove Programs icon Open Control Panel window, then click on... - Page 17 2. Choose Agere Systems Soft Modem device Install/Uninstall tab, then click on Add/Remove... - 17 -...
-
Page 18: Installing Modem In Windows 2000
3. Click Yes to ensure to remove Agere Systems Usb Soft Modem device and its drivers. Click Yes to restart your computer for all of the changes to take effect. Installing Modem in Windows 2000 1. After you complete the modem hardware installation and turn on your PC, Windows system will automatically detect your new added devices. - Page 19 2. Insert the Modem Driver CD-ROM disk attached with your modem into the CD-ROM drive device, then run <CD-ROM letter>:\driver\Win2K&XP\Setup.exe as shown in figure. Then click on OK. And then, a prompt screen will ask you to ensure to install the Modem driver.
-
Page 20: Uninstalling Modem In Windows 2000
4. The prompt screens will be warning you that the digital signature of programs have not found as shown in figure. Click Yes. 5. If there is no error message while the system is installing, you modem has been set up properly and functionally. Uninstalling Modem in Windows 2000 Open Control Panel window and choose Add/Remove Programs icon. - Page 21 2. Select Agere Systems Usb 2.0 Soft Modem device in Change or Remove Programs tab, then click on Change/Remove. - 21 -...
-
Page 22: Installing Modem In Windows Xp
3. Click Yes to ensure to remove Agere Systems Usb 2.0 Soft Modem device and its drivers. Click Yes to restart your computer for all of the changes to take effect. Installing Modem in Windows XP After you complete the modem hardware installation and turn on your PC, Windows system will automatically detect and install your new added devices. - Page 23 Insert the Modem Driver CD-ROM disk attached with your modem into the CD-ROM drive device, Then run <CD-ROM letter>:\Driver\Win2K&XP\SETUP.EXE to upgrade the modem driver as shown in figure. Then click OK. And then, a prompt screen will ask you to ensure to install the modem driver.
- Page 24 The prompt screens will be warning you that the digital signature of programs have not found as shown in figure. Click Yes. If there is no error message while the system is installing, your modem has been set up properly and functionally. - 24 -...
-
Page 25: Uninstalling Modem In Windows Xp
Uninstalling Modem in Windows XP 1. Open Control Panel window, then click on Add or Remove Programs icon. 2. Choose Agere Systems Usb 2.0 Soft Modem device in Change or Remove Programs tab, then click on Change/Remove. - 25 -... - Page 26 3. Click Yes to ensure to remove Agere Systems Usb 2.0 Soft Modem device and its drivers. 4. Click Yes to restart your computer for all of the changes to take effect. - 26 -...
-
Page 27: Testing The Modem
Testing the Modem Before you set up your software, start with a quick test to check that your modem is working. Once you have determined that your modem is setup properly, go on to Section 2.5 Install Communication Software to install your communications software. If you are having problems, see Section 3 Troubleshooting. -
Page 28: Troubleshootings
TROUBLESHOOTINGS Modem Connection Your modem is designed to provide reliable and trouble-free functionality, however, should you experience any difficulty, the information contained in this section will assist you in determining and resolving the source of the problem. 1. Modem does not respond to AT commands Make sure the modem is not configured with a conflicting COM port and IRQ setting. - Page 29 You may also be prompted to enter an initialization string by the software. Use AT&F as your initialization string. 2. Modem dials but does not connect Be sure the IRQ setting is identical on the modem and the software. Make sure that the phone line is working properly. A noisy line will prevent proper modem operation.
- Page 30 Ensure that no other devices, such as fax or answering machines, are answering calls before the modem does. If you still encounter problems or have any questions regarding the TFM-560U, please contact TRENDnet’s Technical Support Department. - 30 -...
-
Page 31: Limited Warranty
TFM-560U USB Data/Fax/Voice Modem – 3 Years Warranty If a product does not operate as warranted above during the applicable warranty period, TRENDnet shall, at its option and expense, repair the defective product or part, deliver to customer an equivalent product or part to replace the defective item, or refund to customer the purchase price paid for the defective product. - Page 32 ANY OTHER LIABILITY IN CONNECTION WITH THE SALE, INSTALLATION MAINTENANCE OR USE OF TRENDNET’S PRODUCTS. TRENDNET SHALL NOT BE LIABLE UNDER THIS WARRANTY IF ITS TESTING AND EXAMINATION DISCLOSE THAT THE ALLEGED DEFECT IN THE PRODUCT DOES NOT EXIST OR WAS CAUSED BY CUSTOMER’S THIRD PERSON’S...
Need help?
Do you have a question about the TFM-560U - 56 Kbps Fax and is the answer not in the manual?
Questions and answers