Table of Contents
Advertisement
Quick Links
Advertisement
Table of Contents

Subscribe to Our Youtube Channel
Related Manuals for Elite Fitness VAlOR 4


Summary of Contents for Elite Fitness VAlOR 4
- Page 1 ASSEMBLY MANUAL Record serial number Elite Valor 4 Elliptical...
-
Page 2: Table Of Contents
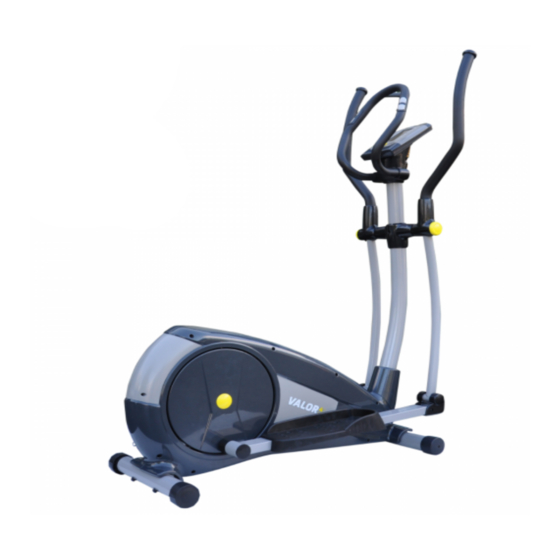
Thank you for purchasing the Elite Valor 4 Elliptical. For over 20 years, Elite Fitness™ has been New Zealand’s largest supplier of fitness equipment. Our aim and vision is to provide you Elite™ branded products, tested to the highest standard for quality and biomechanics at the best possible price. -
Page 3: Important Safety Instructions
IMPORTANT SAFETY INSTRUCTIONS The following definition applied to the word “WARNING” when used in this manual: Used to call attention to POTENTIAL hazards that could result in personal injury or loss of life. READ ALL INSTRUCTIONS BEFORE USING THE MACHINE This product has been designed for home use only. -
Page 4: Product Specifications
— Only carry out training work on the equipment when it is in perfect working order. Only use original spare parts in the event of a repair. — Do not use strong solvents for cleaning, and only use the tools supplied, or suitable ones of your own, for any repairs that may be required. -
Page 5: Assembly Instructions
ASSEMBLY INSTRUCTIONS #55 M8*73mm Allen #104 6mm Allen key Bolt (Qty4) Use numbers as indicated in diagrams to carry out the assembly process. STEP 1 — Attach the Front Stabiliser (#59) to the Main frame (#89) using 2 x M8 Bolts (#55) 2 x Semi- circle Washers (#23) and 2 x Spring Washers (#56). —... - Page 6 ASSEMBLY INSTRUCTIONS #104 6mm Allen ke STEP 2 — Slide the Front Post Cover (#60) over the Front Post (#10). — Connect the Main Frame Cable to the Front Post Cable. — Connect the Front Post (#10) to the Main Frame (#89) using 4 x M8 Bolts (#31) 4 X Semi-circle Washers (#32) and 4 x Spring Washers (#33).
- Page 7 ASSEMBLY INSTRUCTIONS 105#Screwdriver(1 pcs) #104 6mm Allen key STEP 3 Please note: Lubricate wheel axle and upper arm axle using a multi purpose grease. Refer to red circles on diagram above. — Attach the top end of the Lower Handlebar L (#34) to the left hand side of the Front Post (#10) using 1 x Wave Washer (#108), 1 x Flat Washer (#28), 1 x Spring Washer (#25) and 1 x M8 Bolt (#29).
- Page 8 ASSEMBLY INSTRUCTIONS 105#Screwdriver(1 pcs ) #44 M6x43LCarriage bolt(Qty4) STEP 4 — Attach the left Pedal (#65L) to the Left Pedal Arm (#43) using 2 x Carriage Bolts (#44), 2 x Flat Washers (#45), 2 x Spring Washers (#47) and 2 x Nylon nuts (#46). —...
- Page 9 ASSEMBLY INSTRUCTIONS 105#Screwdr iver(1 pcs) #104 6mm Allen ke STEP 5 — Attach the Left and Right Upper Handlebars (#21 & 63) using 4 x M8 Bolts (#24), 4 x Semi-circle Washers (#23) and 4 x Nylon Nuts (#22). Refer to the diagram above. ELITE ELLIPTICAL ASSEMBLY MANUAL...
- Page 10 ASSEMBLY INSTRUCTIONS #104 6mm Allen key 105#Screwdriver(1 pcs) STEP 6 — Attach Handlebar (#6) to the Front Post (#10). Ensure the Front Post Cover (#11) has been placed over the Handlebar before the Handlebar is secured. Secure using 2 x M8 Bolts (#12), 2 x Spring Washers (#13) and 2 x Flat Washers (#15).
- Page 11 ASSEMBLY INSTRUCTIONS 105# Screwdriver(1 pcs ) STEP 7 — Connect Upper Computer Wire from Computer (#1) to the Front Post Wire. — Connect Upper Pulse Wire from Computer (#1) to the Lower Pulse Wire from Handlebar. — Attach Computer (#1) to the Front Post (#10) using 4 x M5 Screws (#5). Refer to the above diagram.
- Page 12 ASSEMBLY INSTRUCTIONS 105# Screwdriver(1 pcs STEP 8 — Attach the left covers (#27 & 26) to left Lower Handle Bar (#34) using 4 screws. — Attach the right covers (#64 & 62) to right Lower Handle Bar (#34) using 4 screws — Attach the central covers (#17 & 14) tot he Front Post (#10) using 2 M5 Screws (#4). —...
- Page 13 ASSEMBLY INSTRUCTIONS CONGRATULATIONS Assembly of your Elite Valor 4 Elliptical is now complete! Be sure to fully inspect your machine before using it for the first time. Failure to visually check and test and tech the assembly before use can cause damage to the Elite Elliptical and serious injury to users and bystanders and can also compromise the effectiveness of your exercise program.
-
Page 14: User Instructions
USER INSTRUCTIONS CONTROL MODE MANUAL / PROGRAM /WATT/ PERSONAL/HRC PROGRAMS (P1-P12) FUNCTION VALUE RPM / SPEED DISTANCE DISPLAY WATTS / CALORIES PULSE / HRC USED DATA RECOVERY START / STOP QUICK START RESET ENTER AND UP / DOWN SCAN : Alternates between WATTS/CALORIES and RPM/SPEED. 6 seconds per display. : 0-15-999 SPEED : 0.0-99.9 km/h... - Page 15 USER INSTRUCTIONS PRE-SET USER: Enter user data (sex / age/ height / weight) to accurately calculate workout feedback. SELECT MANUAL/PROGRAMS/ WATT CONSTANT/PERSONAL/FITNESS(OPTION)/H.R.C User can choose different control modes to start their workout. See below is main description of each control mode. EXECUTE MANUAL/PROGRAMS/ WATT CONSTANT/PERSONAL/ FITNESS(OPTION)/H.R.C Execute selected control mode.
- Page 16 USER INSTRUCTIONS by UP/DOWN KEY, and then pres ST/STOP key, if user’s heart rate reach to 100% lasting 30 seconds, this mode function will be stoped. After finished this FITNESS function, please refer below FITNESS table. Note: 1.If the user reaches F1 level and their heart rate is not over H.R.C 100%, the computer/console stop working.
- Page 17 USER INSTRUCTIONS H.R.C HEART RATE CONTROL: Select your target Heart Rate, choose from one of the preset programs 55%, 75% or 90%. Please enter your age into the User Data to ensure that your target heart rate is set correctly. The PULSE display will flash when you have reached your target heart rate according to the Program you have chosen.
-
Page 18: Care And Maintenance
CARE AND MAINTENANCE Before cleaning or carrying out any maintenance on your elliptical, ensure the power is turned off and the power cord removed from the plug socket. Prolong the life of your elliptical by performing periodic maintenance checks. Not only does this ensure your machine is in full working order to ensure they continue to run smoothly and reliably, but it will save you service costs in the long run. -
Page 19: Maintenance Log
MAINTENANCE LOG Prolong the life of your elliptical by performing periodic maintenance checks. Not only does this ensure your machine is in full working order, but it will save you service costs in the long run. Every time you perform maintenance, record the date and if you can, the distance and hours operated. -
Page 20: Limited Warranty
B) Used with an extension cord any longer than 1.5m. Repair and Maintenance Service Please contact our Elite Fitness Service Department at eliteservice@elitefitness.co.nz or visit www.elitefitness.co.nz for any service related issues or advice on preventative maintenance servicing procedures. -
Page 21: Warm-Up Exercise
WARM-UP EXERCISE Warm up exercise is important in preparing the muscles for activity whilst minimising the risk of injury. You may choose to warm up with a light/brisk walking pace for 5-10 minutes before stopping and performing some simple stretches. (As shown in the pictures below) —... -
Page 22: Training Stages
TRAINING STAGES Cardiovascular training plays an important part in maintaining a healthy heart and lung function, so it’s no surprise we should be paying attention to how quickly our heart beats during exercise. The chart above outlines a range of heart rate training zones determined by the individual’s age and workout goals to ensure you train safely and effectively. -
Page 23: Parts List
PARTS LIST We recommend 2 people assist in assembling this unit. Place all parts of the elliptical in a cleared area and remove the packing materials. Do not dispose of the packing materials until assembly is completed. Before you start installation, inspect and prepare all parts and screws featured in this manual. - Page 24 PARTS LIST PART PART DESCRIPTION Q’TY DESCRIPTION Q’TY Turn plate ABS Main Frame Q235 Flat washer Q235 Ф4.5*Ф16*1.5 8 Magnet set A3 Cross Q235 20*40 Screw A3 M8*P1.25*45L*S15L 2 Screw A3 ST3.9*16L Screw A3 M6*P1.25*55L Nut PP M10*P1.25 Wave washer 65Mn Ф20.5*Ф30*0.3T Screw A3 ST3.9*50L C-rings 65Mn Ф18.5*Ф22 Screw 3/16”*3/4”...
-
Page 25: Exploded Drawing
EXPLODED DRAWING 6mm All e n key ( 1 pcs) Screwdriver(1 pcs) ELITE ELLIPTICAL ASSEMBLY MANUAL... - Page 26 EXPLODED DRAWING...
-
Page 27: Notes
NOTES ELITE ELLIPTICAL ASSEMBLY MANUAL... - Page 28 For more information about our Elite exercise equipment or other brands that we stock for your home, visit www.elitefitness.co.nz Copyright © 2015 Elite Fitness Elite Fitness, 11 George Bourke Drive, Mt Wellington, Auckland, New Zealand, 0800 243 834, www.elitefitness.co.nz Keep up to date with the latest products, competitions and equipment, follow us on our social media sites.
Need help?
Do you have a question about the VAlOR 4 and is the answer not in the manual?
Questions and answers