Advertisement
Quick Links
Advertisement

Related Manuals for WATSON Miro Desk


Summary of Contents for WATSON Miro Desk
- Page 1 ASSEMBLY Miro Desk View Digitally V.21.0 12/2023 360.394.1300 watsonfurniture.com...
- Page 2 Miro Desk Typicals Callout Fasteners ¼-20x⅜” #8-½” #10x⅝” #8x32x¼” M6-1x40mm Pan Head Wood Pan Head Screw Pan Head Screw (125293) Pan Head Screw Pan Head Wood (126665) Screw (122800) (121538) Screw (127000) #10-32x⅜” M6-1x12mm M6-1x12mm ¼-20x1¼” Phillips Pan Head Nylock Nut...
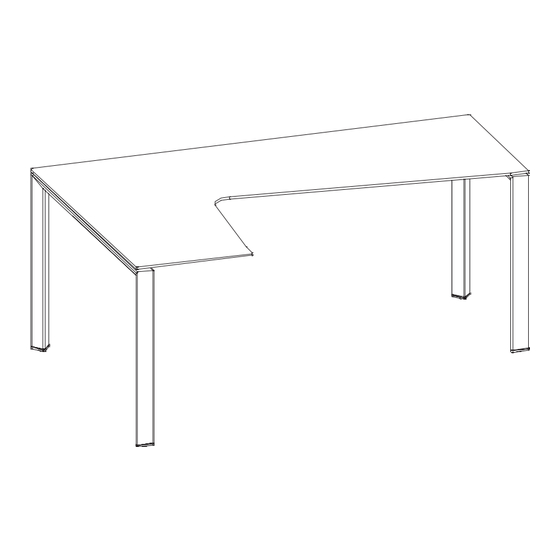
- Page 3 Product Basic Components Worksurface Bridge Leg Support Tube Support Tube Bracket Modesty Panel 3 PRODUCT LINE ASSEMBLY INSTRUCTIONS...
- Page 4 Install Support Tube Center the support tube in its designated pocket on the underside of the surface. Position 2 clamping brackets (490154F) on the ends of the tube and the 3rd bracket in the center. Align brackets to pilot holes and secure with wood screws provided.
- Page 5 Optional: Modesty Panel Worksurfaces are predrilled for the largest modesty panel the desk can accomodate. The pilot holes may not work for your particular installation. Before installing the modesty panel, please follow the below guidelines for positioning, depending on the workstation configuration.
- Page 6 Attach Modesty Panel Fully assemble and install desk in final location before installing the modesty panel. Locate the predrilled pilot holes for alignment, and using the screws provided screw the modesty panel bracket in place. PPHWS #10 x 3/4” Wood Screw Desk with modesty panel installed.
Need help?
Do you have a question about the Miro Desk and is the answer not in the manual?
Questions and answers