Advertisement
Quick Links
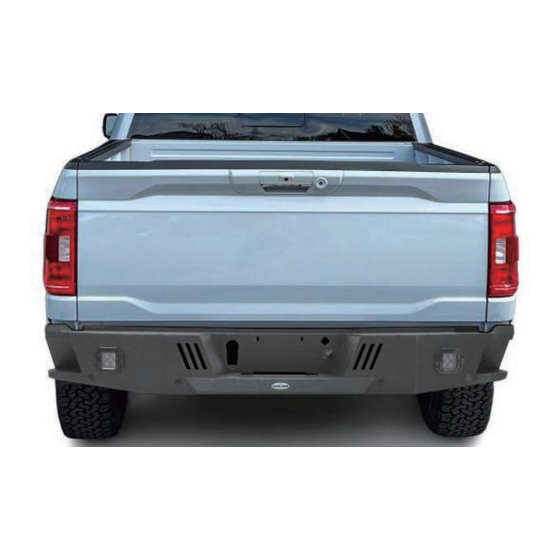
Rear Bumper
CONTENTS
1
Qty
Part Name
Hex Bolts
6
6
Split Lock Washer
12
Button Head Socket Cap
Bolts Screws
6
Sensor Brackets
TOOLS REQUIRED
2
Drive Socket Ratchet Wrench
19mm Wrench
19mm Shallow Socket
Bolts
Size(mm)
Picture
M12*35
D12
M4*16
INSTALLATION TIME
3
About 1 hour, 2-3 people may be needed.
Installation time may differ according to
your mechanical skill level.
(PLEASE VERIFY ALL PARTS ARE PRES-
ENT AND READ INSTRUCTIONS CAREFUL-
LY BEFORE STARTING INSTALLATION!)
To view the electronic version (BXG.8302),
please scan the QR code.
MAKE A DIFFERENCE
Qty
Part Name
Flat Washer
6
6
Hex Nuts
1
L-Wrench
BXG.8302
(INSTALLATION INSTRUCTION)
Size(mm)
Picture
M12*30*2
M12
M4
Advertisement

Related Manuals for HOOKE ROAD BXG.8302


Summary of Contents for HOOKE ROAD BXG.8302
- Page 1 Installation time may differ according to 19mm Wrench your mechanical skill level. (PLEASE VERIFY ALL PARTS ARE PRES- 19mm Shallow Socket ENT AND READ INSTRUCTIONS CAREFUL- LY BEFORE STARTING INSTALLATION!) To view the electronic version (BXG.8302), please scan the QR code.
- Page 2 Step 4 The installation is complete. We hope you enjoy a wonderful off-road life with this quality Hooke Road product! Step 2 Distinguish the mounting brackets of passenger side and driver side.
Need help?
Do you have a question about the BXG.8302 and is the answer not in the manual?
Questions and answers