Table of Contents
Advertisement
Available languages
Available languages
Quick Links
GEBRUIKSAANWIJZING
Instructions for use
Novi Jacky Pro
Geschikt voor kinderen vanaf 40 cm
tot max: 87cm <13 KG
Suitable for children from 40 cm
up to max: 87cm <13 KG
R129
40 87CM
LEES VOOR GEBRUIK DE GEBRUIKSAANWIJZING DOOR EN
BEWAAR DEZE VOOR TOEKOMSTIGE RAADPLEGING.
READ THE INSTRUCTIONS FOR USE BEFORE USE
KEEP THIS FOR FUTURE REFERENCE.
Advertisement
Chapters
Table of Contents

Related Manuals for NOVI Baby Jacky Pro


Summary of Contents for NOVI Baby Jacky Pro
- Page 1 GEBRUIKSAANWIJZING Instructions for use Novi Jacky Pro Geschikt voor kinderen vanaf 40 cm tot max: 87cm <13 KG Suitable for children from 40 cm up to max: 87cm <13 KG R129 40 87CM LEES VOOR GEBRUIK DE GEBRUIKSAANWIJZING DOOR EN BEWAAR DEZE VOOR TOEKOMSTIGE RAADPLEGING.
-
Page 2: Table Of Contents
Inhoudsopgave WAARSCHUWING ..................... 1 Onderdelen lijst....................2 Hendel ........................ 4 De kap ........................ 4 Stoelhoes......................5 De autostoel gebruiken met base: ..............7 Veiligheid in het voertuig en voor de baby ............7 Voorbereidend werk.................... 8 Installatie van de isofix base................8 Plaats het kind in .................... -
Page 3: Waarschuwing
WAARSCHUWING BELANGRIJK! Vanwege potentiële medische problemen die inherent zijn aan een laag geboortegewicht en premature baby’s, dient u altijd een opgeleide professionele arts of ziekenhuispersoneel de geschiktheid van het autostoeltje te laten beoordelen voordat u het ziekenhuis verlaat of het autostoeltje gebruikt. •... -
Page 4: Onderdelen Lijst
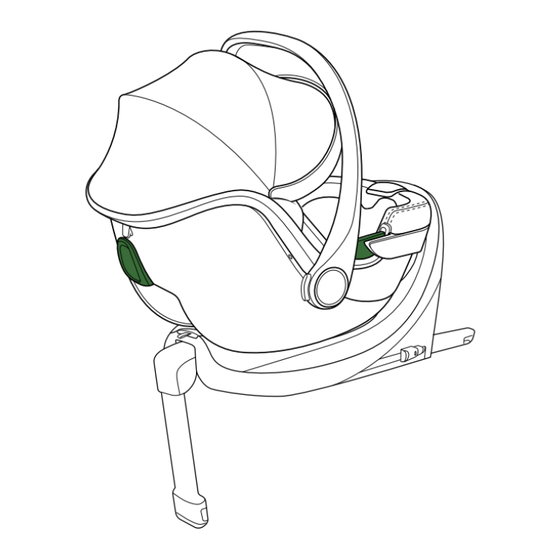
Onderdelen lijst 24 23... - Page 5 WAARSCHUWING Lees de instructies zorgvuldig voor gebruik en bewaar ze voor toekomstig gebruik. Hoofdsteun Schouderkussens Schouderriemen Kruisbeschermer Hoogteverstelling hoofdsteun Losse adapterknoppen (optioneel voor wandelwagen) Gordelgeleiding voertuig Stoel “Cradleyou” Verkleiner Gordelsluiting Verstelknop Verstelband Gesp Tongen Rode ontgrendelingsknop De kap Diagonale gordelgeleiding voertuig Draaiknoppen Handgreep Stoelbekleding...
-
Page 6: Hendel
Hendel CLICK 1.1 Houd beide draaiknoppen (16) 1.2 U kunt de hendel (17) in drie ingedrukt. Verplaats de handgreep standen verstellen: A, B en C zoals (17) naar de gewenste positie en afgebeeld: laat vervolgens de draaiknoppen A - Voor het dragen en voor transport in (16) los. -
Page 7: Stoelhoes
2.2.1 2.2.2 2.2.2 Trek de steun van de kap (14) aan 2.2.1 Verwijder de hoes direct van de kunststof voorkant. beide zijden uit de zwarte buis. 2.2.3 Maak de kap (14) los van het 2.2.3 autostoeltje. TIP! Als u de kap wilt reinigen, trek dan de plastic steunbuis uit de kap. - Page 8 3.1 Open de gesp van het harnas (9), zie (3.2) zoals afgebeeld. 3.2 Open de stoffen bekleding. Verwijder de metalen plaat van de schouderriem (3) 3.3 Verwijder de schouderkussens (2) en de gesptongen (12). Verwijder de stoelbekleding (18). TIP! Bewaar de gesptongen en de metalen plaat goed voor toekomstig gebruik.
-
Page 9: De Autostoel Gebruiken Met Base
De autostoel gebruiken met base: Veiligheid in het voertuig en voor de baby In deze instructies worden de volgende symbolen gebruikt: Symbool Trefwoord Toelichting GEVAAR! RISICO op ernstig lichamelijk letsel WAARSCHUWING! RISICO op ernstig lichamelijk letsel LET OP! RISICO op materiële schade TIP! Nuttige opmerkingen This child car seat is exclusively intended to secure your child in your vehicle. -
Page 10: Voorbereidend Werk
Voorbereidend werk Als uw auto niet standaard is uitgerust met ISOFIX-inschuifhulpen (29), klemt u de twee ISOFIX-inschuifhulpen (29), die bij de levering van het zitje zijn inbegrepen, met de opening naar boven op de twee ISOFIX-bevestigingspunten (30) van uw auto. Als je geen ISOFIX-insteekhulp (29) hebt, negeer dan deze stap. - Page 11 CLICK 5.3 Druk op de ISOFIX-knoppen (24) om de twee ISOFIX-vergrendelarmen (23) uit de base van het zitje te schuiven. 5.4 Duw de base terug totdat deze stevig tegen de autostoel rust en u een klikgeluid hoort. Aan beide kanten veranderen de ISOFIX-knoppen (24) van rood naar groen.
-
Page 12: Plaats Het Kind In
Plaats het kind in 6.1 Maak de schoudergordels (3) los door op de verstelbutton (10) te drukken en trek beide schoudergordels (3) naar voren. Druk op de rode ontgrendelknop (13) om het gordelslot (9) te openen. Beweeg de gordels naar de zijkant om het kind in het zitje te plaatsen. Breng beide gespen (12) naar elkaar toe. - Page 13 Stel de hoofdsteun (1) in de juiste stand. Zorg ervoor dat de afstand tussen de schouder van het kind en de onderkant van de hoofdsteun kleiner is dan één vinger. Trek aan de verstelband (11) totdat de band plat en strak om het lichaam van je kind zit.
-
Page 14: Installatie Van Het Kinderzitje
Installatie van het kinderzitje CLICK Zet het kinderstoeltje op de base, steek de metalen staven (21) in de gleuf en je hoort een klikgeluid. De indicators (25) van de base veranderen van rood naar groen. Gebruik het babystoeltje nooit met het gezicht naar voren. Rotatie Trek met je vinger aan de rotatie-insteller (22) en draai de zitschaal. -
Page 15: Uit Het Voertuig Verwijderen
Uit het voertuig verwijderen 9.1 Til de ontgrendelingsknop (31) op en verwijder het kinderzitje. 9.2 Verkort de steunpoot (26): Druk op de verstelknoppen (27) om hem terug in de steunpoot (26) te duwen. 9.3 Knijp de ISOFIX-knop (24) naar elkaar toe om de ISOFIX-bevestigingspun- ten (30) aan beide zijden los te maken. -
Page 16: De Autostoel Gebruiken Zonder Base
De autostoel gebruiken zonder base: Veiligheid in het voertuig en uw baby In deze instructies worden de volgende symbolen gebruikt: Symbool Trefwoord Uitleg GEVAAR! RISICO op ernstig persoonlijk letsel WAARSCHUWING! RISICO op ernstig persoonlijk letsel WAARSCHUWING! GEVAAR voor materiële schade TIP! Nuttige opmerkingen Dit autokinderzitje is uitsluitend bedoeld om uw kind vast te zetten in uw voertuig. -
Page 17: Het Kind In Het Autostoeltje Plaatsen
Het kind in het autostoeltje plaatsen 4.1 Maak de schouderbanden (3) los 4.2 Druk op de rode ontgrendelings- door op de verstelknop (10) te knop (13) om de gesp van het harnas (9) te openen. Beweeg de drukken en trek beide schouderbanden naar voren. - Page 18 4.5 Stel de hoofdsteun (1) in op de 4.6 Trek aan de verstelriem (11) totdat juiste positie. Zorg ervoor dat de de riem plat en strak om het lichaam afstand tussen de schouder van het van uw kind ligt. Zorg ervoor dat de kind en de onderkant van de schouderbanden iets hoger of gelijk hoofdsteun kleiner is dan één...
-
Page 19: Het Kinderzitje Installeren
Het kinderzitje installeren Het vast maken van het babyzitje met de riem (Universele Gordel) WAARSCHUWING! Neem tijdens het gebruik het voertuighandboek in acht en volg het. Zorg ervoor dat u eventuele beperkingen met betrekking tot airbags in acht neemt. WAARSCHUWING! Maak het baby-autostoeltje nooit vast met een 2-puntsveiligheids- gordel! 5.1 Plaats het babyzitje op het autostoel, naar achteren gericht, tegen de... - Page 20 CLICK 5.3 Vergrendel het uiteinde van de gesp met een klikgeluid in de gesp van de autostoel. 5.4 Trek de diagonale riem naar de achterkant van het autostoeltje. Laat de diagonale gordel door de diagonale gordelgeleiding van het voertuig (15) gaan. 5.5 Volg de richting van de pijl om de diagonale gordel en de heupgordel aan te spannen.
-
Page 21: Problemen Oplossen
Problemen oplossen Om de veiligheid van uw kind te garanderen, is het absoluut essentieel dat de gesp van het tuigje correct blijft functioneren. Storingen in de gordelsluiting worden meestal veroorzaakt door opeenhoping van vuil of door externe voorwerpen: Wanneer u op de rode ontgrendelingsknop (13) drukt, duurt het lang voor- dat de gesptongen worden uitgeworpen. -
Page 22: De Gesp Van Het Harnas Schoonmaken
De gesp van het harnas schoonmaken 6.1 Draai de metalen plaat op de kruis riem verticaal 90°. Schuif de metalen plaat naar beneden door de gleuf voor het harnas (a), zoals afgebeeld. 6.2 Trek aan de kruis riem en schuif de metalen plaat 90° verticaal naar boven door de gleuf voor het harnas (b), zoals afgebeeld. - Page 24 Contents WARNING ......................23 Part list........................ 24 Handle ........................ 26 Canopy ....................... 26 Seat cover ......................27 Using the carseat with the base: ................ 29 Safety in the vehicle and for baby ..............29 Preparatory work ....................30 Installation of the isofix base ................30 Put the child in ....................
-
Page 25: Warning
WARNING DANGER! Because of potential medical issues inherent to Iow birth weight and premature infants, always have a trained professional doctor or hospital staff assess the suitability of the ECRS prior to leaving the hospital or using the ECRS. • MAKE SURE any straps holding the car seat to the vehicle should be tight. Any straps restraining the child should be adjusted to the child’s body. -
Page 26: Part List
Part list 24 23... - Page 27 WARNING Read the instructions carefully before using and keeping for future reference. Headrest Shoulder Pads Shoulder Straps Crotch Pad Headrest Height Adjuster Separate Adapter Buttons (optional for stroller) Vehicle Lap Belt Guidance Seat “Cradleyou” Reducer Harness Buckle Adjustment Button Adjustment Strap Buckle Tongues Red Release Button Canopy...
-
Page 28: Handle
Handle CLICK 1.1 Hold down both swivel buttons 1.2 You can adjust the handle (17) (16). Move handle (17) to desired in three positions: A, B and C as position, then release swivel but- shown: tons (16). Ensure that the handle A - For carrying and for transport in your (17) with a clicking sound as shown. -
Page 29: Seat Cover
2.2.2 2.2.1 2.2.1 Remove cover directly from 2.2.2 Draw out the canopy (14) strut plastic front edge. from black tube on both sides. 2.2.3 Detach the canopy (14) from 2.2.3 infant carrier. TIP! If you need to clean the canopy, please pull out the plastic support pipe in the canopy. - Page 30 3.1 Open the harness buckle (9), refer to (3.2) as shown. 3.2 Open the cloth cover. Remove the metal plate from shoulder strap (3). 3.3 Remove shoulder pads (2) and buckle tongues (12). Remove the seat cover (18). TIP! Please keep the buckle tongues and metal plate well for further use. TIP! Follow above steps in reverse order with R-elf (19), which can help you assemble cover more easily.
-
Page 31: Using The Carseat With The Base
Using the carseat with the base: Safety in the vehicle and for baby These instructions use the following symbols: Symbol Keyword Explanation DANGER! RISK of severe personal injury WARNING! RISK of severe personal injury CAUTION! RISK of material damage TIP! Useful notes This child car seat is exclusively intended to secure your child in your vehicle. -
Page 32: Preparatory Work
Preparatory work If your vehicle is not fitted with ISOFIX insertion aids (29) as standard, clamp the two ISOFIX insertion aids (29), which are included in the scope of delivery of the seat, with the opening pointing upwards to the two ISOFIX fastening points (30) of your vehicle. - Page 33 CLICK 5.3 Press the ISOFIX buttons (24) to push out the two ISOFIX locking arms (23) from the seat base. 5.4 Push back the base until the base is rest firmly against the vehicle seat then you hear a clicking sound. And on both sides the ISOFIX buttons (24) turn from red to green safety color.
-
Page 34: Put The Child In
Put the child in 6.1 Loosen the shoulder straps (3) by pressing the adjustment botton (10) and pull both shoulder straps (3) forwards. 6.2 Press red release button (13) to open the harness buckle (9). Move the harness straps to the side to place the child in the seat. 6.3 Bring both buckle tongues (12) together. - Page 35 6.5 Adjust the headrest (1) to proper position. Make sure the distance between child’s shoulder and the bottom of the headrest is lower than one finger. 6.6 Pull the adjustment strap (11) until the strap lies flat and snug on your child’s body.
-
Page 36: Installation Of The Infant Carrier
Installation of the infant carrier CLICK Put the infant carrier on the base, insert the metal bars (21) into the slot, then you hear a clicking sound. The base indicators (25) turn from red to the green safety color. Never use the infant carrier facing forwards. Rotation Pull the rotation adjuster (22) with finger, rotate the seat shell. -
Page 37: Remove From Vehicle
Remove from vehicle 9.1 Lift the release button (31), remove the infant carrier. 9.2 Shorten the support leg (26): Press the adjustment buttons (27) to push back into support leg (26). 9.3 Squeezethe ISOFIX button (24) towards each other to loosen the ISOFIX fastening points (30) on both sides. -
Page 38: Using The Carseat Without A Base
Using the carseat without a base: Safety in the vehicle and for baby These instructions use the following symbols: Symbol Keyword Explanation DANGER! RISK of severe personal injury WARNING! RISK of severe personal injury WARNING! RISK of material damage TIP! Useful notes This child car seat is exclusively intended to secure your child in your vehicle. -
Page 39: Putting The Child In The Car Seat
Putting the child in the car seat 4.1 Loosen the shoulder straps (3) by 4.2 Press red release button (13) to pressing the adjustment button open the harness buckle (9). (10) and pull both shoulder straps Move the harness straps to the side forwards. - Page 40 4.5 Adjust the headrest (1) to proper 4.6 Pull the adjustment strap (11) until position. Make sure the distance the strap lies flat and snug on your between child’s shoulder and the child’ s body. Make sure shoulder bottom of the headrest is lower than straps slightly higher or equal to one finger.
-
Page 41: Installing The Infant Seat
Installing the infant seat Secure infant carrier with belt (Universal Belted) WARNING! Note and follow the vehicle handbook during use, be sure to observe any restrictions relating to airbags. WARNING! Never secure the infant carrier with a 2-point seat belt! 5.1 Position infant carrier on the car seat facing backwards against the direction of travel. - Page 42 CLICK 5.3 Lock the tip of the buckle into the vehicle seat buckle with a clicking sound. 5.4 Pull the diagonal belt to the back of the infant carrier. Let the diagonal belt go through the vehicle diagonal belt guidance (15). 5.5 Follow the direction of arrow to tighten diagonal belt and lap belt.
-
Page 43: Troubleshooting
Troubleshooting To ensure the safety of your child, it is absolutely essential that the harness buckle continues to function correctly. Harness buckle malfunctions are usually caused by a build-up of soiling or by external objects: When you press the red release button (13), it takes a long time for the buckle tongues to be ejected. -
Page 44: Cleaning The Harness Buckle
Cleaning the harness buckle 6.1 Rotate the metal plate on crotch strap by 90° vertically. Slide the metal plate downward through the harness slot (a) as shown. 6.2 Pull crotch strap and slide the metal plate by 90° vertically upward through the harness slot (b) as shown. - Page 46 Dit product wordt geïmporteerd door: This product is imported by: van Asten BabySuperstore Ringbaan Zuid 5 5021 AA Tilburg Geproduceerd volgens: ECE R129/03 Produced according: ECE R129/03...
Need help?
Do you have a question about the Jacky Pro and is the answer not in the manual?
Questions and answers