Table of Contents
Advertisement
Available languages
Available languages
Quick Links
GEBRUIKSAANWIJZING
Instructions for use
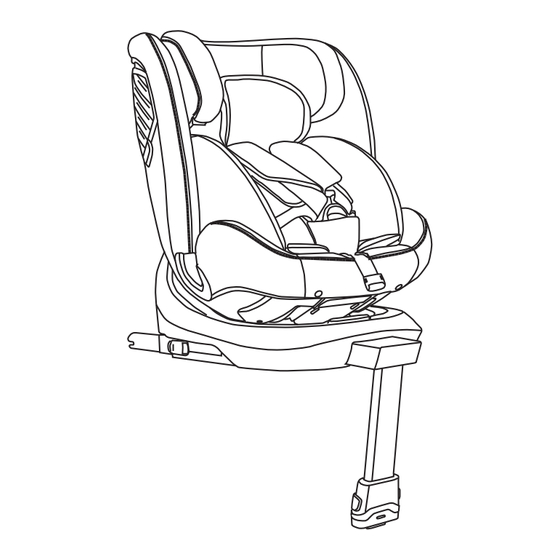
Novi Baby David 2.0 Go
Geschikt voor kinderen vanaf 40cm
tot max: 150cm
Suitable for children from 40cm
up to max: 150cm
LEES VOOR GEBRUIK DE GEBRUIKSAANWIJZING DOOR EN
BEWAAR DEZE VOOR TOEKOMSTIGE RAADPLEGING.
READ THE INSTRUCTIONS FOR USE BEFORE USE
KEEP THIS FOR FUTURE REFERENCE.
Advertisement
Chapters
Table of Contents

Related Manuals for NOVI Baby David 2.0 Go


Summary of Contents for NOVI Baby David 2.0 Go
- Page 1 GEBRUIKSAANWIJZING Instructions for use Novi Baby David 2.0 Go Geschikt voor kinderen vanaf 40cm tot max: 150cm Suitable for children from 40cm up to max: 150cm LEES VOOR GEBRUIK DE GEBRUIKSAANWIJZING DOOR EN BEWAAR DEZE VOOR TOEKOMSTIGE RAADPLEGING. READ THE INSTRUCTIONS FOR USE BEFORE USE...
-
Page 2: Table Of Contents
Inhoudsopgave Let op!......................... 1 1. Onderdelen lijst....................2 2. Veiligheidsinstructies ..................3 3. Aanpassing aan de lengte van het kind ............4 4. Veiligheidsmaatregelen voor installatie ............4 5. ISOFIX-gebruiksmethode ................5 6. De steunpoot gebruiken ................. 6 7. Methode voor 360 graden rotatie ..............8 8. -
Page 3: Let Op
Let op! 1. Gebruikt als i-Size ECRS: Dit is een i-Size Enhanced Child Restraint System. Het is goedgekeurd volgens VN-reglement nr. 129 voor gebruik in i-Size compatibele zitplaatsen in auto’s, zoals aangegeven door de autofabrikant in de handleiding van de auto. Raadpleeg bij twijfel de fabrikant of de verkoper van het uitgebreide kinderveiligheidssysteem. -
Page 4: Onderdelen Lijst
1. Onderdelen lijst Controleer of er onderdelen ontbreken. Als er een onderdeel ontbreekt, neem dan contact op met de leverancier. 1. Hoofdsteun 11. Rotatiehendel 2. Comfortkussen 12. Schouder riem kussen 3. Gesp 13. Schouderriem 4. Gespkussen 14. Hoofdsteunkussen 5. Verstelbare riem 15. -
Page 5: Veiligheidsinstructies
2. Veiligheidsinstructies • De stevige en plastic onderdelen van een ECRS moeten zo geplaatst en geïnstalleerd worden dat ze niet bekneld kunnen raken door een verplaats- bare stoel of in een deur van het voertuig tijdens het dagelijkse gebruik van het voertuig. -
Page 6: Aanpassing Aan De Lengte Van Het Kind
3. Aanpassing aan de lengte van het kind In geval van nood zal de veiligheidsgordel doorgeknipt worden en het kind zo snel mogelijk van het ongeval worden verwijderd. Installatie-instructies: Lengte Installatierichting Rugleuningpositie Installatiemethode Achterwaartse ISOFIX+Steun- 40-105cm Stand 1 tot 4 installatie poot+Harnas Voorwaartse... -
Page 7: Isofix-Gebruiksmethode
5. ISOFIX-gebruiksmethode Gebruiksmethode met isofix-geleider: 1. Zoek het ISOFIX-verankeringspunt in de ruimte tussen de rugleuning van de autostoel en het zitoppervlak. 2. lnsert de ISOFIX-gleuf in de opening tussen de rugleuning van de autostoel en het zitoppervlak en Sluit de Isofix-connector aan. ISOFlX aanpassen: Houd de ISOFIX-verstelknop ingedrukt en schuif hem naar achteren om de ISO- FIX in de langste stand te zetten. -
Page 8: De Steunpoot Gebruiken
6. De steunpoot gebruiken ISOFIX bevestigen en demonteren: 1. Steek beide Isofix-connectors in de geleidingsgleuf en sluit ze aan op de Iso- fix-verankeringspunten van de auto. 2. Duw de base in de richting van de rugleuning van de autostoel zodat hij goed aansluit, en wanneer de ISOFIX-indicator groen oplicht, betekent dit dat het correct geïnstalleerd is. - Page 9 2. Druk op de verstelknop op de steunpoot (zie afbeelding 2) en trek de binnenste buis van de steunpoot naar beneden totdat deze de vloer van de auto raakt (de steunpoot heeft 21 verstelsegmenten) en wanneer de steunpoot groen oplicht (zie afbeelding 3), geeft dit aan dat de steunpoot op zijn plaats zit.
-
Page 10: Methode Voor 360 Graden Rotatie
7. Methode voor 360 graden rotatie 1. Trek aan de draaiknop op de base naar buiten (zie afbeelding 1) en draai het kinderzitje (zie afbeelding 2) om de status van het kinderzitje aan te passen. 2. Afbeelding A toont de installatiemethode voorwaarts. Na 180° te draaien (zie afbeelding B), wordt het zitje omgekeerd geïnstalleerd. -
Page 11: Aanpassing Van Harnassysteem
3. De zitting van het kinderzitje kan in 4 posities worden versteld (zie Afbeelding 2 en Afbeelding 3). 9. Aanpassing van harnassysteem 1. Druk met de ene hand op het verstelsysteem zonder los te laten (zie afbeelding 1) en trek met de andere hand de twee schouderriemen naar buiten (zie afbeelding 2, trek niet aan het schouderriemkussen) om de speling van de veiligheidsgordel aan te passen. -
Page 12: Hoofdsteun Verstellen
10. Hoofdsteun verstellen 1. Voordat de hoofdsteun wordt versteld, moet het gordelsysteem in de los- hangende stand worden gezet. 2. De hoogte van de hoofdsteun kan worden versteld door op de hendel voor hoofdsteunverstelling te drukken en ondertussen de hendel omhoog en omlaag te trekken. -
Page 13: Installatiemethode Achterwaarts Gericht
12. Installatiemethode achterwaarts gericht Installatiemethode: ISOFIX + steunpoot+ harnas voor maatbereik 40-105cm 1. Volg de procedure beschreven in punt 5 om de Isofix te installeren. 2. Volg de procedure beschreven in punt 6 om de steunpoot te installeren. 3. Stel het kinderzitje in op de achterwaarts gerichte stand volgens de procedure beschreven in punt 7. -
Page 14: Installatiemethode Voorwaarts Gericht
4. lnstalleer je kind in het kinderzitje volgens de handelingen beschreven in punt 8, 9 en 10. 13. Installatiemethode voorwaarts gericht Installatiemethode: ISOFIX + steunpoot+ harnas voor maatbereik 76-105cm 1. Volg de procedure beschreven in punt 5 om de Isofix te installeren. - Page 15 2. Volg de procedure beschreven in punt 6 om de steunpoot te installeren. 3. Stel het kinderzitje naar voren gericht in volgens de procedure beschreven in punt 7. 4. Installeer je kind in het kinderzitje volgens de handelingen beschreven in punt 8, 9 en 10.
-
Page 16: Installatiemethode Voorwaarts Gericht
14. Installatiemethode voorwaarts gericht Installatiemethode 1: 3-punts veiligheidsgordel voor maatbereik 100-150cm Installatiemethode 2: 3-punts veiligheidsgordel + ISOFIX voor maatbereik 100-150cm Voorbereiding voor installatie 1. Plaats de steunpoot in de opslaggleuf van de base volgens de procedure beschreven in punt 6 (zie afbeelding 1). 2. - Page 17 5. Plaats de linker- en rechterinzetstukken in elkaar. 6. Als u het geluid van een “klik” hoort en de gesp groen wordt, betekent dit dat de gesp goed vastzit. 7. Open het klepje van het opbergvak en plaats de schouderbanden en gesp in de box.
-
Page 18: Installatiemethode 1: 3-Punts Veiligheidsgordel Voor Maatbereik 100-150Cm
9. Verberg de schouderriemen en schouderkussentjes achter de stoffen bekleding van de rugleuning. Installatiemethode 1: 3-punts veiligheidsgordel voor maatbereik 100-150cm 1. Zet het kinderzitje op de autostoel en duw de base goed tegen de rugleuning van de autostoel. 2. Steek de schouderriem van de autogordel door de schoudergordelgeleidings- haak onder de hoofdsteun van het autostoeltje en de heupgordel door de heupgordelgeleidingshaak aan beide kanten van het autostoeltje en maak het 3-punt veiligheidsslot vast, de autogordel mag niet verdraaien. -
Page 19: Installatiemethode 2: 3-Punts Veiligheidsgordel + Isofix Voor
Installatiemethode 2: 3-punts veiligheidsgordel + ISOFIX voor maatbereik 100-150cm 1. Zet het kinderzitje op de autostoel, plaats de twee ISOFIX-connectoren in de geleidingsgleuf, maak verbinding met het ISOFIX-verankeringspunt van de auto, en tijdens het proces hoor je misschien twee keer het geluid van een “klik”, en wanneer de ISOFIX-indicator groen aangeeft, betekent dit dat de installatie is voltooid. -
Page 20: De Hoes Van Het Kinderzitje Verwijderen
15. De hoes van het kinderzitje verwijderen 1. Druk op de knop om het gordel- 2. Verwijder de schoudervullingen systeem los te maken en verwijder afzonderlijk van de schouderbanden. het gespkussen. 3. Verwijder de stoffen bekleding van 4. Open de verborgen gesp van de de hoofdsteun. -
Page 21: Onderhoud En Reparatie
16. Onderhoud en reparatie • Gebruik geen strijkijzer voor de verzorging. • Leg het plat te drogen op een koele plaats. • Niet bleken of chemisch reinigen. • Wassen op een watertemperatuur onder de 30 graden. • Niet hard wringen en drogen, overmatig draaien en drogen kan kreukels achterlaten. -
Page 22: Onderhoud Van De Zitting
17. Onderhoud van de zitting • Controleer altijd of de onderdelen van het zitje compleet zijn en of het zitje in goede staat is om de kans op ongelukken te verkleinen. • Trek voor gebruik aan de riem van de gesp om te controleren of de gesp los zit. -
Page 23: Kwaliteitsgarantie
20. Kwaliteitsgarantie Wij garanderen dat dit product is vervaardigd in overeenstemming met de huidige installatienormen en kwaliteitseisen voor dit product in China en Europa, en dat het product vrij is van materiaal- en fabricagefouten op het moment van aankoop, en dat het product diverse kwaliteitstests heeft ondergaan tijdens het fabricage- proces, en als u, zelfs na deze controles, nog steeds materiaal- of fabricagefou- ten aantreft (bij normaal gebruik in overeenstemming met de gebruiksaanwijzing), zullen wij de garantievoorwaarden nakomen! Neem in dat geval contact op met... - Page 24 Table of contents Notice ......................... 23 1. Part list......................24 2. Safety instructions ..................25 3. Adjust to the childs length ................26 4. Safety Precautions For Installation ..............26 5. ISOFIX Use method ..................27 6. Use method of support leg ................28 7.
-
Page 25: Notice
Notice 1. Used as i-Size ECRS: This is an i-Size Enhanced Child Restraint System. It is approved according to UN Regulation No.129, for use in, i-Size compatible vehicle seating positions as indicated by vehicle manufacturers in the vehicle users’ manual. If in doubt, consult either the Enhanced Child Restraint System manufacturer or the retailer. -
Page 26: Part List
1. Part list Check whether any component is missing. If any component is missing, contact the vendor. 1. Headrest 11. Rotation Adjusting Handle 2. Comfort Cushion 12. Shoulder Belt Pad 3. Buckle 13. Shoulder Strap 4. Buckle pad 14. Headrest cushion 5. -
Page 27: Safety Instructions
2. Safety instructions • The rigid items and plastic parts of an ECRS shall be located and installed so that they are not liable to become trapped by a movable seat or in a door of the vehicle during everyday use of the vehicle. •... -
Page 28: Adjust To The Childs Length
3. Adjust to the childs length In case of an emergency, they shall cut the seat belt and remove the child from the scene in a rapid manner. Installation instructions: Size range Seat back position Installation method Installation direction Rearward IISOFIX+Support 40-105cm Gear 1 to 4... -
Page 29: Isofix Use Method
5. ISOFIX Use method Use method of guide slot: 1. Find the ISOFlX anchor point in the gap between the car seat backrest and the seating surface. 2. lnsert the ISOFIX guide slot into the gap between the car seat backrest and the seating surface, and connect the lSOFIX connector. -
Page 30: Use Method Of Support Leg
Fixing and disassembly ISOFIX: 1. Put both ISOFIX connectors into the guide slot and connect them to the ISOFIX anchor points of the car. 2. Push the base towards the car seat back to fit tightly, and when the ISOFIX indicator shows green, it means it is installed correctly. - Page 31 2. Press the adjustment button on the support leg (refer to Figure 2) and pull down the inner tube of the support leg until it hits the floor of the car (the support leg has 21 adjustment segments) and when the support leg displays green (refer to Figure 3), it indicates that the support leg is in place.
-
Page 32: Method Of 360 Degree Rotation
7. Method of 360 degree rotation 1. Pull the Rotation Adjusting Handle on the base outward refer to Figure 1), and turn the child seat(refer to Figure 2) to adjust the status of the child seat. 2. Figure A shows the forward installation method. After rotating to 180° refer to Figure B), it will be in the reverse installation method. -
Page 33: Adjustment Of Harness System
3. Body of the child seat can be adjusted to 4 positions (refer to Figure 2 and Figure 3). 9. Adjustment of harness system 1. Press the adjusting device with one hand without releasing (refer to Figure 1), and pull the two shoulder straps outward with the other hand (refer to Figure 2, please do not pull the shoulder belt pad) to adjust the seat belt slack condition. -
Page 34: Adjustment Of Headrest
10. Adjustment of headrest 1. Before adjusting the headrest, the harness system must be adjusted to the slack state. 2. The height of headrest can be adjusted by pressing the headrest adjustment handle, in the meanwhile pulling the handle up and down. (there are 13 segments for the adjustment of the headrest). -
Page 35: Rearward Facing Installation Method
12. Rearward facing installation method Installation Method: ISOFIX + support leg+ harness for size range 40-105cm 1. Follow the operation descripted in item 5 to install the ISOFIX. 2. Follow the operation descripted in item 6 to install the support leg. 3. -
Page 36: Forward Facing Installation Method
4. lnstall your child in the child seat according to operations descripted in item 8, 9 and 10. 13. Forward facing installation method Installation method: ISOFIX + support leg+ harness for size range 76-105cm 1. Follow the operation descripted in item 5 to install the ISOFIX. - Page 37 2. Follow the operation descripted in item 6 to install the support leg. 3. Adjust the child seat to the forward facing status according to operation descripted in item 7. 4. lnstall your child in the child seat according to operations descripted in item 8, 9 and 10.
-
Page 38: Forward Facing Installation Method
14. Forward facing installation method Installation method 1: 3-point safety belt for size range 100-150cm Installation method 2: 3-point safety belt+ ISOFIX for size range 100-150cm Preparation before installation 1. Put the support leg into the storage slot of the base following the operation descripted in item 6 (refer to Figure 1). - Page 39 5. Put the left and right inserts together. 6. Fasten the buckle, and when you hear the sound of “click” and the buckle appears green, it means that the buckle is fastened correctly. 7. Open the cover of the storage box and place the shoulder straps and buckle into the box.
-
Page 40: Installation Method 1: 3-Point Safety Belt For Size Range 100-150Cm
9. Hide the shoulder straps and shoulder pads behind the seat back fabric cover. Installation method 1: 3-point safety belt for size range 100-150cm 1. Put the child seat on the car seat and push the base to the car seat back closely. -
Page 41: Installation Method 2: 3-Point Safety Belt+ Isofix For Size Range 100-150Cm
Installation method 2: 3-point safety belt+ ISOFIX for size range 100-150cm 1. Put the child seat on the car seat, put the two ISOFIX connectors into the guide slot, connect with the ISOFIX anchor point of the car, and during the process, you may hear the sound of “click”... -
Page 42: Removing The Child Seat Cover
15. Removing the child seat cover 1. Press the button to unfasten the 2. Remove the shoulder pads from the harness system and remove the shoulder straps separately. buckle pad 3. Remove the headrest fabric cover. 4. Open the concealed buckle of the seat cover. -
Page 43: Maintenance And Repair
16. Maintenance and repair • Do not use an iron for treatment. • Please lay flat to dry it in a cool place. • Do not use bleach or dry clean. • Wash in water temperature below 30 degrees. • Do not twist and dry vigorously, excessive twisting and drying may leave wrinkles. -
Page 44: Preservation Of The Seat
17. Preservation of the seat • Please always check whether the parts of the seat are complete or not and whether the seat is in good condition or not, to reduce the chance of accidents. • Before use, please pull the webbing on the buckle to check if the buckle is loose. -
Page 45: Quality Assurance
20. Quality assurance We guarantee that this product is manufactured in accordance with the current installation standards and quality requirements for this product in China and Europe, and that the product is free of any material and manufacturing defects at the time of purchase, and that the product has undergone various quality tests during the manufacturing process, and if, even after these checks, you still find material or manufacturing defects (under normal use in compliance with the instruction manual), the terms of the warranty we will fulfil! - Page 46 Dit product wordt geïmporteerd door: This product is imported by: van Asten BabySuperstore Ringbaan Zuid 5 5021 AA Tilburg Geproduceerd volgens: ECE R129/03 Produced according: ECE R129/03...
Need help?
Do you have a question about the David 2.0 Go and is the answer not in the manual?
Questions and answers