Table of Contents
Advertisement
Available languages
Available languages
Quick Links
GEBRUIKSAANWIJZING
Goliath Go Grey
Autostoel groep 0+/1/2/3
Geschikt voor kinderen met een
Gewicht: van 0 - 36 kg
Leeftijd: van 0 - 12 jaar
van Asten BabySuperstore
Ringbaan Zuid 5
5021 AA Tilburg
BELANGRIJK. LEES DEZE GEBRUIKSAANWIJZING GOED DOOR
VOORDAT U DIT PRODUCT GEBRUIKT EN BEWAAR DIT DOCUMENT
VOOR TOEKOMSTIG GEBRUIK.
Advertisement
Chapters
Table of Contents

Related Manuals for NOVI Baby Goliath Go Grey


Summary of Contents for NOVI Baby Goliath Go Grey
- Page 1 GEBRUIKSAANWIJZING Goliath Go Grey Autostoel groep 0+/1/2/3 Geschikt voor kinderen met een Gewicht: van 0 - 36 kg Leeftijd: van 0 - 12 jaar van Asten BabySuperstore Ringbaan Zuid 5 5021 AA Tilburg BELANGRIJK. LEES DEZE GEBRUIKSAANWIJZING GOED DOOR VOORDAT U DIT PRODUCT GEBRUIKT EN BEWAAR DIT DOCUMENT...
-
Page 3: Table Of Contents
Inhoudsopgave: Belangrijke mededeling vóór gebruik..............5 Installatiepositie......................7 Onderdelen van het kinderzitje................8 Installatiemethoden....................9 Installatie van ISOFIX....................11 Installatie van Groep 0+ met ISOFIX en toptetherriem.........12 Installatie van Groep I met ISOFIX en autogordel..........13 Installatie van Groep 0+ (gebruik autogordel)............15 Installatie van Groep I (gebruik autogordel)............16 Kind vastmaken Groep 0+/I...................17 Installatie van Groep II/III..................21 ISOFIX-connector losmaken...................22... - Page 4 Mededeling Let bij gebruik als kinderbeveiliging van de categorie universeel op onderstaande informatie: 1. D it is een “universeel” kinderbeveiligingssysteem, het is goedgekeurd volgens Europees voorschriftnr. 44, 04 serie amendementen, voor algemeen gebruik in voertuigen en past op de meeste, maar niet alle, autozittingen. 2.
-
Page 5: Belangrijke Mededeling Vóór Gebruik
1. Belangrijke opmerkingen. Voor gebruik lezen a.u.b. Lees voor gebruik van de autostoel de instructies zorgvuldig door en bewaar deze gebruikershandleiding als naslagwerk. Het niet opvolgen van de instructies kan gevolgen hebben voor de veiligheid van je kind. 1. GEEN enkel kinderbeveiligingssysteem kan volledige bescherming tegen letsel bij een ongeval garanderen. - Page 6 16. Een niet-gecertificeerd of een aangepast product is gevaarlijk. Het is te- vens gevaarlijk om niet de door de fabrikant geleverde installatie-instruc- ties in het bezit te hebben. Installeer de stoel overeenkomstig de instal- latiemethode in deze handleiding. Zo voorkomt u dat het tijdens gebruik vast komt te zitten tussen de stoelen of portieren van het voertuig.
-
Page 7: Installatiepositie
31. Gebruik GEEN andere dragende contactpunten dan diegene die wor- den omschreven in de instructies en die op het kinderbeveiligingssys- teem zijn gemarkeerd. 32. Controleer regelmatig of de ISOFIX-geleiders vuil zijn en maak ze indien nodig schoon. 33. Zet het kinderbeveiligingssysteem niet op zitplaatsen voorin met een airbag terwijl uw kind nog steeds naar achteren gericht zit. -
Page 8: Onderdelen Van Het Kinderzitje
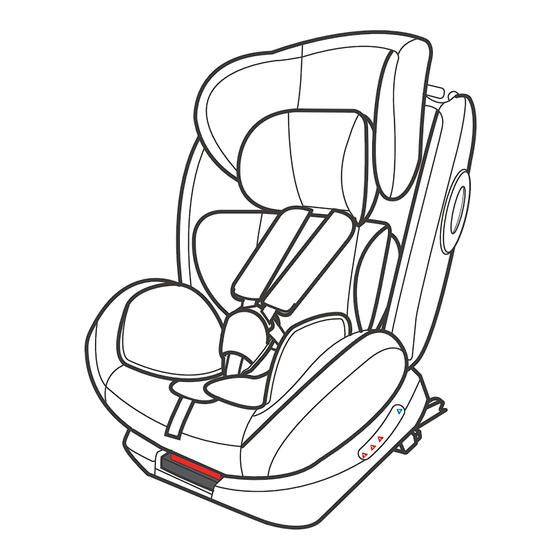
Onderdelenlijst Gordelgeleider voor groep II,III Hoofdsteun Hoofdkussen Schouderkussen Gesp Binnenkussen Gespkussentje Verstelknop Gordel verstelband Verstelhendel ligstand Knop voor draaien Versteller voor tether riem Toptether Riem voor bevestiging Toptether haak Gordelgeleider voor groep II,III Beugel ISOFIX connector ISOFIX bevestigingsarm ISOFIX ontgrendelingsknop... -
Page 9: Installatiemethoden
Installatiemethode (op basis van het gewicht van uw kind) Dit kinderzitje is geschikt voor vier massagroepen op basis van (GB27887-2011) en (ECE R44/04). Het gewicht van het kind bepaalt voor welke configuratie en installatie moet worden gekozen. (0 - 18 maanden) P11, 12 9-18 (9 maand tot 4 jaar) - Page 10 Installatiemethode voor Groep 0+ en I selecteren ISOFIX + toptether 3-puntsgordel Groep 0+ P12,11 P8, 9 ISOFIX + 3-puntsgordel 3-puntsgordel Groep I P13,11 • Groep 0+, er zijn 3 vaste punten bij het gebruik van ISOFIX, vergeet er geen. • Voor Groep I, II, III mag ISOFIX als vast punt onderaan worden gebruikt.
-
Page 11: Installatie Van Isofix
Installatie van ISOFIX Verbind de ISOFIX-bevestigingsgelei- Verleng de ISOFIX-bevestigingsarmen ders met de ISOFIX-ankerpunten. door de ontgrendelingsknop in te drukken. Stel de ISOFIX-bevestigings- arm in op de juiste lengte KLIK Zorg ervoor dat beide ISOFIX-bevesti- De kleur van de indicatoren op beide gingsarmen goed zijn verbonden met ISOFIX-bevestigingsarmen moet vol- de ISOFIX-ankerpunten. -
Page 12: Installatie Van Groep 0+ Met Isofix En Toptetherriem
Installatie van Groep 0+ met ISOFIX en toptether. Groep 0+ Naar achte- ren gericht Geschikt voor kinderen met een gewicht van: 0 - 13 kg (pasgeborene t/m 18 maanden) Druk op de knop voor draaien om het zitje naar achteren gericht te draaien. Naar achteren Toptether Stel de toptether in op de achter-... -
Page 13: Installatie Van Groep I Met Isofix En Autogordel
Groep I naar voren gericht (installatie met ISOFIX en gordel) Groep I Naar voren gericht Geschikt voor kinderen met een gewicht van: 9 - 18 kg Draai het kinderzitje naar voren (9 maanden tot 4 jaar) gericht. Zorg ervoor dat beide ISO- FIX-bevestigingsarmen goed zijn ver- bonden met de ISOFIX-ankerpunten Stand 3, 2... - Page 14 Maak de autogordel vast en voer de schouderriem en buikriem door de geleider aan de onderkant. KLIK Druk met één hand op de kinderstoel en trek de gordel met de andere hand goed vast. Speciale opmerkingen: zorg ervoor dat de kinderstoel goed vastzit vóór gebruik.
-
Page 15: Installatie Van Groep 0+ (Gebruik Autogordel)
Installatie van Groep 0+ met alleen autogordel Groep 0+ Geschikt voor kinderen met een gewicht van: 0 - 13 kg (pasgeborene t/m 18 maanden) Draai de kinderstoel naar achteren gericht. Naar achteren Verstel de stoel naar stand ‘4’. Plaats de kinderstoel naar achteren gericht op de installatiepositie Trek de autogordel volledig uit. -
Page 16: Installatie Van Groep I (Gebruik Autogordel)
Ontgrendel het harnas en til het Voer de autogordel door de stoel binnenkussen op. zoals afgebeeld, plaats het binnen- kussen terug. KLIK Maak de gordel vast Trek de gordel goed vast. Tips: Voordat u de kinderstoel gaat gebruiken, moet u ervoor Controleer of elke gordel goed vastzit zorgen dat deze correct en stevig is door de kinderstoel naar voren en... -
Page 17: Kind Vastmaken Groep 0+/I
Groep I naar voren gericht (installatie met autogordel) Groep I Geschikt voor kinderen met een gewicht van: 9 - 18 kg (9 maanden tm 4 jaar oud) Draai de kinderstoel naar voren gericht Stand 3, 2 of 1 Verstel de stoel en zet deze in stand Verwijder alle binnenkussens als het 3, 2 of 1 kind anderhalf jaar oud is... - Page 18 KLIK Voer de schouderriem van de Maak de autogordel vast en voer autogordel door de gordelgeleidings- de schouderriem en buikriem door haak de geleider aan de onderkant. Druk met één hand op de kinderstoel Controleer of elke gordel goed vastzit en trek de gordel met de andere door de kinderstoel naar voren en hand goed vast.
- Page 19 Groep 0+/I (gebruik 5-puntsharnasgordel om het kind vast te maken) Houd de verstelknop voor het har- Zet het kind in het kinderbeveiligings- nas ingedrukt en trek aan de twee systeem en doe beide armen door de schoudergordels van het kinderbevei- harnasgordels ligingssysteem B elangrijk: De linker- en rechterde-...
- Page 20 KLIK Maak de gesp goed vast Trek de gordel met oprolmechanisme zo strak als nodig is Zorg ervoor dat de ruimte tussen het Druk op de rode knop om de gesp los kind en het schouderharnas onge- te maken veer twee vingers dik is. De getoonde gesp kan afwijken van de gesp die u hebt ontvangen.
-
Page 21: Installatie Van Groep Ii/Iii
Groep II/III (installatie met autogordel) Groep II Stand 1 Groep III Geschikt voor kinderen met een gewicht van: 15 - 36 kg 3 tm 12 jaar oud Draai de kinderstoel naar voren ge- richt, aanpassen naar Groep II/III ISOFIT Trek de autogordel volledig uit (kan De schoudergordel moet door de met ISOFIX worden gecombineerd) schoudergordelgeleider worden ge-... -
Page 22: Isofix-Connector Losmaken
ISOFIX ontgrendelen DRUK Druk met uw knieën tegen de kinder- Druk op de ontgrendelingsknop en stoel. trek terug om de ISOFIX-connector te ontgrendelen. Druk de knop van de toptether- Druk de veer naar beneden, verstelling in, trek de riem uit om de verwijder de trekkoorden van de bovenkant te ontspannen. -
Page 23: Toptether Correct Vastmaken Bij Naar Achteren Gerichte Installatie
Toptether correct vastmaken bij naar achteren gerichte installatie Belangrijk: gebruik de langere riem. (Gebruik de toptether correct, verdraai de riem niet, installeer de vaste haak met de open zijde naar beneden). Verstellen: over de kortere toptether Draai de toptetherhaak van het Voer de toptetherhaak door de korte riem onderste naar het bovenste deel en trek deze aan. -
Page 24: De Hoek Van De Kinderstoel Aanpassen
Ligstand aanpassen Trek de rode hendel omhoog om de stand aan te passen. Naar achteren Deze kinderstoel heeft 3 standen voor naar voren gerichte installatie. Groep I kan stand 1, stand 2 en stand 3 gebruiken. Groep II, III mag alleen stand 1 gebruiken. -
Page 25: 5-Puntsharnassysteem Aanpassen
5-puntsharnasgordel verstellen Pas het harnas aan het kind aan, zorg ervoor dat er niets verdraaid is. Druk op de harnasverstelknop Om los te maken Om vast te maken Trek terwijl u de harnasverstelknop Trek de verstelriem naar beneden en ingedrukt houdt aan de twee pas deze aan de correcte lengte aan, schoudergordels van het kinder- zodat uw kind goed vastzit... -
Page 26: De Hoogte Van De Hoofdsteun Aanpassen
Hoofdsteun aanpassen Trek aan de hoofdsteunverstelling terwijl u de hoofdsteun naar boven of beneden drukt. Schouder BELANGRIJK: Groep II, III: de gordelgeleidingshaak Zorg ervoor dat de hoogte goed is. voor Groep II, III moet hoger zijn dan Groep 0+, I, het schouderharnas de schouder van het kind moet op dezelfde hoogte of iets hoger dan de schouder van het kind... - Page 27 Druk op de harnasverstelknop en Til de bovenste flap naar boven en maak de riemen los trek de onderste flap naar voren Berg de schoudergordels en gesp op Til de bodemafdekking op, verwijder in de toepasselijke opbergvakjes de gespkap, verwijder het slot van de gesp.
-
Page 28: De Kinderstoel Draaien/Aanpassen
Draaien/aanpassen De kinderstoel heeft een roterende basis (360 graden) die in 4 standen kan worden vastgezet WAARSCHUWING Rearward achterwaarts Zet de stoel correct in de gewenste stand voordat u het gaat gebruiken. Forward voorwaarts Naar achteren gericht Naar voren gericht Zijwaarts gericht Geschikt voor Groep 0+ Geschikt voor Groep I/... - Page 29 Houd de knop voor draaien ingedrukt terwijl u de kinderstoel draait. BELANGRIJK De rugleuning kan in 4 standen (0°, 90°, Schud de rugleuning naar links 180°, 360°) worden vergrendeld. Als u en rechts om te bevestigen dat ‘Ka’ hoort, is de rugleuning correct ver- deze vergrendeld is.
-
Page 30: De Bekleding Verwijderen/Aanbrengen
Zachte onderdelen losmaken Druk op de rode knop om de gesp los Druk het rugkussen onder de te maken hoofdsteun naar boven Verwijder de diagonale riemkapjes aan beide zijden. -
Page 31: Maintaining/Washing Of Baby Car Seat
Verwijder het gespkussentje, verberg Verwijder de bekleding van de de gesp in de toepasselijke opening in hoofdsteun. de zitting. Bekleding van de stoel aanbrengen: Herhaal de bovenstaande stappen om de zachte onderdelen aan te brengen. Verwijder de bekleding van de kinderstoel. -
Page 32: De Kinderstoel Onderhouden/Wassen
Onderhoud Onderhoud kinderstoel Berg de kinderstoel op een voor het kind ontoegankelijke plek op nadat u het schuim uit het inzetstuk hebt verwijderd. • Was de zachte onderdelen met koud water (< 30 °C). • De zachte onderdelen niet strijken. •... - Page 33 USER MANUAL Goliath Go Grey Car seat group 0+/1/2/3 Suitable for children: Weight: van 0 - 36 kg Age: van 0 - 12 jaar van Asten BabySuperstore Ringbaan Zuid 5 5021 AA Tilburg Important. For your child’s safety, please read the following instructions carefully before using and keep this manual for future reference.
- Page 34 Content Important notice before using................36 Installation position....................38 Parts list.........................39 Option of installation method................40 How to install ISOFIX.....................42 Group 0+ Installation with ISOFIX and top tether..........43 Group I Installation with ISOFIX and Car belt............44 Installation of Group 0+(Use Car Belt)..............46 Installation of Group I (Use car Belt)..............48 Group 0+/1 To fix child..................50 Installation of Group II/III..................52 Unlock the ISOFIX connector.................53...
- Page 35 NOTICE When using as universal category,please notice below information: 1. This is a “universal “ child restraint, it is approved to Regulation No. 44,04 series of amendments,for general use in vehicles and it will fit most but not all car seats. 2.
-
Page 36: Important Notice Before Using
1. Important notice before using Important notice before using Lees voor gebruik van de autostoel de instructies zorgvuldig door en bewaar deze gebruikershandleiding als naslagwerk. Het niet opvolgen van de instructies kan gevolgen hebben voor de veiligheid van je kind. 1. - Page 37 16. A product without a certification or a modified product is dangerous, and it is also dangerous to not have the installation instructions provided by the manufacturer. Please install the seat according to the installation me- thod given in this manual, to avoid baby car seat stuck in active car seats or car doors during use.
-
Page 38: Installation Position
31. DO NOT use any load bearing contact points other than those described in the instructions and marked in the child restraint. 32. Frequently check the ISOFIX attachments guides for dirt and clean them if necessary. 33. Do not place the child restraint in seating positions where an active frontal air- bag is installed if your child is still in rear facing mode. -
Page 39: Parts List
Parts List Belt guiding hook for group II,III Headrest Head pillow Shoulder pad Buckle Inner cushion Buckle pad Adjuster button Harness adjusting strap Recline adjustment handle Rotating button Tether strap adjuster Toptether Strap for fixing hook Toptether hook Car belt guide way for Group II,III Bracket of ISOFIX connector ISOFIX attachments... -
Page 40: Option Of Installation Method
Installation method (based on your child’s weight) This baby car seat has four mass group based on (GB27887-2011) and (ECE R44/04), Please choose the way to install the mass group corresponding to the children’s immediate weight . New born to 18 months P42, 43 9-18 9 months to 4 years old... - Page 41 Installation way selection of Group 0+,I ISOFIX + top tether 3-point seat belt Group 0+ P43,42 P8, 9 3-point seat belt ISOFIX + 3-point seat belt Group I P44,42 • Group 0+, there are 3 fixed point when use ISOFIX, do not forget any one.
-
Page 42: How To Install Isofix
How to install ISOFIX Fit the ISOFIX attachments Extend the ISOFIX attachments guides with the ISOFIX connectors by depressing on the attachments anchor points. release button. Adjust the right length of the ISOFIX connector. CLICK M ake sure that both ISOFIX The colors of the indicators on attachments connectors are both ISOFIX attachments... -
Page 43: Group 0+ Installation With Isofix And Top Tether
Group 0+ Installation with ISOFIX and top tether. Group 0+ Rearward position Suitable for children weighing: 0 - 13 kg (New born to 18 months) Press the rotating button to rotate the seat to rearward direction. Rearward facing Top tether Adjust top tether to rearward state and suitable length. -
Page 44: Group I Installation With Isofix And Car Belt
Group I forward facing (Installation with ISOFIX and seat belt) Group I Forward position Suitable for children weighing: 9 - 18 kg Rotate the seat to forward (9 months to 4 years old) direction. Make sure that both ISOFIX attachments connectors are securely attached to their ISOFIX attachments anchor pionts tightly. - Page 45 Fasten car seat belt and ensure that the shoulder strap and the belly strap pass through the guide manager at the bottom. CLICK Hold down the child seat by one hand,pull the belt tightly by another hand Special notes:Make sure the child seat is fixed tightly before using. Using ISOFIX together with car belt can enhance the security.
-
Page 46: Installation Of Group 0+(Use Car Belt)
Group 0+ installation with car belt only Group 0+ Suitable for children weighing: 0 - 13 kg (New born to 18 months) Rotate the seat to reaward direction. Rearward position Recline the seat to position ‘4’. Put the child seat on installation position with rearward facing. - Page 47 Unlock the harness and lift up Pass the seat belt through the the inner cushion. seat as shown,put the inner cushion back. KLIK Fasten the belt. Pull the belt tightly. Tips: Before using the safety seat, make sure the safety seat is Please check by moving the firmly installed.
-
Page 48: Installation Of Group I (Use Car Belt)
Group I forward facing (installation with seat belt) Group I Suitable for children weighing: 9 - 18 kg (9 months to 4 years old) Rotate the seat to forward dierection Stand 3, 2 of 1 Recline level adjust to level 3, 2 or 1. Remove all inner pad when child is one and a half years old. - Page 49 CLICK Pass the shoulder strap of the Fasten car seat belt and ensure that car seat belt through the seat the shoulder strap and the belly strap belt guide hook. pass through theguide manager at the bottom. Hold down the child seat by Please check by moving the one hand,pull the belt tightly child seat back and forth to...
-
Page 50: Group 0+/1 To Fix Child
Group 0+/I (Using 5 point harness to fix child) While pressing the harness adjust- Place the child in the child ment button, pull completely the restraint and pass both arms two shoulder harnesses of the child through the harnesses. restaint. Important: The left and right Engage the buckle as pitucres bolts of the 5-point safety... - Page 51 CLICK Make sure the buckle is properly Pull the retractor belt to the engaged. right tightness. Make sure the space between the Press the red button to disengage the child and the shoulder harness is buckle. about the thickness of two fingers. The style of the buckle may vary, depending on the actual receipt.
-
Page 52: Installation Of Group Ii/Iii
Group II Group III (Installation with seat belt) Group II Position 1 Group III Suitable for children weighing: 15 - 36 kg (3 to 12 years old) Draai de kinderstoel naar voren ge- richt, aanpassen naar Groep II/III ISOFIT Pull our the seat belt entirely (can Shoulder belt must pass through install together with ISOFIX) shoulder belt guide. -
Page 53: Unlock The Isofix Connector
Release ISOFIX PUSH Prop up baby car seat with Pressing on release button and pull your knees. back to release the ISOFIX connector. Press the button on top tether Hold down spring, remove the adjustment, pull out the belt to fixing hooks drawstrings. -
Page 54: To Fix Top Tether Correctly At Rearward Installation
To fix top tether correctly at rearward installation Important: use the longer strap. (Use the top tether correctly,a void twisting the belt,install the fixed hook with open side down.) Adjustment: about the shorter top tether Overturn the top tether hock Pass the top tether hock through the from the top tether’s underpart short strap, and tighten up. -
Page 55: Recline Adjustment
Recline adjustment Find the red hand lever, pull it up to adjust the position. Rearward This safety seat have 3 positions for forward installation. Group I could use position 1, position 2 and position 3.Group II, III only could use position 1. The safety seat only provide one position for rearward installation. -
Page 56: To Adjust Five Point Harness System
5 point harness adjustment Adjusting the harness according to the current situation of child,make sure there no any twisting. Pass the harness adjustment button To loosen To tighten While pressing the harness Pull down the adjustment webbing adjustment button, pull and adjust it to the proper length completely the two shoulder to make sure your child is snugly... -
Page 57: To Adjust Height Of Headrest
Head rest adjustment Pull the head support adjustment, meanwhile pull up or push down the head support. Shoulder IMPORTANT: Group II III, The belt guiding Make sure the height is right. hook for group II, group II III Group 0+,I, the shoulder must be higher than child harness height must be even shoulder. - Page 58 Press the harness adjustment Lift the upper flap upward and button and loosen the straps. pull the lower flap forward. Store the shoulder harnesses Lift up cover of bottom,remove and buckle in their storage the buckle cover remove the compartments. lock of buckle.
-
Page 59: Rotating/Switching The Direction Of Baby Car Seat
Rotate/changing direction The car seat is with 360 degree rota- ting base which could be fixed with 4 direction. WARNING Rearward Never use any unblock direction, fixed direction before using. Forward Rearward facing Forward facing Side facing Suitable for group 0+ Suitable for group I, II This position is only III. - Page 60 Squeeze the rotating button while rotating the seat. IMPORTANT Beckrest could be locked at 4 postions Shake backrest left and right (0°,90°,180°,360°) at rotating time, sound to confirm locked. “Ka” shows backrest was locked well.
-
Page 61: Remove/Install The Cover
Detach soft goods Press the red button to disengage Raise the back cushion under the buckle. the headrest. Remove the diagonal belt covers of both sides. - Page 62 Remove the buckle pad, conceal the Remove the headrest cloth cover. buckle in the buckle hole on the seat base. Seat cloth cover mounted: To assemble soft goods ,reverse the steps above. Remove the cloth cover all seats. WARNING Child restraint system (safety seat) without cloth cover cannot be used.
-
Page 63: Post-Accident Treatment
Maitenance Safety seat maintenance: After removing foam of infant insert,please store it somewhere that the child can not access it. • Please wash the soft goods with cold water under 30°C. • Do not iron the soft goods. • Do not bleach or dry clean the soft goods. •... - Page 64 Dit product wordt geïmporteerd door: This product is imported by: van Asten BabySuperstore Ringbaan Zuid 5 Geproduceerd volgens en voldoet aan: ECE R44 5021 AA Tilburg Produced according and complies with ECE R44...
Need help?
Do you have a question about the Goliath Go Grey and is the answer not in the manual?
Questions and answers