
Related Manuals for Banner DXMR90-X1 Series


Summary of Contents for Banner DXMR90-X1 Series
- Page 1 DXMR90-X1 Series Controller Product Manual Original Instructions p/n: 225859 Rev. D 23-Aug-24 © Banner Engineering Corp. All rights reserved.
-
Page 2: Table Of Contents
Configure the DXM Controller for a PROFINET IO Connection ........................30 Save and Upload the Configuration File ............................... 13 Slots and Modules for DXMR90-4K and DXMR110-8K PROFINET ......................31 Slots and Modules for DXMR90-4K and DXMR110-8K PROFINET ......................31 Configuration Instructions.................................... 10 Install the GSD File ....................................34 Change the Device IP Address ................................36 © Banner Engineering Corp. All rights reserved. - Page 3 Firmware Updates ....................................44 Website Information ....................................44 Feature Requests ....................................44 Potential DXM Issues ................................... 44 DXM Security ......................................44 Warnings........................................44 Banner Engineering Corp Limited Warranty ............................45 Contact Us ......................................45 © Banner Engineering Corp. All rights reserved.
-
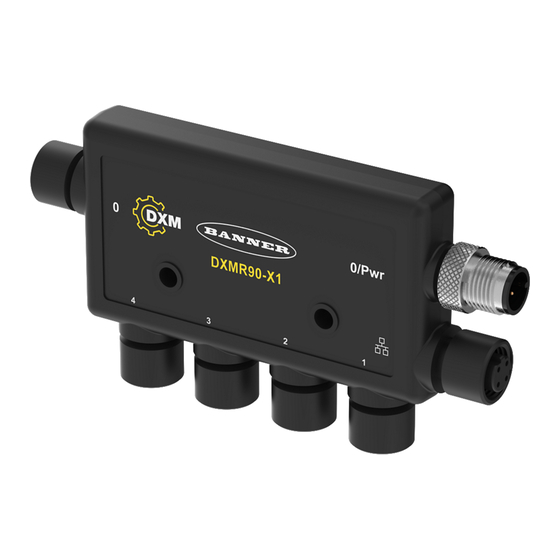
Page 4: Chapter 1 Dxmr90-X1 Overview
Chapter 1 DXMR90-X1 Overview Banner's DXMR90-X1 Series Controller consolidates data from multiple sources to provide local data processing as well as accessibility for host systems as a platform for the Industrial Internet of Things (IIoT). The DXMR90-X1 contains four individual Modbus clients allowing for concurrent communication to up to four independent networks. - Page 5 DXMR90-X1, processes, or equipment Modbus registers for internal local registers (Modbus ID 199) Local Registers Type Description 1–845 32-bit integer Local data registers 846–849 32-bit integer Reset, Constant, Timer 851–900 32-bit non-volatile integer Data flash, non-volatile 901–1000 Reserved for internal use 1001–5000 Floating point Floating point registers, local data registers 5001–7000 32-bit integer Local data registers 7001–8000 32-bit non-volatile integer Data flash, non-volatile > 10000 Read-only virtual registers, system-level data 23-Aug-24 page 5 of 46 © Banner Engineering Corp. All rights reserved.
-
Page 6: Dxmr90-X1 Models
Use the model number to identify which boards are included in the controller. Automation Procotols The DXMR90-X1 Series Controller supports the following automation protocols. EtherNet/IP™ By default, EtherNet/IP is disabled. Configure the DXMR90-X1 Local Registers as EtherNet/IP input or output registers using the DXM Configuration Software. -
Page 7: Modbus Overview
DXMR90-X1 Series Controller Product Manual Modbus Overview The DXMR90-X1 Series Controller uses internal 32-bit registers to store information. The processor's internal Local Registers serve as the main global pool of registers and are used as the common data exchange mechanism. External Modbus device registers can be read into the Local Registers or written from the local data registers. -
Page 8: Dxmr90 Dimensions
63.5 mm 32.3 mm 32.3 mm [2.5”] [1.27”] [1.27”] 50.5 mm [1.99”] 8 mm 40 mm 4.5 mm dia 6x M12 x 1 (Female) [0.32”] M12 x 1 [1.57”] [0.18”] (Male) page 8 of 46 23-Aug-24 © Banner Engineering Corp. All rights reserved. -
Page 9: Chapter 2 Quick Start Guide
Black (bk) RS485 / D0 / A / - D-coded industrial Ethernet connector 4-pin Industrial Ethernet Connector (female) Wire Color Description Black (bk) Red (rd) Green (gn) –Tx White (wh) –Rx 23-Aug-24 page 9 of 46 © Banner Engineering Corp. All rights reserved. -
Page 10: Configuration Instructions
After the configuration file is saved, upload the XML configuration file to the DXMR90-X1 for operation. IMPORTANT: The DXMR90-X1 Series Controller comes preloaded with a default configuration XML file. You can download the default XML on the product page for the DXMR90-X1. - Page 11 Modify a range of registers from the Local Registers › Local Registers in Use › Modify Multiple Registers screen. Select which parameter fields to modify. Most parameters have three selections. • Unchanged—no changes • Default—change to default settings • Set—modify the parameter. Other selections will appear based on the parameter. Modify Multiple Registers screen Enter the Starting register and Ending register. 23-Aug-24 page 11 of 46 © Banner Engineering Corp. All rights reserved.
- Page 12 12345 to the DXM local registers. Notice the list of local register names this read rule is using. Read Rules - Configuration Example Defined for both the Modbus client and server Baud Rate page 12 of 46 23-Aug-24 © Banner Engineering Corp. All rights reserved.
-
Page 13: Save And Upload The Configuration File
Save the XML configuration file to your hard drive by going to the File › Save As menu. Go to the DXM › Send XML Configuration to DXM menu. Status indicator bar 23-Aug-24 page 13 of 46 © Banner Engineering Corp. All rights reserved. -
Page 14: Mechanical Installation
See the figure below to help in determining the minimum screw length. 16.0 mm 3 mm * for minimum engagement of Screw Length = 16.0 mm + “X” mm + 3 mm three threads CAUTION: Do not overtighten the DXMR90-X1's mounting screw during installation. Overtightening can affect the performance of the DXMR90-X1. page 14 of 46 23-Aug-24 © Banner Engineering Corp. All rights reserved. -
Page 15: Chapter 3 Controller Connections
Reserved for internal use 1001–5000 Floating point Floating point registers, local data registers 5001–7000 32-bit integer Local data registers 7001–8000 32-bit non-volatile integer Data flash, non-volatile > 10000 Read-only virtual registers, system-level data 23-Aug-24 page 15 of 46 © Banner Engineering Corp. All rights reserved. - Page 16 Number of read maps in default 10101 Number of read map successes 10102 Number of read map timeouts Read Map statistics 10103 Number of read map errors 10104 Read map success streak Continued on page 17 page 16 of 46 23-Aug-24 © Banner Engineering Corp. All rights reserved.
- Page 17 Socket x Rule 0 broadcasts 2x029 Reserved 2x031 Socket x Rule 1 transmits 2x033 Socket x Rule 1 receives 2x035 Socket x Rule 1 timeouts 2x037 Socket x Rule 1 broadcasts 2x039 Reserved Reset Codes—The reset codes are in virtual register 11015 and define the condition of the last restart operation. 23-Aug-24 page 17 of 46 © Banner Engineering Corp. All rights reserved.
-
Page 18: Connecting To Remote Modbus Devices
The Modbus RTU server connection, port 0, is controlled by another Modbus client device that is not the DXMR90-X1. The server port is used by an external Modbus client device that will access the DXMR90-X1 as a Modbus server Device. Use the DXM Configuration Software to define the operational settings for both the Modbus RTU client ports 1–4 and the Modbus RTU server port 0. page 18 of 46 23-Aug-24 © Banner Engineering Corp. All rights reserved. -
Page 19: Set The Client And Server Port Parameters
Modify the Baud Rate, Parity, and change the Internal Server ID. The Internal Server ID is the Modbus ID that an external Modbus Client will access to read/write to the local registers on the DXMR90-X1. Server Port 0 Settings 23-Aug-24 page 19 of 46 © Banner Engineering Corp. All rights reserved. -
Page 20: Chapter 4 Working With Modbus Devices
DXMR90-X1. DXM Client Configuration—When the DXM operates as a Modbus client, use the configuration software to configure read or write operations of the DXM Modbus network. The DXM communicates with all internal and external peripheral devices using the external Modbus bus RS-485 port(s). 23-Aug-24 page 20 of 46 © Banner Engineering Corp. All rights reserved. -
Page 21: Modbus Operation
The DXMR90-X1 can operate as a Modbus TCP client on Ethernet. Users may define up to five socket connections for Modbus TCP server devices to read Modbus register data over Ethernet. Use the DXM Configuration Software to define and configure Modbus TCP client communications with other Modbus TCP servers. 23-Aug-24 page 21 of 46 © Banner Engineering Corp. All rights reserved. -
Page 22: Configuration Instructions
Register updates can be changed up to two times per day for each rule. Each rule can be set for any number of days in the week by clicking the buttons M, T, W, Th, F, S, or Su. 23-Aug-24 page 22 of 46 © Banner Engineering Corp. All rights reserved. -
Page 23: Create A One-Time Event
The DXMR90-X1 has three areas that can be configured to require login and password authentication. • Webserver/ Cloud Services Authentication • Mail Server Authentication • DXM Configuration Authentication The webserver and mail server authentication depends upon the service provider. 23-Aug-24 page 23 of 46 © Banner Engineering Corp. All rights reserved. -
Page 24: Set The Controller To Use Authentication
At the bottom of the pop-up window is a checkbox to enable authentication/validation. Enter the same username and password as used in the DXM Configuration Software. The username and password do not need to be a defined user within the Banner Cloud Data Services website. page 24 of 46 23-Aug-24 ©... -
Page 25: Controller Configuration Authentication
When a configuration is running on the DXMR90-X1, viewing the Local Registers can help you to understand the application's operation. This utility can also access data from remote devices and LED registers. 23-Aug-24 page 25 of 46 © Banner Engineering Corp. All rights reserved. -
Page 26: Saving And Loading Configuration Files
The DXMR90-X1 can be configured to send/receive local register data to and from an EtherNet/IP™ host. EDS (Electronic Data Sheet) files allow users of the EtherNet/IP protocol to easily add a Banner DXM device to the PLC. Download the EDS files from the Banner website. -
Page 27: Set Up The Email
After entering the user name and password, click on Send SMTP Password to save the username and password to the DXMR90-X1. The DXMR90-X1 must be connected to the PC to complete this operation. If successful, a pop-up window appears, asking to reboot the device. Select Yes to reboot the device. 23-Aug-24 page 27 of 46 © Banner Engineering Corp. All rights reserved. -
Page 28: Define The Network Interface Settings
Configuration Instructions Define the Network Interface Settings On the Cloud Services screen, define the network connection settings by selecting HTTP Cloud Push to send data to Banner CDS or AWS IoT Core Push to send data to AWS IoT Core. -
Page 29: Set The Email Parameters
Any past data that the DXMR90 was unable to push is lost and cannot be recovered. Using SSL on Ethernet will have no retries. Event/Action—Event-based pushes caused by Action rules sent using email follow the same process when failures occur, based on the network connection. Email—There are no retries for emails that fail to be sent from the DXMR90-X1. 23-Aug-24 page 29 of 46 © Banner Engineering Corp. All rights reserved. -
Page 30: Chapter 6 Profinet
Save the XML configuration file to your hard drive by going to the File › Save As menu. Go to the DXM › Send XML Configuration to DXM menu. 23-Aug-24 page 30 of 46 © Banner Engineering Corp. All rights reserved. -
Page 31: Slots And Modules For Dxmr90-4K And Dxmr110-8K Profinet
0x01 IO-Link In/Out 16/16 Byte + Status Bidirectional x051 x059 x851 x859 x001 x005 x506 x507 0x47 0x01 IO-Link In/Out 8/8 Byte + Status Bidirectional x051 x055 Continued on page 32 23-Aug-24 page 31 of 46 © Banner Engineering Corp. All rights reserved. - Page 32 1 and 2 bytes Slot 5 Digital Output Use SIO Output mode on Port 4 Slot 10 ISDU 190 Byte + Status ISDU read/write access for all ports in IO-Link mode page 32 of 46 23-Aug-24 © Banner Engineering Corp. All rights reserved.
- Page 33 Allowed in slots 4-6, Module Identifier= 0x36 Input Float 64 Allowed in slots 4-6, Module Identifier= 0x37 Slots 7 through 9 Module Notes Output Integer 512 Allowed in slots 7-9, Module Identifier= 0x40 Continued on page 34 23-Aug-24 page 33 of 46 © Banner Engineering Corp. All rights reserved.
-
Page 34: Install The Gsd File
Launch the Siemens TIA Portal (v14) software. Click Open existing project. Select a project and open it. After the project is uploaded, click Devices & networks. Devices and networks screen Click Configure networks. page 34 of 46 23-Aug-24 © Banner Engineering Corp. All rights reserved. - Page 35 The system installs the DXM GSD file and places it in the Hardware catalog. In the example, the DXM GSD file is located under Other field devices › PROFINET IO › Banner Engineering Corp. › Banner. If the DXM GSD file does not install properly, save the log and contact Banner Engineering Corp. 23-Aug-24 page 35 of 46...
-
Page 36: Change The Device Ip Address
Click Properties. Click General. Select PROFINET Interface › Ethernet addresses. Ethernet addresses Select Set IP address in the project. Enter the IP address. Right-click on the device icon and select Online & diagnostics. page 36 of 46 23-Aug-24 © Banner Engineering Corp. All rights reserved. -
Page 37: Change The Device Name
Follow these instructions to change the name of the DXM using the Siemens TIA Portal (v14) software. Use these instructions as a basis if you are using another controller (PLC). Open a project and click on Devices & networks. 23-Aug-24 page 37 of 46 © Banner Engineering Corp. All rights reserved. - Page 38 The Assign PROFINET device name window displays. The software searches for devices of the same type. Enter the desired name in the PROFINET device name field. Note that each name can be used only once. Click Assign name. The device now has a PROFINET name. page 38 of 46 23-Aug-24 © Banner Engineering Corp. All rights reserved.
-
Page 39: Chapter 7 Dxmr90-X1 Accessories
MQDEC-415SS 4.58 m (15 ft) 44 Typ. [1.73"] Male MQDEC-420SS 6.10 m (20 ft) MQDEC-430SS 9.14 m (30.2 ft) M12 x 1 ø 14.5 [0.57"] MQDEC-450SS 15.2 m (49.9 ft) Continued on page 40 1 = Brown 2 = White 3 = Blue 4 = Black 23-Aug-24 page 39 of 46 © Banner Engineering Corp. All rights reserved. - Page 40 MQDC1-5100 31 m (101.7 ft) 1 = Brown MQDC1-506RA 2 m (6.5 ft) 2 = White 32 Typ. 3 = Blue MQDC1-515RA 5 m (16.4 ft) [1.26"] 4 = Black 5 = Gray MQDC1-530RA 9 m (29.5 ft) 30 Typ. Right-Angle [1.18"] MQDC1-560RA 19 m (62.3 ft) M12 x 1 ø 14.5 [0.57"] page 40 of 46 23-Aug-24 © Banner Engineering Corp. All rights reserved.
- Page 41 3 = White/Blue 6 = Blue 47.4 Typ. Straight STP-M12D-430 9.14 m (30 ft) M12 x 1.0 ø 14.5 1 = White/Orange 2 = White/Blue 3 = Orange 4 = Blue 23-Aug-24 page 41 of 46 © Banner Engineering Corp. All rights reserved.
-
Page 42: Chapter 8 Product Support And Maintenance
Overcurrent protection is required to be provided by end product application per the supplied table. Overcurrent protection may be provided with external fusing or via Current Limiting, Class 2 Power Supply. Supply wiring leads < 24 AWG shall not be spliced. 23-Aug-24 page 42 of 46 © Banner Engineering Corp. All rights reserved. -
Page 43: Fcc Part 15 Class A For Intentional Radiators
DO NOT disconnect the power during the 6 to 7 minutes after the device cycles the power. To verify the firmware has been updated, go to Tools › Reprogram › Get Device Information and verify the new versions are listed. 23-Aug-24 page 43 of 46 © Banner Engineering Corp. All rights reserved. -
Page 44: Dxm Support Policy
DXM. Firmware updates and description details are found on the Banner website. Customers with critical update requirements will get access to pre- released firmware from the factory. -
Page 45: Banner Engineering Corp Limited Warranty
Engineering Corp. will repair or replace, free of charge, any product of its manufacture which, at the time it is returned to the factory, is found to have been defective during the warranty period. This warranty does not cover damage or liability for misuse, abuse, or the improper application or installation of the Banner product. - Page 46 LinkedIn X (formerly Twitter) Facebook © 2024. All rights reserved. www.bannerengineering.com...
Need help?
Do you have a question about the DXMR90-X1 Series and is the answer not in the manual?
Questions and answers