
Related Manuals for Banner DXM100


Summary of Contents for Banner DXM100
- Page 1 DXM100 Controller Instruction Manual Instruction Manual Original Instructions 190037 Rev. A 22 January 2016 190037...
- Page 2 3 DXM Connections ......................13 3.1 I/O Base Board Connections ....................13 3.2 Applying Power to the DXM100 Controller ................... 14 3.2.1 Supplying Power from 12 to 30 V dc and a Battery Backup ..........14 3.2.2 Supplying Power from a Solar Panel .................
-
Page 3: Dxm Overview
DXM100 Controller Instruction Manual 1 DXM Overview 1.1 DXM System Overview Banner's DXM Logic Controller integrates Banner's wireless radio, cellular connectivity, and local I/O to provide a platform for the Industrial Internet of Things (IIoT). Automation Internet Connectivity Protocols Messaging... -
Page 4: Dxm Modbus Overview
Controller is the Modbus Master when operating the Modbus master RTU port. The DXM Controller uses the master Modbus RTU bus to communicate with locally connected Modbus devices or uses the Banner wireless radio to communicate with remote Modbus devices. The other Modbus RTU port is used by a host system to access the DXM Controller as a slave device. -
Page 5: Dxm Configuration Tool Overview
DXM100 Controller Instruction Manual 1.4 DXM Configuration Tool Overview The main storage elements for the DXM Controller are its Local Registers, which can store up to 4-byte values that result from register mapping, action rules, or ScriptBasic commands. DXM Configuration Software... -
Page 6: Dxm Hardware Configuration
2.1 DXM Hardware Configuration Overview The DXM100 Controller can have multiple configurations. The DXM100 Controller will have a model number label on the housing. Use the model number and model table above to identify which boards are included in the controller. - Page 7 The ISM radio board may be a MultiHop radio (DX80DR*M-HE5) or a Performance Gateway radio (DX80G*M2S-PE5). Refer to the model number label on the DXM100 Controller and the model number table to identify the ISM radio type. The ISM radio should be plugged into the I/O base board with the U.FL antenna connector closest to the SMA...
-
Page 8: Sam4 Processor Board
DXM100 Controller Instruction Manual Switches Device Settings MultiHop radio setting: Repeater OFF* OFF* MultiHop radio setting: Master MultiHop radio setting: Slave MultiHop radio setting: Reserved 2.2 Performance Gateway (PE5) DIP Switch Settings Switches Device Settings Transmit Power Level: 1 Watt (30 dBm) - Page 9 DXM100 Controller Instruction Manual Clear Password. By default, the DXM Controller does not require a password to load a configuration file. If a password is defined, the DXM Controller requires that you enter the password before uploading a configuration file. To change the password, you must already know the current password.
-
Page 10: I/O Base Board
2.4.1 DIP Switches for the I/O Board The DXM100 Controller I/O board DIP switches are set from the factory to Modbus Slave ID 200 and should not need to be changed. For more advanced information about the DIP switches, refer to... -
Page 11: Setting The Modbus Slave Id On The I/O Base Board
On the DXM100 Controller models, use the DIP switches at location K to define the lower digit of the Modbus Slave ID. 2.4.3 DXM100 Controller Models DIP Switch location J defines the course group of Modbus Slave IDs. DIP Switch 4 must be set to ON for DXM100-S1 and DXM100-S1R2 models. -
Page 12: Cellular Modem Board
DXM100 Controller Instruction Manual 2.5 Cellular Modem Board The optional cellular modem is installed on the SAM4 processor board on the two 12-pin sockets. The U.FL connector should be to the left, with the antenna cable going to the left antenna U.FL connector. -
Page 13: Dxm Connections
DXM100 Controller Instruction Manual 3 DXM Connections 3.1 I/O Base Board Connections TVS1 A OUT 2 A OUT 1 R118 R121 R122 IC18 No connection CT. RS-232 CTS N3. NMOS OUT 3 PW. 12 to 30 V dc or solar power in S-. -
Page 14: Applying Power To The Dxm100 Controller
DXM100 Controller Instruction Manual 3.2 Applying Power to the DXM100 Controller Apply power to the DXM100 Controller using either 12 to 30 V dc or a 12 V dc solar panel and 12 V sealed lead acid battery operating together. -
Page 15: Supplying Power From A Solar Panel
3.2.2 Supplying Power from a Solar Panel To power the DXM100 Controller from a 12 V dc solar panel, connect the solar panel to power pins 2(+) and 3(-). Connect a 12 V dc sealed lead acid (SLA) rechargeable battery to pins 4(+) and 5(-). -
Page 16: Ethernet
3.3 Modbus RTU Master/Modbus RTU Slave The DXM100 Controller can be a Modbus RTU master device to other slave devices and can be a Modbus slave device to another Modbus RTU master. The DXM100 Controller uses the primary RS-485 port (pins 6 and 7) as a Modbus RTU master to control external slave devices. -
Page 17: Modbus Slave Port Id
DXM Slave ID is listed under the System menu. 3.6 USB The USB port is used with the DXM Configuration Tool to program the DXM100 Controller. The USB port is also used as the console output for the processor and ScriptBasic. -
Page 18: Working With Modbus Devices
DXM100 Controller Instruction Manual 4 Working with Modbus Devices 4.1 Overview The DXM Controller has two physical RS-485 connections using Modbus RTU protocol. The master Modbus RS-485 port is for the DXM Controller to act as a Modbus master device to control internal and external Modbus slave devices. -
Page 19: Modbus Operation
DXM100 Controller Instruction Manual 4.2 DXM Master Configuration The DXM Controller operates as a Modbus master device, use the DXM Configuration Tool to configure read or write operations of the DXM Modbus network. The DXM Controller communicates with all internal and external peripheral devices using the external Modbus bus RS-485 (M+, M-) There are four internal Modbus slave devices that are configured from the factory with slave IDs. -
Page 20: Modbus Timeouts
DXM100 Controller Instruction Manual 4.5 Modbus Timeouts A Modbus timeout is the amount of time a Modbus slave is given to return an acknowledgement of a message sent by the Modbus master. If the Modbus master waits for the timeout period and no response is seen, the Modbus master considers it a lost message and continues on to the next operation. - Page 21 DXM100 Controller Instruction Manual • Master to Slave Send time = (9 × 0.04 sec) + (8 retry wait × 0.04 sec) = 1 second • Slave to Master Send time = (9 ×* 0.04 sec) + (8 retry wait × 0.04 sec) = 1 second •...
-
Page 22: Configuration Instructions
DXM100 Controller Instruction Manual 5 Configuration Instructions 5.1 Working with Solar Power A reliable solar system requires careful planning and monitoring to size the components correctly. The recommendations provided are for the DXM Controller system as an autonomous system. Adding extra components increases the power requirements and likely requires increasing the solar system components. - Page 23 Solar Panels Banner solar panels come in two common sizes for the DXM Controller: 5 Watt and 20 Watt. Both panels are designed to work with the DXM Controller but provide different charging characteristics. Use the 5 watt panel for light duty operation and use the 20 watt panel when you require greater charging capabilities.
-
Page 24: Inputs And Outputs
I/O board and the processor board are fixed. External Modbus communication runs at a maximum rate of 50 ms per transaction. The parameter settings for the external RS-485 buses are controlled by the DXM Configuration Tool. Refer to the Modbus Registers section for more descriptions of each Modbus register on the DXM100 Controller. 5.2.1 Universal Inputs The universal inputs on the DXM100 Controller can be programmed to accept several different types of inputs: •... - Page 25 The universal inputs are treated as analog inputs. When the universal inputs are defined as mA, V, or temperature, use Modbus registers to configure the operational characteristics of the inputs. These parameters are temperature conversion type, enable full scale, threshold and hysteresis. Refer to the DXM100 Controller Instruction Manual (p/n 190037) for the parameter definitions.
-
Page 26: Nmos Outputs
DXM100 Controller Instruction Manual 5. Cycle power to the device. 6. Using the Register View tab, read register 3326 to verify it is set to 3. Example: Change Analog Output 1 to a 0 to 10 V dc Output 1. Launch the DXM Configuration Tool tool. - Page 27 DXM100 Controller Instruction Manual 5.3 Weekly Schedules Define weekly events using the weekly events screen. To create a new rule: 1. Click on the Add New Rule link. 2. Click on the arrow to the left of the new rule to expand the parameters into view.
-
Page 28: Lcd And Menu System
DXM100 Controller Instruction Manual 5. Enter the starting time, date, and starting value for the local register. 6. Enter the ending time, date, and ending value for the local register. 5.3 Create Holiday Schedules Use the Create Holidays tab to create exception conditions that alter the standard scheduled register changes. -
Page 29: Authentication Setup
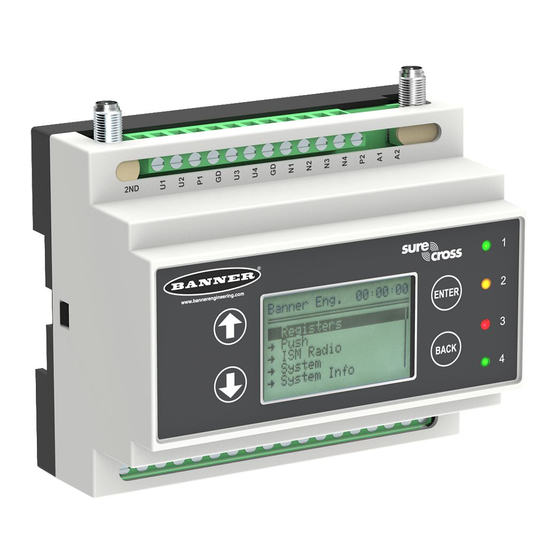
DXM100 Controller Instruction Manual Main Menu Sub Menu Description ISM Radio The ISM Radio menu allows the user to set the Modbus Slave ID of the ISM Radio 08:25:45 internal ISM radio, invoke binding, or run a site survey. The controller ↑... - Page 30 DXM100 Controller Instruction Manual Set up the webserver with a username and password to accept the DXM Controller messages. Otherwise, the webserver ignores all messages. When using the Sensonix website's dashboard, set the authentication by clicking the edit button next to the appropriate site name. Enter the Username and Password, then click Save to save your changes.
-
Page 31: Register Flow And Configuration
DXM100 Controller Instruction Manual To change or remove an admin password, the current password must be supplied. The DXM Controller must be connected to the PC to change the administration password. The DXM Controller can be unlocked without knowing the administration password, but doing this erases the configuration program, logging files, and any ScriptBasic program on the device. -
Page 32: Dxm Cellular Modem
DXM100 Controller Instruction Manual 5.6 Troubleshooting a Configuration The built-in Register View utility is found in the DXM Configuration Tool under the Register View tab. When a configuration is running on the DXM Controller, this utility can read or write Local Registers to help understand application operation. -
Page 33: Binding And Conducting A Site Survey With The Ism Radio
4. It is very important to make sure the carrier knows that the data plan is being attached to the device known as SENSX001. 5. Remove the DXM100 housing cover to see the cellular modem. Use the MEID printed on the Telit CE910-DUAL cellular modem to uniquely identify the device. The carrier requires this number to attach a monthly data plan. -
Page 34: Setting Up Ethernet/Ip
The Originator is the host PLC system, and the Target is the DXM Controller. The host system sees the DXM Controller as a generic device with the product name of Banner DXM (ProdType: 43 - Generic Device, ProdName: Banner DXM). -
Page 35: Setting Up Email And Text Messaging
DXM100 Controller Instruction Manual The screen shot below shows the DXM Configuration Tool defining register 1 as an Originator -> Target register. The EIP PLC will write data into register 1. To send local registers to the EIP controller, define the registers as Target -> Originator. - Page 36 DXM100 Controller Instruction Manual Cellular-connected systems can use email or SMS. Ethernet-connected systems may only use email, but can send email to cellular phones as a SMS message depending upon the network carrier. To send email to a Verizon phone, use the phone number followed by , for example, 1234567890@vtext.com.
- Page 37 DXM100 Controller Instruction Manual 5.10 Configuring your Cellular Connection A cellular connection does not require any configuration other than being selected as the network connection under the Cloud Services screen. 5.10 Setting the Email and Messaging Parameters From the Settings > Mail and Messaging screen, enter the SMPT definition, login, and password for a mail server. You must supply the SMTP Server, Server Port, and login credentials to send email.
-
Page 38: Ethernet And Cellular Push Retries
DXM100 Controller Instruction Manual Select the registers to log on the Local Registers > Register Configuration screen. Define the setup of the log file using the Settings > Logging screen. Typical settings are shown. 1. Enable the log and timestamp with every entry. -
Page 39: Accessing The Dxm Using Sms
DXM100 Controller Instruction Manual antenna is reconnected. If the signal quality was good, but the cellular network was not responding, the DXM Controller archives the register data packets after 10 failed attempts. 5.11 Event/Action Rule or Log Files Event-based pushes caused by Action rules and locally stored log files sent using email follow the same process when failures occur, based on the network connection. -
Page 40: Using The Display Leds
DXM100 Controller Instruction Manual 5.12 Set Register srN,X sets a register value, where N is the register number and X is the value. The DXM Controller responds with a SMS message indicating the register was set. Example: Texting sets register 1 to value of 10 sr1,10 <send>... - Page 41 DXM100 Controller Instruction Manual 3. Create a Read Rule to read the four universal inputs from the I/O board (Modbus slave 200) and write the values in local registers 1 through 4. 4. Create a Write Rule to write the four local register values to the DXM display registers 1102 through 1105 (Modbus Slave 201).
-
Page 42: File System And Archive Process
DXM100 Controller Instruction Manual 6 File System and Archive Process The DXM file system consists of two physical components: the serial EEPROM that stores non-volatile configuration information and a removable micro SD card that stores file backup data and user created files. -
Page 43: Dxm Modbus Registers
DXM100 Controller Instruction Manual 7 DXM Modbus Registers The DXM100 Controller may have up to four internal Modbus slave devices: DXM Internal Modbus Slave IDs (factory default) Modbus Slave ID Device Gateway (PE5) or MultiHop (HE5) ISM Radio—MultiHop wireless devices connected to the internal MultiHop radio should be assigned Modbus Slave addresses starting at 11. -
Page 44: Multihop 1 Watt Radio
DXM100 Controller Instruction Manual DX80 Device Slave ID Modbus Registers DXM Gateway radio Modbus registers 1–8 are inputs, 9–16 are outputs Node 1 Modbus registers 17–25 are inputs, 26–32 are outputs Node 2 Modbus registers 33–40 are inputs, 41–48 are outputs Node 3 Modbus registers 49–56 are inputs, 57–64 are outputs... - Page 45 DXM100 Controller Instruction Manual Registers 1001 [31:16], 1002 [15:0] store the first floating point value; registers 1003, 1004 store the second floating point number. There are a total of 250 floating point values; they are addressed as two 16-bit pieces to accommodate the Modbus protocol.
- Page 46 DXM100 Controller Instruction Manual Registers Definition 10109 Number of passthrough successes API message passing statistics 10110 Number of passthrough timeouts 10111 Number of passthrough errors 10112 Passthrough success streak 10113 Number of 43 buffer successes DX80 Gateway automatic messaging buffer statistics...
-
Page 47: I/O Base Board (Modbus Slave 200)
DXM100 Controller Instruction Manual 7.4 I/O Base Board (Modbus Slave 200) Base Board Input Connection Base Board Output Connection Modbus Register Description Modbus Register Description Universal input 1 NMOS Output 1 Universal input 2 NMOS Output 2 Universal input 3... - Page 48 DXM100 Controller Instruction Manual In the example shown graphically, the input is considered on at 15 mA. ON point To consider the input off at 13 mA, set the hysteresis to 2 mA. The input will be considered off when the value is 2 mA less than the threshold.
- Page 49 DXM100 Controller Instruction Manual 7.4 Power Modbus Registers Modbus Register Description 6071 Battery backup charging algorithm. 0 = Battery is recharged from a solar panel 1 = Battery is recharged from 12 to 30 V dc . (default) 6081 Battery voltage (mV)
-
Page 50: Restoring Factory Default Settings
DXM100 Controller Instruction Manual 8 Restoring Factory Default Settings To reset to factory defaults, write to two Modbus registers in the I/O board. The default slave ID for the I/O board is 200. To reset the DXM I/O board parameters: 1. -
Page 51: Contact Us
Email: salesindia@bannerengineering.com Pune 411016, India Mexico Address: Phone: +52 81 8363 2714 or 01 800 BANNERE (toll free) Banner Engineering de Mexico Monterrey Head Office Website: www.bannerengineering.com.mx Edificio VAO Av. David Alfaro Siqueiros No.103 Col. Valle Oriente C.P.66269 Email: mexico@bannerengineering.com... -
Page 52: Warnings
Banner Engineering could void the user’s authority to operate the product. All specifications published in this document are subject to change; Banner reserves the right to modify product specifications or update documentation at any time. For the most recent version of any ©...
Need help?
Do you have a question about the DXM100 and is the answer not in the manual?
Questions and answers