Banner Sure Cross DXM700-B Series Instruction Manual
Wireless controller
Hide thumbs
Also See for Sure Cross DXM700-B Series:
- Instruction manual (73 pages) ,
- Instruction manual (69 pages)

Related Manuals for Banner Sure Cross DXM700-B Series


Summary of Contents for Banner Sure Cross DXM700-B Series
- Page 1 ® Sure Cross DXM700-Bx Wireless Controller Instruction Manual Original Instructions 207894 Rev. B 6 December 2018 © Banner Engineering Corp. All rights reserved 207894...
-
Page 2: Table Of Contents
® Sure Cross DXM700-Bx Wireless Controller Contents 1 DXM700-Bx System Overview ............................4 1.1 DXM Hardware Configuration Overview ............................5 1.2 DXM Automation Protocols ................................6 1.3 DXM Modbus Overview ................................... 7 1.3.1 DXM Modbus Registers ................................8 1.4 DXM Configuration Tool Overview ..............................9 1.5 Dimensions .................................... - Page 3 10.4.1 Firmware Updates ................................60 10.4.2 Website Information ................................60 10.4.3 Feature Requests ................................60 10.4.4 Potential DXM Issues ................................60 10.4.5 DXM Security ..................................60 10.5 Contact Us ....................................60 10.6 Warnings ...................................... 61 10.7 Banner Engineering Corp. Limited Warranty ..........................61...
-
Page 4: Dxm700-Bx System Overview
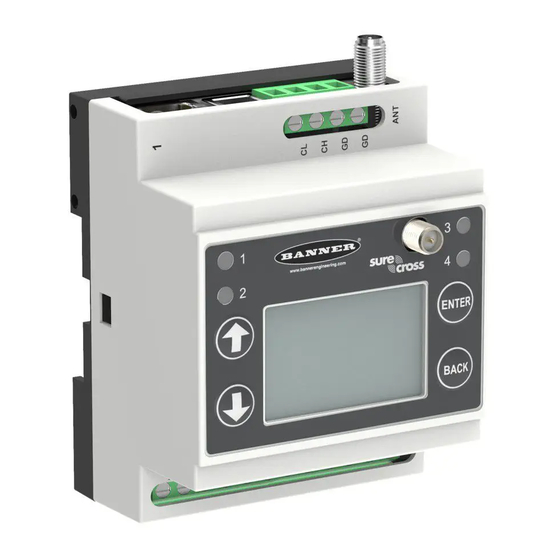
® Sure Cross DXM700-Bx Wireless Controller 1 DXM700-Bx System Overview Banner's DXM Logic Controller integrates Banner's wireless radio, cellular connectivity, and local I/O to provide a platform for the Industrial Internet of Things (IIoT). Logic Controller User Interface Connectivity Discrete Outputs... -
Page 5: Dxm Hardware Configuration Overview
® Sure Cross DXM700-Bx Wireless Controller Register Mapping Scheduler • Cyclical Read rules from wireless devices or local • Time/calendar-based events wired Modbus devices that include optional scaling, • Holiday skips error conditions, and the ability to activate a read •... -
Page 6: Dxm Automation Protocols
® Sure Cross DXM700-Bx Wireless Controller ISM radio antenna connection Cellular radio antenna connection Housing catch Cellular modem board Processor/base board Figure 2. DXM700 base board The DXM700 base board provides connections for all communications connections, outputs and power/ground. The optional cellular modem is installed in the bottom base board. -
Page 7: Dxm Modbus Overview
The DXM700 manages two separate physical ports running the Modbus RTU protocol. The DXM700 is the Modbus Master when operating the Modbus master RTU port. The DXM700 uses the master Modbus RTU bus to communicate with locally connected Modbus devices or uses the Banner wireless radio to communicate with remote Modbus devices. -
Page 8: Dxm Modbus Registers
® Sure Cross DXM700-Bx Wireless Controller Processor/Outputs (Base Board) Local Registers ISM Radio (Modbus ID 1) (Modbus ID 199) Local Regi sters Ethernet Gateway or MultiHop Integer RS232/CAN User Display (Modbus ID 201) Local Registers RS-485 (master) Float LED / LCD Display Local Registers RS-485 (slave) Non-Volatile... -
Page 9: Dxm Configuration Tool Overview
® Sure Cross DXM700-Bx Wireless Controller Modbus Registers for the LCD Board (Modbus Slave ID 201) Modbus Register Color State 1102 : bit 0 LED 1 1103 : bit 0 LED 2 Amber 1104 : bit 0 LED 3 1105: bit 0 LED 4 Amber 1 = On... -
Page 10: Dimensions
® Sure Cross DXM700-Bx Wireless Controller 1.5 Dimensions ISM radio 60 mm antenna connection [2.36”] 58.1 mm [2.29”] 52.8 mm [2.08”] 28.8 mm 35.5 mm Cellular radio [1.13”] [1.4”] antenna connection 70 mm [2.76”] 86 mm [3.39”] 94.5 mm [3.72”] All measurements are listed in millimeters [inches], unless noted otherwise. -
Page 11: Quick Start Guide
® Sure Cross DXM700-Bx Wireless Controller 2 Quick Start Guide 2.1 Device Setup 2.1.1 Apply 12–30 V DC to the Controller Follow these instructions to apply 12–30 V dc power to the controller using a wall plug. Equipment used: • DXM700-Bx Wireless Controller MQDMC-501 0.3 m (1 ft) cordset with a 5-pin M12/Euro-style quick disconnect fitting PS24W Wall plug power supply;... -
Page 12: Set The Ip Address
® Sure Cross DXM700-Bx Wireless Controller 6. Click BACK on the DXM to exit binding for that specific Node address. 7. Repeat steps 2 through 5, for as many DX80 Nodes as are needed for your network. 8. When you are finished binding, click BACK on the DXM until you return to the main menu. Bind a MultiHop Radio to a DXM and Assign the Device ID Before beginning the binding procedure, apply power to all the devices. -
Page 13: Configuration Instructions
® Sure Cross DXM700-Bx Wireless Controller 3. Use the arrow keys to select IP. Press Enter. The octet of the IP address displays. 4. Use the up and down arrows to change the IP address. Press Enter to move to the next octet. 5. - Page 14 ® Sure Cross DXM700-Bx Wireless Controller This example screen uses the Modify Multiple Registers feature. Figure 7. Modify Multiple Registers - Configuration Example 1. Click on the Modify Multiple Registers tab. Use this screen to quickly modify multiple local registers at a time. 2.
- Page 15 ® Sure Cross DXM700-Bx Wireless Controller 2.2.2 Step 3: Define the Time Zone and Set the Time Clock Figure 9. Settings > General > Device Time Use the Settings > General screen to define the time zone and daylight saving option. The time zone and DST options are saved into the configuration file.
- Page 16 ® Sure Cross DXM700-Bx Wireless Controller 2.2.2 Tips and Tricks - Register View Screen Figure 11. Register View The Register View screen displays the results of a Modbus read/write utility built into the DXM Configuration Tool. Use this screen to read or write internal local registers or the registers of remote slave devices connected to the DXM700. Use this utility to debug DXM configurations and remote device problems.
-
Page 17: Ism Radio Board (Modbus Slave Id 1)
® Sure Cross DXM700-Bx Wireless Controller 3 ISM Radio Board (Modbus Slave ID 1) The ISM embedded radio boards are available in either DX80 MultiHop or DX80 Performance. The DX80 MultiHop architecture creates a tree network with a Master radio and one or more Repeater/Slave devices. The MultiHop architecture is suited for networks requiring repeater devices to provide extended range or obstacle avoidance. -
Page 18: Application Mode
® Sure Cross DXM700-Bx Wireless Controller Important: Disabling the serial port disables the ISM radio in the DXM700. Selecting Transparent mode causes radio communications to be slower and denies access to device I/O register data. D1 Switches D2 Switches Device Settings Serial line baud rate 19200 OR User defined receiver OFF* OFF*... -
Page 19: Disable Serial
® Sure Cross DXM700-Bx Wireless Controller 3.1.3 Disable Serial If the local serial connection is not needed, disable it to reduce the power consumption of a data radio powered from the solar assembly or from batteries. All radio communications remain operational. 3.1.4 Transmit Power Levels/Frame Size The 900 MHz data radios can be operated at 1 watt (30 dBm) or 0.250 watt (24 dBm). -
Page 20: Alternative Modbus Register Organization
® Sure Cross DXM700-Bx Wireless Controller Although only seven Nodes are listed in the table, the Modbus register numbering continues for as many Nodes as are in the network. For example, the register number for Node 10, I/O point 15 , is 175. Calculate the Modbus register number for each device using the equation: Register Number = I/O# + (Node# ×... - Page 21 ® Sure Cross DXM700-Bx Wireless Controller Input Registers and Outputs Registers Modbus registers 2201 through 2584 are used to organize all inputs together. In this format, users can sequentially read all input registers using one Modbus message. Modbus registers 4401 through 4784 organize all outputs together to allow users to sequentially write to all outputs registers using one Modbus message.
- Page 22 ® Sure Cross DXM700-Bx Wireless Controller Inputs Outputs Modbus Register Description (Inputs) Modbus Register Description (Outputs) Address (Decimal) Address (Decimal) 6631-6633 Input 3 from all devices 6711–6713 Output 3 from all devices 6641-6643 Input 4 from all devices 6721–6723 Output 4 from all devices 6651-6653 Input 5 from all devices 6731–6733...
- Page 23 ® Sure Cross DXM700-Bx Wireless Controller Inputs Outputs Modbus Register Description (Inputs) Modbus Register Description (Outputs) Address (Decimal) Address (Decimal) 7103 Input 3 for Node 2 8303 Output 3 for Node 2 7851 Input 8 (Status Register) for Gateway 9051 Output 8 for Gateway 7852 Input 8 (Status Register) for Node 1...
-
Page 24: Processor/Base Board Connections
® Sure Cross DXM700-Bx Wireless Controller 4 Processor/Base Board Connections Figure 13. DXM700 base board PW. Power in at 12 to 30 V dc O3. Sourcing Output 3 GD. Ground GD. Ground O4. Sourcing Output 4 GD. Ground M-. Master RS-485 - PW. -
Page 25: Dip Switch Settings For The Base Board
® Sure Cross DXM700-Bx Wireless Controller Force Cloud Push Button Press and hold this button for five seconds to send an immediate push message from the device (if properly configured). Clear Password By default, the DXM700 does not require a password to load a configuration file. If a password is defined, the DXM700 requires that you enter the password before uploading a configuration file. -
Page 26: Ethernet
® Sure Cross DXM700-Bx Wireless Controller 4.2 Ethernet Before applying power to the DXM700-Bx Wireless Controller, verify the Ethernet cable is connected. If the Ethernet cable is not connected when the device powers up, the DXM700-Bx Wireless Controller will not recognize the connection. The number of times the processor attempts to connect to the Ethernet network is configured in the DXM Configuration Tool (Settings >... - Page 27 ® Sure Cross DXM700-Bx Wireless Controller a Modbus master device or a Modbus slave device, exchanges data using the Local Registers. Modbus over Ethernet (Modbus/TCP) uses the Local Registers as the accessible register data. Local Registers 851–900 and 7001–8000 (Data Flash, Non-volatile, 32-bit, Unsigned)—The top 50 Local Registers are special non-volatile registers.
- Page 28 ® Sure Cross DXM700-Bx Wireless Controller Modbus Registers for Virtual Registers Registers Definition 10057–10058 Alarms, smtp, fails Email failures 10100 Number of read maps in default 10101 Number of read map successes 10102 Number of read map timeouts Read Map statistics 10103 Number of read map errors 10104...
-
Page 29: Applying Power To The Dxm700-Bx Wireless Controller
® Sure Cross DXM700-Bx Wireless Controller TCP Client Stats Register Definition 2x015–2x020 Reserved 2x021 Socket x Rule 0 transmits 2x023 Socket x Rule 0 receives 2x025 Socket x Rule 0 timeouts 2x027 Socket x Rule 0 broadcasts 2x029 Reserved 2x031 Socket x Rule 1 transmits 2x033 Socket x Rule 1 receives... -
Page 30: Modbus Master Port And Slave Port
® Sure Cross DXM700-Bx Wireless Controller Parameter Description Pin 6 Primary RS-485 – Running Modbus protocol at 19.2k baud, use this bus to connect to other Modbus Slave devices. The DXM700 is a Modbus Master device on this RS-485 port. Pin 7 Primary RS-485 + Pin 13... -
Page 31: Dxm Modbus Slave Port Id
® Sure Cross DXM700-Bx Wireless Controller • Set the Modbus Slave port ID using the DXM700 LCD • Set the Wireless Modbus Backbone parameter when there is an ISM radio plugged into the SAM4 processor board and the Modbus slave port is using the MultiHop radio as the slave port instead of the terminal block connection. 4.7.2 DXM Modbus Slave Port ID Set the DXM Modbus slave port ID using the LCD menu system. -
Page 32: Cellular Modem Boards
SIM card, IMEI (International Mobile Equipment Identity) number. For additional information, refer to the Banner Connected Data Solutions by Sensonix support center. The support center includes video tutorials, product documentation, technical notes, and links to download configuration software. - Page 33 The GSM cellular modem is operational world-wide and requires an activated card to operate. GSM wireless cellular plans cannot be purchased through the Banner Connected Data Solutions by Sensonix website. 1. Work with the local Banner technical support person to identify and purchase machine-to-machine (M2M) (data plan only) SIM cards in 3FF ‘micro’ form factor.
- Page 34 • The ICCID is the 20-digit number printed on the SIM card itself Activate a Verizon 4G LTE Cellular Plan Activate a cellular plan for your DXM700 using the Banner Connected Data Solutions by Sensonix website. https://bannercds.com 1. Go to to purchase DXM700 cellular data plans.
- Page 35 On the LCD menu, select Push > Trigger Data Push. Obtaining LTE service outside of Banner CDS—Customers have the option of securing a data plan for the Verizon network themselves without using the Banner Connected Data Solutions by Sensonix platform. Suitable plans would include those available from Verizon directly or from a Mobile Virtual Network Operator (MVNO) licensed to resell Verizon network data plans.
-
Page 36: Lcd And Menu System
LCD menu. The top-level menu always displays the time in a 24-hour format. • The up and down arrows scroll through display items. Banner Eng 08:25:45 • The enter button selects the highlighted items on the display ↑... -
Page 37: Ism Radio
® Sure Cross DXM700-Bx Wireless Controller 6.3 ISM Radio The ISM Radio menu allows the user to view the Modbus ID of the internal ISM radio, invoke binding, or run a site survey. To change the ISM Radio Modbus ID refer to the System menu. The top level menu includes a read-only ISM Radio menu selection. -
Page 38: System Config
® Sure Cross DXM700-Bx Wireless Controller 6.5 System Config Use the System Config menu to set DXM700 system parameters. New ISM Modbus ID: x System Config ISM Radio DX80 ID: x Auto Detect Radio Radio Detected Type: DX80 ID: 1 Advanced Options Ref Type: DX80 Ref Modbus ID: x... -
Page 39: Ethernet
® Sure Cross DXM700-Bx Wireless Controller Max Node Count—Defines the maximum number of devices for the DX80 wireless network. Binding #—This parameter allows the user to define the Binding code within the ISM radio. Typically, you will not have to adjust this number unless you are replacing an existing Gateway or master radio. -
Page 40: System Info
® Sure Cross DXM700-Bx Wireless Controller 6.6 System Info Various DXM system settings are shown in this menu. The Push, Ethernet, and Cell parameters are helpful for debugging network connections. This is a read only menu. System Info Controller Date: ↑... -
Page 41: Display Lock
® Sure Cross DXM700-Bx Wireless Controller Wifi Displays the Wifi IP address and other settings. Sript Displays the name of the ScriptBasic file running. LCD Board Displays the serial number, model, date, firmware part numbers, and version numbers. 6.7 Display Lock Display Lock protects the DXM LCD menu system from being used until the proper pass code is entered. -
Page 42: Working With Modbus Devices
® Sure Cross DXM700-Bx Wireless Controller 7 Working with Modbus Devices The DXM700 has two physical RS-485 connections using Modbus RTU protocol. The master Modbus RS-485 port is for the DXM700 to act as a Modbus master device to control internal and external Modbus slave devices. -
Page 43: Modbus Operation
® Sure Cross DXM700-Bx Wireless Controller Set the DXM Slave ID from the LCD menu under System > DXM Slave ID. The DXM700 can have any unique slave ID between 1 and 246, depending upon the host Modbus network. Other RS-485 slave port parameters are set in the DXM Configuration Tool under the Settings >... -
Page 44: Multihop Networks Vs Dx80 Star Networks
® Sure Cross DXM700-Bx Wireless Controller The timeout parameter is simple to set for Modbus devices directly connected to the DXM700, if there are no MultiHop wireless devices. If a MultiHop network a part of the DXM700, special considerations need to be made to set the timeout parameter. -
Page 45: Adjusting The Receive Slots And Retry Count Parameters
® Sure Cross DXM700-Bx Wireless Controller Minimum Timeout period = 2 seconds 7.4.4 Adjusting the Receive Slots and Retry Count Parameters The number of receive slots governs how often a MultiHop device can communicate on the wireless network. Battery-powered devices typically have DIP switches that allow the user to set the number of receive slots, which directly affects the battery life of the radio. -
Page 46: Configuration Instructions
® Sure Cross DXM700-Bx Wireless Controller 8 Configuration Instructions 8.1 Scheduler Use the Scheduler screens to create a calendar schedule for local register changes, including defining the days of the week, start time, stop time, and register values. Schedules are stored in the XML configuration file, which is loaded to the DXM700. Reboot the DXM700 to activate a new schedule. -
Page 47: Create A Holiday Event
® Sure Cross DXM700-Bx Wireless Controller Figure 21. Scheduler > One Time Events screen 1. Click on Add One Time Event. A new one-time event is created. 2. Click on the arrow to expand the parameters into view. The user-defined parameters are displayed. 3. -
Page 48: Controller Configuration Authentication
At the bottom of the pop-up window is a checkbox to enable authentication/validation. 3. Enter the same username and password as used in the DXM Configuration Tool. The username and password do not need to be a defined user within the Banner Connected Data Solutions by Sensonix website. 8.2.2 Controller Configuration Authentication The DXM700 can be programmed to allow changes to the configuration files only with proper authentication by setting up a password on the Settings >... -
Page 49: Register Flow And Configuration
® Sure Cross DXM700-Bx Wireless Controller 1. Turn off the power to the DXM700. 2. Open the controller top to access the button and DIP switches of the SAM4 processor board. 3. Turn on DIP switch 4 (next to the SD card holder). 4. -
Page 50: Saving And Loading Configuration Files
EtherNet/IP using the DXM Configuration Tool and only selecting the needed registers. A maximum of 228 registers can be read or written with Ethernet/IP. EDS (Electronic Data Sheet) files allow users of the EtherNet/IP protocol to easily add a Banner DXM device. Download the EDS files from the Banner website. -
Page 51: Setting Up Email
® Sure Cross DXM700-Bx Wireless Controller Figure 27. Local Register Configuration screen Use the Modify Multiple Registers screen to change many registers parameters at one time. The DXM700 is big endian: the upper bits of a local register (15:8) are stored in the first byte of the assembly instance and the second byte of the assembly instance is stored in the lower bits of a local register (7:0). -
Page 52: Mail Server Authentication
® Sure Cross DXM700-Bx Wireless Controller 1. Set the time on the DXM700. 2. Define the Network Interface settings by selecting either Ethernet or Cell on the Cloud Services screen. 3. If you selected Ethernet, configure your Ethernet connection by setting the IP settings on the Network screen. 4. -
Page 53: Configure Your Ethernet Connection
® Sure Cross DXM700-Bx Wireless Controller 8.5.3 Configure your Ethernet Connection To send email based on a threshold rule or to email log files, first define the network and email servers. In the DXM Configuration Tool, go to Settings > Network. 1. -
Page 54: Define Threshold Rules For Email
® Sure Cross DXM700-Bx Wireless Controller Figure 31. Mail server settings At the bottom of the screen, define the recipient to receive emails. These recipients for email can be selected in the threshold definition for sending alert messages. 8.5.6 Define Threshold Rules for Email To define a threshold, go to Action Rules >... -
Page 55: Ethernet And Cellular Push Retries
® Sure Cross DXM700-Bx Wireless Controller Figure 33. Defining the data log files 4. Define the local register data put into the log file using the Local Registers > Local Register Configuration screen, under the Logging and Protocol Conversion section. From the SD Card Logging drop-down list, select the log file to write to. -
Page 56: Email Message Push Retries
® Sure Cross DXM700-Bx Wireless Controller 8.6.4 Email Message Push Retries There are no retries for emails that fail to be sent from the DXM700. www.bannerengineering.com - Tel: + 1 888 373 6767... -
Page 57: Accessories
® Sure Cross DXM700-Bx Wireless Controller 9 Accessories Accessories List For a complete list of all the accessories for the Sure Cross wireless product line, please download the (p/n b_3147091). Cordsets Misc Accessories MQDC1-506—5-pin M12/Euro-style, straight, single ended, 6 ft BWA-CG.5-3X5.6-10—Cable Gland Pack: 1/2-inch NPT, Cordgrip for 3 holes of 2.8 to 5.6 mm diam, qty 10 MQDC1-530—5-pin M12/Euro-style, straight, single ended, 30 ft... -
Page 58: Product Support And Maintenance
® Sure Cross DXM700-Bx Wireless Controller 10 Product Support and Maintenance 10.1 File System and Archive Process The DXM file system consists of two physical components: the serial EEPROM that stores non-volatile configuration information and a removable micro SD card that stores file backup data and user created files. 10.1.1 EEPROM Files The serial EEPROM stores basic data that is required to be non-volatile, including network configuration data, IP address, MAC address, network masks, firewall settings, and authentication information. -
Page 59: Update Your Dxm Processor Firmware Using The Dxm Configuration Tool
The device reboots when finished. Verify the firmware has been updated, under Settings > General > Device Information. 10.3 DXM700 Documentation For more information about the DXM700 family of products, please see additional documentation and videos on the Banner www.bannerengineering.com website: 194063 •... -
Page 60: Dxm700 Support Policy
Banner website. Customers with critical update requirements will get access to pre-released firmware from the factory. 10.4.2 Website Information The Banner website is the main method of disseminating DXM700 information to customers. The data found on the website include: •... -
Page 61: Warnings
10.7 Banner Engineering Corp. Limited Warranty Banner Engineering Corp. warrants its products to be free from defects in material and workmanship for one year following the date of shipment. Banner Engineering Corp. will repair or replace, free of charge, any product of its manufacture which, at the time it is returned to the factory, is found to have been defective during the warranty period. This warranty does not cover damage or liability for misuse, abuse, or the improper application or installation of the Banner product. - Page 62 Index authentication 47, 48 registers 8 configure for cell 34 cell modem activate 3G GSM 33 scheduler 46, 47 holiday event 47 activate Verizon 4G LTE 34 configure DXM 34 install 33 purchase 33 Modbus regsiters 8 webserver authentication 47, 48 create weekly event 46 holiday event 47...
Need help?
Do you have a question about the Sure Cross DXM700-B Series and is the answer not in the manual?
Questions and answers