Table of Contents
Advertisement
Quick Links
Advertisement
Table of Contents

Subscribe to Our Youtube Channel
Related Manuals for ACME TV LIGHT PANEL 3000


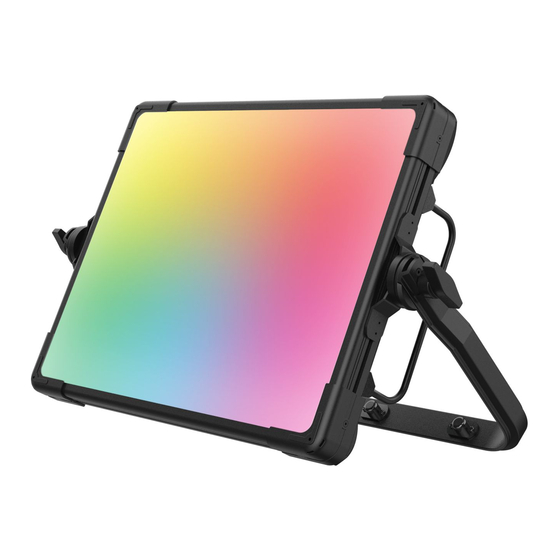
Summary of Contents for ACME TV LIGHT PANEL 3000
-
Page 2: Table Of Contents
REV B 09/03/2024 CONTENTS 01/ Safety Information ....................2 02/ Technical Specifications ..................4 03/ Overview ........................6 04/ Connecting Power and Data ................7 4.1 Connecting Power ................... 7 4.2 Connecting Data....................8 05/ Fixture Installation ....................9 5.1 Hanging the Fixture ..................10 5.2 Barn Door Installation .................. -
Page 3: 01/ Safety Information
REV B 09/03/2024 01/ Safety Information Please read the instruction carefully which includes important information about the installation, usage and maintenance. WARNING Please keep this User Manual for future consultation. If you sell the unit to another user, be sure that they also receive this instruction manual. Important: Damages caused by the disregard of this user manual are not subject to warranty. - Page 4 REV B 09/03/2024 Avoid any flammable liquids, water or metal from entering the unit. Once it happens, cut off the mains power immediately. DO NOT operate in a dirty or dusty environment. DO clean the fixture regularly. DO NOT touch any wire during operation as there might be a hazard of electric shock. ...
-
Page 5: 02/ Technical Specifications
REV B 09/03/2024 02/ Technical Specifications AC Power 100-240Vac; 50/60Hz Max. Power 455W Consumption 336x2.5W RGB LED Light Source 356x3W WW LED Color Temperature 2500K-20000K Beam Angle 115° Field Angle 162° DMX Channels 10/28 DMX512 Control and Protocols Programming Art-Net sACN Firmware Update via DMX or USB memory device... - Page 6 REV B 09/03/2024 Photometric Diagram (Beam Angle): Photometric Diagram (Field Angle): - 5 -...
-
Page 7: 03/ Overview
REV B 09/03/2024 03/ Overview 1. DIMMER Manually adjust the dimmer value 2. Display To show the various menus and the selected function 3. COLOR Manually adjust the color temperature value TEMPERATURE MENU To enter into move backward or leave the menu ... -
Page 8: 04/ Connecting Power And Data
REV B 09/03/2024 04/ Connecting Power and Data 4.1 Connecting Power This fixture can operate on any 100-240Vac; 50/60Hz AC mains power supply. The maximum power consumption is 455W. The fixture must be grounded/earthed and able to be isolated from AC power. The AC power supply must incorporate a fuse or circuit breaker for fault protection. -
Page 9: Connecting Data
REV B 09/03/2024 4.2 Connecting Data The fixture is equipped with 5-pin (or 3-pin) XLR sockets for DMX input and output. Use a high-quality DMX cable designed for RS-485 and 5-pin (or 3-pin) XLR-plugs and connectors in order to connect the controller with the fixture or one fixture with another. Building a serial DMX chain: Connect the DMX data output from the controller to the fixture’s data input socket. -
Page 10: 05/ Fixture Installation
REV B 09/03/2024 05/ Fixture Installation DO install and operate by qualified operator. Fixture(s) should be installed in areas outside walking paths, seating areas, or away from areas were unauthorized personnel might reach the fixture by hand. NEVER stand directly below the fixture(s) when rigging, removing or servicing. -
Page 11: Hanging The Fixture
REV B 09/03/2024 5.1 Hanging the Fixture - 10 -... -
Page 12: Barn Door Installation
REV B 09/03/2024 5.2 Barn Door Installation A. Open the barn door fully and position in front of the fixture. B. Tighten the four screws in place after aligning and fitting the barn door to the fixture. - 11 -... -
Page 13: 06/ Operation
REV B 09/03/2024 06/ Operation 6.1 Control Menu To access the control menus, press the [MENU] button. Navigate the menu structure, using the [ENTER], [ UP] and [ DOWN] buttons. To select a menu option or to confirm a selection, press the [ENTER] button. ... - Page 14 REV B 09/03/2024 MAIN MENU SUBMENU CHOICES/VALUES Linear Square Law Dimmer Curve Inv SQ Law S Curve Fast Dimmer Speed Smooth 125-255 Green 125-255 Blue 125-255 Red 1 125-255 Green 1 125-255 White Balance Blue 1 125-255 …… …… Red 6 125-255 Green 6 125-255...
- Page 15 REV B 09/03/2024 MAIN MENU SUBMENU CHOICES/VALUES Hi CRI Calibration Mode Hi Output DUV Calibration -100%~100% Display Invert Backlight Intensity 1-10 (Default=10) Display Settings °C Temperature Unit °F English Language Chinese Single Auto Test Cycle Mode 1 Mode 2 Clear No/Yes Clear No/Yes Strobe...
- Page 16 REV B 09/03/2024 DMX Settings Enter the control menu and select DMX Settings, press ENTER. Use the UP/DOWN button to select DMX Address, DMX Channel Mode, No DMX Status, View DMX Value, Connect Option, Network, Art-Net Settings, sACN Settings or Network to DMX. DMX Address Select DMX Address, press ENTER.
- Page 17 REV B 09/03/2024 View DMX Value Select View DMX Value, press ENTER. Use UP/DOWN button to select the desired DMX channel, for which the value is to be displayed. To exit the menu, press MENU, or wait 30 seconds. Connect Option Select Connect Option, press ENTER.
- Page 18 REV B 09/03/2024 Fixture Settings Enter the control menu and select Fixture Settings, press ENTER. Use the UP/DOWN button to select Dimmer Curve, Dimmer Speed, White Balance, LED Refresh Rate, Pri./Sec. Mode, Fan Mode, Invert Pixel Order, Color Calibration, Calibration Mode or DUV Calibration. Dimmer Curve Select Dimmer Curve, press ENTER.
- Page 19 REV B 09/03/2024 LED Refresh Rate Select LED Refresh Rate, press ENTER. Use UP/DOWN button to select 900Hz, 1000Hz, 1100Hz, 1200Hz, 1300Hz, 1400Hz, 1500Hz, 2500Hz, 4000Hz, 5000Hz, 6000Hz, 10000Hz, 15000Hz, 20000Hz or 25000Hz, confirm your selection with ENTER. To exit the menu, press MENU, or wait 30 seconds. Pri./Sec.
- Page 20 REV B 09/03/2024 Calibration Mode Select Calibration Mode, press ENTER. Use UP/DOWN button to select Hi CRI or Hi Output, confirm your selection with ENTER. To exit the menu, press MENU, or wait 30 seconds. DUV Calibration Select DUV Calibration, press ENTER. Use UP/DOWN button to select a value between -100% and 100%, confirm your selection with ENTER.
- Page 21 REV B 09/03/2024 Language Select Language, press ENTER. Use UP/DOWN button to select English or Chinese, confirm your selection with ENTER. To exit the menu, press MENU, or wait 30 seconds. Fixture Test Enter the control menu and select Fixture Test, press ENTER. Use the UP/DOWN button to select Auto Test or Manual Test.
- Page 22 REV B 09/03/2024 Fixture Information Enter the control menu and select Fixture Information, press ENTER. Use the UP/DOWN button to select Fixture Use Hour, LED Use Hour, Temperature, Upgrade File, Firmware Version, RDM UID or Error Logs. Fixture Use Hour Select Fixture Use Hour, press ENTER.
- Page 23 REV B 09/03/2024 Firmware Version Select Firmware Version, press ENTER. The firmware version is displayed. To exit the menu, press MENU, or wait 30 seconds. RDM UID Select RDM UID, press ENTER. The RDM UID is displayed. To exit the menu, press MENU, or wait 30 seconds. Error Logs Select Error Logs, press ENTER.
- Page 24 REV B 09/03/2024 RDM functions: Certain menus of the device and functions can be called up via the RDM protocol. The parameter IDs are implemented as follows for different commands: Command Command Command Parameter ID ‘Discovery’ ‘Set’ ‘Get’ DISC_UNIQUE_BRANCH √ DISC_MUTE √...
-
Page 25: Home Position Adjustment
REV B 09/03/2024 6.2 Home Position Adjustment To access the control menus, press the [MENU] button. To access the offset menus, long-press the [ENTER] button. Navigate the offset menus, using the [ENTER], [ UP] and [ DOWN] buttons. ... - Page 26 REV B 09/03/2024 Frequency(Hz) Select Frequency(Hz), press ENTER. Use UP/DOWN button to select a value, confirm your selection with ENTER. To exit the offset menu, press MENU, or wait 30 seconds. Frequency VALUES 900Hz 772~1027 1000Hz 872~1127 1100Hz 972~1227 1200Hz 1072~1327 1300Hz 1172~1427...
- Page 27 REV B 09/03/2024 Blue Select Blue, press ENTER. Use UP/DOWN button to select a value between 0 and 1500, confirm your selection with ENTER. To exit the offset menu, press MENU, or wait 30 seconds. White Select White, press ENTER. Use UP/DOWN button to select a value between 0 and 1500, confirm your selection with ENTER.
- Page 28 REV B 09/03/2024 …… Red 6 Select Red 6, press ENTER. Use UP/DOWN button to select a value between 0 and 500, confirm your selection with ENTER. To exit the offset menu, press MENU, or wait 30 seconds. Green 6 Select Green 6, press ENTER.
-
Page 29: 07/ Configuring The Device For Dmx Control
REV B 09/03/2024 07/ Configuring the Device for DMX Control 7.1 Address Setting All fixtures should be given a DMX starting address when operating with a DMX controller, in order to ensure that the correct fixture responds to the correct control signal. Incorrect settings will result in unpredictable responses from the lighting controller. -
Page 30: Dmx Protocol
REV B 09/03/2024 7.2 DMX Protocol CHANNEL VALUE FUNCTION 10ch 28ch STROBE 000-007 Close 008-015 Open 016-131 Strobe from Slow to Fast 132-139 Open 140-181 Fast Open Slow Close from Slow to Fast 182-189 Open 190-231 Slow Open Fast Close from Slow to Fast 232-239 Open 240-247... - Page 31 REV B 09/03/2024 138-139 Null 140-159 Null 160-169 Color Calibration: On 170-179 Color Calibration: Off 180-189 Calibration Mode: High CRI 190-199 Calibration Mode: High Output 200-209 Null 210-219 Dimmer Speed: Fast 220-229 Dimmer Speed: Smooth 230-239 Invert Pixel Order: Yes 240-249 Invert Pixel Order: No 250-255...
- Page 32 REV B 09/03/2024 096-098 6600K 099-102 6500K 103-106 6400K 107-110 6300K 111-114 6200K 115-117 6100K 118-121 6000K 122-125 5900K 126-129 5800K 130-133 5700K 134-137 5600K 138-140 5500K 141-144 5400K 145-148 5300K 149-152 5200K 153-156 5100K 157-159 5000K 160-163 4900K 164-167 4800K 168-171 4700K...
- Page 33 REV B 09/03/2024 031-037 Color 4 038-044 Color 5 045-051 Color 6 052-058 Color 7 059-065 Color 8 066-072 Color 9 073-079 Color 10 080-086 Color 11 087-093 Color 12 094-100 Color 13 101-107 Color 14 108-114 Color 15 115-121 Color 16 122-128 Color 17...
- Page 34 REV B 09/03/2024 RED 3 000-255 0%100% GREEN 3 0%100% 000-255 BLUE 3 000-255 0%100% WHITE 3 000-255 0%100% RED 4 000-255 0%100% GREEN 4 000-255 0%100% BLUE 4 0%100% 000-255 WHITE 4 000-255 0%100% RED 5 000-255 0%100% GREEN 5 000-255 0%100% BLUE 5...
-
Page 35: 08/ Error Information
REV B 09/03/2024 08/ Error Information Error codes are shown continuously in the display when the fixture fails and they will not disappear until the fixture is repaired. CPU-B/C/D Error Check whether the 485 (DATA) leads on the PCB board are installed in place or disconnected. -
Page 36: 09/ Troubleshooting
REV B 09/03/2024 LED Too Hot Off When the fixture temperature reaches 81℃, it will automatically turn off to protect the fixture. 09/ Troubleshooting Problem Potential cause(s) Remedies Confirm that the power is switched No power to the fixture. Fixture does not respond on and cables are plugged in. -
Page 37: 10/ Fixture Cleaning
REV B 09/03/2024 10/ Fixture Cleaning Regular cleaning is very important for fixture life and performance. Buildup of dust, dirt, smoke particles, fog fluid residues, etc. degrades the fixture’s light output and cooling ability. Cleaning schedules for lighting fixtures vary greatly depending on the operating environment. It is therefore impossible to specify precise cleaning intervals for the fixture.
Need help?
Do you have a question about the TV LIGHT PANEL 3000 and is the answer not in the manual?
Questions and answers