Advertisement
Quick Links
1 - Sidewall 1
2 pcs.
4 - Longer rod
7 pcs.
7 - Rope net
1 pc.
Pic. 1
Take the sidewalls (1, 2, 3) and a shim (6) and join them with the shorter
rod (5) and rope net (7) using screws (a, b), and hex key (c). See Pic. 1.
Triangle with rope
ASSEMBLY DETAILS
2 - Sidewall 2
2 pcs.
5 - Shorter rod
3 pcs.
a - Screw M6x35
24 pcs.
long rod should
be above
7
short rod should
be beneath
3 - Sidewall 3
2 pcs.
6 - Shim
2 pcs.
b - Screw M6x50
2 pcs.
a
2
3
a
a
1
6
5
50
c - 4 mm hex key
1 pc.
b
Advertisement

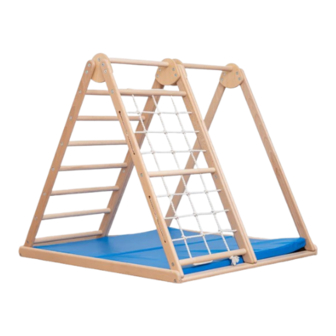
Summary of Contents for Montessori Furniture Wood and Hearts Triangle with rope
- Page 1 Triangle with rope ASSEMBLY DETAILS 1 - Sidewall 1 2 - Sidewall 2 3 - Sidewall 3 2 pcs. 2 pcs. 2 pcs. 4 - Longer rod 5 - Shorter rod 6 - Shim 7 pcs. 3 pcs. 2 pcs. 7 - Rope net a - Screw M6x35 b - Screw M6x50...
- Page 2 Pic. 2 Take a previously assembled construction and attach the rods (4, 5) to it using screws (a) and hex key (c). See Pic. 2. Pic. 3 Take the sidewalls (1, 2, 3) and a shim (6) and join them with the previously assembled construction using screws (a, b) and hex key (c).
- Page 3 Arch ASSEMBLY DETAILS 1 - Sidewall 1 2 - Sidewall 2 3 - Sidewall 3 4 - Sidewall 4 1 pc. 1 pc. 1 pc. 1 pc. 5 - Short rod 6 - Long rod 7 - Fixator a - Screw M6x35 b - 4 mm hex key 6 pcs.
- Page 4 а Pic. 2 Take the sidewall 2 (2) and attach it to the short rods (5) using screws (a) and hex key (b). See Pic. 2. а Pic. 3 Join the previously assembled constructions and attach the sidewall 4 (4) to the rods using screws (a) and hex key (b).
- Page 5 а Pic. 4 Take the sidewall 3 (3) and attach it to the rods with screws (a) and hex key (b). Finalize the construction with adding fixator (7). See Pic. 4. Use only for its intended purpose, indoors, under the direct supervision of adults. Maximum load weight - 60 kg / 132 lbs.
-
Page 6: Assembly Details
LARGE RAMP Video assembly here! Scan to watch. ASSEMBLY DETAILS 1.1 - Ramp 1.2 - Hook 2.1 - Confirmat screw 2.2 - 3mm hex key 1 pc. 4 pcs. 8 pcs. + 2 pcs. spare 1 pc. Screw the hooks (1.2) to the Ramp (1.1) with the confirmat Screws (2.1). Tighten with the 3mm hex key (2.2).


Need help?
Do you have a question about the Wood and Hearts Triangle with rope and is the answer not in the manual?
Questions and answers