Autonomous SmartDesk One Assembly Instructions Manual
Hide thumbs
Also See for SmartDesk One:
- Assembly instructions (3 pages) ,
- Assembly instructions manual (6 pages)
Advertisement
Quick Links
Advertisement

Subscribe to Our Youtube Channel
Related Manuals for Autonomous SmartDesk One


Summary of Contents for Autonomous SmartDesk One
- Page 1 SmartDesk One A s s e m b l y I n s t r u c t i o n s www.autonomous.ai...
- Page 2 Warning Make sure that children, pets, etc... are away from the product while it is in operation. When not using the product for a long time or there is lightning, please unplug the power supply. Ensure that the desktop does not touch the wall. Ensure that the product is free of any obstacles during operation.
-
Page 3: Parts List
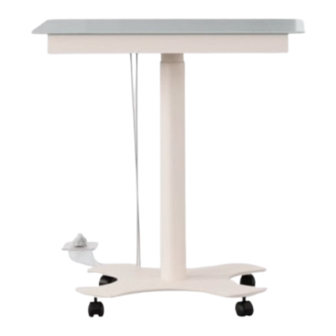
Parts List Installation time Installer Installation tools Name of parts Desktop components Column Column connectors Extension Socket Feet Metal Tray Caster Wheels Power Cord Upper Tube M6*10 Screws M5*14 Screws M6*20 Screws M4 Wrench M3 Wrench... - Page 4 Parts List Column connectors Column Extension Socket Feet Desktop components 1 pc 1 pc 2 pcs 1 pc 1 pc Upper Tube Metal Tray Caster Wheels Power Cord M6*10 Screws 1 pc 4 pcs 1 pc 1 pc 8 pcs M4 Wrench M3 Wrench M6*20 Screws...
- Page 5 Installation Guide Fix the Column (2) and the Column Connectors (3) to the Desktop Components (1) with 4x M6*10 Screws (A) and 1x M4 Wrench (D). Connect the Adapter Cable (pre-assembled on the Desktop Components (1) to the motor cable on the Column (2)). Plug the Power Cord (8) into the Adapter Cable. Adapter Cable Motor Cable Protect the desktop well to avoid any damages and scratches.
- Page 6 Installation Guide Tighten 4x Caster Wheels (6) to the Feet (5) well. After the assembly is completed, reset the desk and raise it to the highest position. Put the power cord (8) and the cord of the Extension Socket (4) into the Upper Tube (9) and then put them onto the Column (2).
-
Page 7: Adjusting The Height
Operation Guide 1. Reset 1) Press the up and down buttons at the same time for 3 seconds, and the column will begin to descend to the lowest position. When the reset is completed, release the up and down buttons and the keypad displays the starting height. - Page 8 Operation Guide 3) Remove the upper height limit ① Adjust the desk to the position where the upper height limit has been set. ② Press up and down buttons together for less than 3 seconds. ③ Keep pressing the up button while releasing the down button and clicking the down button 3 or more times in succession. ④...
-
Page 9: Reset To Default Settings
Operation Guide 9. Adjust Sensor Sensitivity 1) Press the "1" and "2" buttons at the same time for 5 seconds, and the screen will flash the current sensitivity value, which is a value between "-0-" and "-9-". The flashing lasts for 5 seconds. If there is no operation, the setting status will exit (If the screen flashes "0-0"... - Page 10 Operation Guide Error Codes Descriptions Processing Method Reset, if unable to resolve, contact No Hall signal at M1 interface after-sales service Reset, if unable to resolve, contact No Hall signal at M2 interface after-sales service Reset, if unable to resolve, contact No Hall signal at M3 interface after-sales service Reset, if unable to resolve, contact...
- Page 11 Autonomous Smart Office 21800 Opportunity Way, Riverside, CA 92508 www.autonomous.ai human@autonomous.ai...
Need help?
Do you have a question about the SmartDesk One and is the answer not in the manual?
Questions and answers