Table of Contents
Advertisement
Quick Links
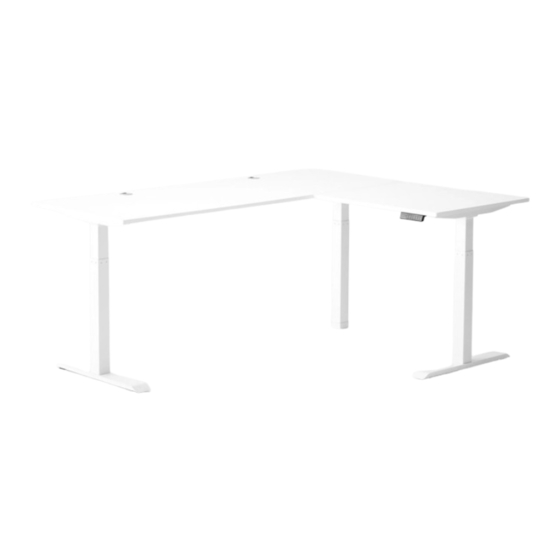
L-Shaped SmartDesk
ASSEMBLY INSTRUCTIONS
1. Loosen the screws of Support Beam (G) using the 4mm Allen Wrench.
2. Extend Support Beam (G) and place over 1 x Side Leg (A) and Middle Leg (B).
Fix both legs into place using 8 x (W) Screws.
a. On the left side of
Support Beam 1 (G),
attach Middle Leg
(B) using 4 (W).
b. Make
sure the
bar faces
outward.
M
3. Loosen the screws of Support Beam (H) using the 4mm Allen Wrench.
c. Assemble
right side of
Support Beam 1
with Side Leg
(A) using 4 (W)
Advertisement
Table of Contents

Related Manuals for Autonomous L-Shaped SmartDesk


Summary of Contents for Autonomous L-Shaped SmartDesk
- Page 1 1. Loosen the screws of Support Beam (G) using the 4mm Allen Wrench. L-Shaped SmartDesk ASSEMBLY INSTRUCTIONS 2. Extend Support Beam (G) and place over 1 x Side Leg (A) and Middle Leg (B). Fix both legs into place using 8 x (W) Screws.
- Page 2 4. Extend Support Beam (H) and place over the remaining Side Leg (A). Fix into 6. Attach 1 x Foot (C) to each Side Leg (A) using 4 x (V) Screws. place using 4 x (W) Screws. Insert 2 x (Z1) Pads into each Foot (C). 5.
- Page 3 8a. Flip the frame upright. Attach 3 x Brackets (E) to the end of the Support Beams using 2 x (W) 9. With a partner, carefully place Desktop (D) into position on top of the frame. Then, fix Desktop Screws for each Bracket. (D) into place using 20 x (Y) Screws in the positions indicated.
- Page 4 11b. Plug the Power Cable (K) into Control Box 11a. Connect the Control Box (F) to corresponding Control Switch (K), and Legs cable. (F) and then into a power outlet. 12. Before use, you must reset the Control Box.
Need help?
Do you have a question about the L-Shaped SmartDesk and is the answer not in the manual?
Questions and answers