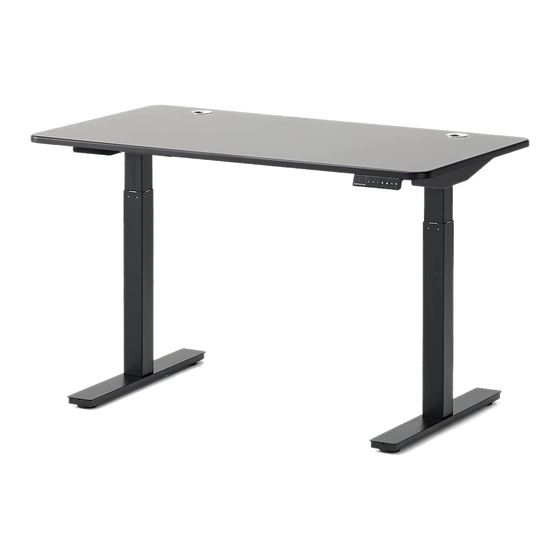
Autonomous SmartDesk Home Edition Assembly Instructions Manual
Hide thumbs
Also See for SmartDesk Home Edition:
- Assembly instructions manual (33 pages) ,
- Assembly instructions manual (33 pages)

Related Manuals for Autonomous SmartDesk Home Edition


Summary of Contents for Autonomous SmartDesk Home Edition
- Page 2 Please go to www.autonomous.ai/assembly to watch our assembly video. We recommend you watch it before assembling your SmartDesk, since it will walk you through the steps and help you understand the instructions. Parts & Tools List Noise Dampener...
- Page 3 Step 1 Lay the top face down on the oor and place the frame at upside down on it. Step 2 DO NOT ATTACH THE FRAME TO THE TOP YET, THIS STEP IS FOR MEASUREMENT ONLY Line up the frame to the two pre-drilled pilot holes on the table top.
- Page 4 Step 3 Hand tighten M6x10 Machine hex screws to the frame. NOTE: Do not over tighten the screws since you may need further adjustment later. M6*10 8PCS Step 4 Firmly attach both lifting columns (legs) to the frame using 8 M8x10 Machine hex screws (4 for each side). M8*10 8PCS...
- Page 5 Step 5 Firmly attach both feet to the bottom of the lifting columns using 8 M8x16 Machine hex screws ( 4 for each side). M8 x 16 8PCS Foot Pad 4PCS Step 6 Turn the table over to upright position. Upside Down...
- Page 6 Step 7 Attach the brackets to both ends of the frame using 4 M6x10 Machine hex screws ( 2 for each side). M6*10 4PCS...
- Page 8 Step 8 Turn the LEFT NUT counterclockwise to remove it from the DRIVESHAFT. Keep the PLASTIC GROMMET inside the LEFT NUT. Step 9 Insert the LEFT NUT and PLASTIC GROMMET into the LEFT COLUMN. Pay attention to the insert direction.
- Page 9 Step 10 Insert the DRIVESHAFT into the LEFT COLUMN. Push the DRIVESHAFT all the way in. Step 11 Turn the LEFT NUT clockwise to rmly lock the DRIVESHAFT in place. Leave a small gap (about 0.2in) between the LEFT NUT and the LEFT COLUMN so they won’t block the DRIVESHAFT when it turns.
- Page 10 Step 12 Slightly loosen the RIGHT NUT by turning it once around. DO NOT REMOVE THE RIGHT NUT. Step 13 Pull the CENTER ROD out and insert it into the RIGHT COLUMN 0.2in...
- Page 11 Step 14 Push the CENTER ROD all the way in. Then leave a small gap (about 0.2 in) between CENTER ROD and RIGHT COLUMN FAR WALL. 0.2in Step 15 Turn the RIGHT NUT to lock the DRIVESHAFT in place. Do not let the RIGHT NUT touch the RIGHT COLUMN.
- Page 12 Step 16 Use the wrench to tighten both LEFT NUT and RIGHT NUT. Step 17 Connect the CONTROL BOX and SMART KEYPAD to your SmartDesk...
- Page 13 Step 18 Almost done. Turn on your SmartDesk by holding both the UP and DOWN buttons for 20 seconds until you hear a BEEP sound.
- Page 14 Check 1 Press UP to raise your SmartDesk up. Press Down to lower your SmartDesk. Repeat it a few times. Check 2 There is a still small gap (about 0.2 in) between the LEFT NUT and the LEFT COLUMN. If not, adjust the LEFT NUT location.
- Page 15 Check 3 There is still a small gap (0.2 in) between the CENTER ROD and the wall of the RIGHT COLUMN. If not, adjust the RIGHT NUT and CENTER ROD. Tighten the RIGHT NUT with the wrench. 0.2in Check 4 There is a gap between the RIGHT NUT and the RIGHT COLUMN.
- Page 16 CONGRATULATIONS! You’re now a driveshaft installation expert! Step 19 Insert the noise dampener on to the holes on the desk top. M4.8 x 19 8 PCS...
- Page 17 Step 20 Readjust the frame length if needed, then tighten 8 M6x10 Hex screws from step 3. Attach the frame to the top using 8 M4 x 19 Wood screws (3 for each side and 2 in the middle). M4.8 x 19 8 PCS Step 21 Attach the control box, control pad to the bottom of the...
- Page 19 v1.1...
Need help?
Do you have a question about the SmartDesk Home Edition and is the answer not in the manual?
Questions and answers