Table of Contents
Advertisement
Quick Links
Advertisement
Table of Contents

Related Manuals for FRENCH FITNESS MIC21


Summary of Contents for FRENCH FITNESS MIC21
- Page 1 FF-MIC21 FRENCH FITNESS MIC21 INDOOR CYCLE W/21.5" TOUCH CONSOLE ASSEMBLY MANUAL...
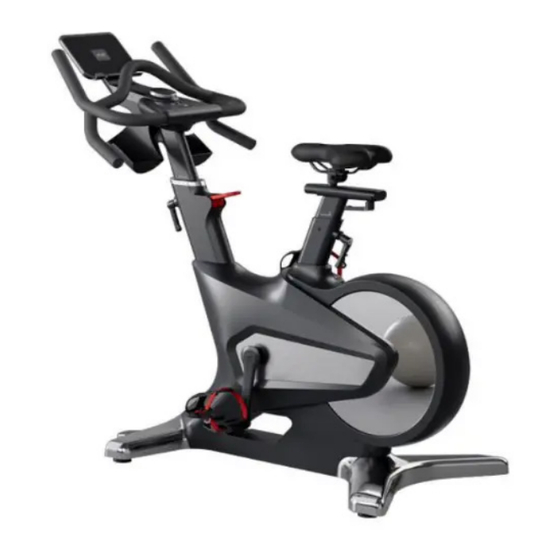
- Page 2 FE AT U RE S 22 kg Flywheel • Display: 21.5" TFT Colored Display • Console Display: Time, Distance, Calories, Steps, Heart Rate, Speed, Slope • Color: Black and Silver • Adjustable Seat • Belt Driven • Brake System: Electronic Control •...
-
Page 3: Table Of Contents
T ABL E OF CONT E NT S SAFETY INSTRUCTIONS ............4 PRODUCT INTRODUCE .............. 6 PARTS LIST ................. 7 INSTALLATION INSTRUCTIONS ..........8 USE ADJUSTMENT INSTRUCTIONS ........13 INSTRUCTIONS OF THE ELECTRONIC WATCH ..... 18 DOWLOAD THE APP INSTRUCTIONS ........21 INSTRUCTIONS OF THE ELECTRONIC WATCH ..... -
Page 4: Safety Instructions
SAF E T Y I NST RU CT I ONS ( Please read carefully that the irregular use may lead to personal injury! ) 1. Make sure that the cushion height adjustment knob is fixed properly, and does not interfere with the range of movement during movement. 2. - Page 5 D AI L Y MAI NT E NANCE Spinning bikes should be placed on a dry, ventilated, flat ground. If not use for a long time, need to cover the car cover, to keep the machine clean and tidy After exercise, dry the sweat on the frame. Do not wipe with a wet cloth to avoid rust. 3.Check whether the belt plate is cracked or deviated, adjust or replace the belt in time;...
-
Page 6: Product Introduce
PROD U CT I NT ROD U CE Display Handrail The seating water cup rack Seating adjust knob Instrument lift pipe Seating lift adjust tube Emergency brake handle Armor adjustment pull pin Seat cushion adjustment pull pin Main frame winch pedal moving wheel adjusting pedal... -
Page 7: Parts List
PART S L I ST A.the forefoot tube B Front foot cover C.the rearfoot tube D.Back foot cover E.Instrument lift pipe F. Water cup rack P. pedal G.Seating lift adjust tube H Armor assembly Z the seating Power adapter H Display... -
Page 8: Installation Instructions
I NST AL L AT I ON I NST RU CT I ONS Forefoot tube installation: Find the front foot pipe A and B in the package, remove the 10 * 40 of the front foot, lock the front foot pipe A through the main frame, and then tilt the front foot cover cover of B on the front foot pipe of A with 24.2 * 35 self-tapping screws through the front foot to secure the front foot cover B. - Page 9 Rear foot tube installation : Find the C rear foot and D rear foot cover in the packaging, remove the two 10 * 45 of t he rear foot, then remove the 10 * 80 of the rear foot, lock the C back foot through the main frame, and then tilt the machine with two 4.2 * 35 self-tapping screws through the front foot to lock the D rear foot cover.
- Page 10 Adjust tube installation: Find the E instrument pipe, then pass the main signal line through the instrument pipe , pull out the front armrest adjustment pin and plug the E instrument tube into the front fixing pipe of the main frame. Find the G cushion lifting tube, pull out the adjusting pin and insert the G cushion tube into the rear pipe after the main frame.
- Page 11 Install the armrest 1. Find the H handrail assembly, connect the main signal line of E instrument pipe docking B armrest assembly of the table (please pay attention to the pin is not skew, gently buckle, not too hard to damage the pin), find 4 half head socket bolt 4 M8 * 12 through E instrument pipe prelock H armrest assembly, find the 5 # socket wrench lock bolt.
- Page 12 Pedal installation: Find the P pedal L \ R, rotate the pedal L with the main frame L counter-clockwise, ro tate the pre-load clockwise, and lock the pedal with a 15 # wrench...
-
Page 13: Use Adjustment Instructions
U SE AD J U ST ME NT I NST RU CT I ONS How to find the right cycling posture Seat height Keep your feet together, stand straight on the side of the owner's frame, adjust the cushion to the same height as the hip joint (Figure 1), then sit on the seat cushion, pedal with the heel, stop it at 6 o'clock, and the legs can be fully straight (Figure 2) Hipjoint... - Page 14 Set the appropriate armrest height Each user can set the appropriate handrail height according to their own height and cycling experience. We suggest: novice users (Figure 4), armrest height slightly higher seat cushion,experienced users (Figure 5) armrest height and seat cushion,parallel to or slightly below the seat cushion.
- Page 15 Seat Angle adjustment Use the 13 # open wrench to slightly rotate the nuts on both sides of the bottom of the cushion (Figure 6), press the cushion head down with hand, and adjust to a more comfortable Angle. (it is recommended to adjust to the cushion head down one case) and lock the left and right nuts of the bottom.
- Page 16 The adjustment method of the seat cushion 6. Adjust the cushion before and after Turn the knob in the direction 1-2 laps, you can move the cushion back and forth, and then fix it in a position suitable for your own use Lock the knob in the right direction. Bicycle level adjustment Emergency brake bars used instructions...
- Page 17 As shown in the figure, rotate the L-shaped pull pin counterclockwise and loosen the 2-3 figure. Then pull the pin out with one hand, and then move the armrest instrument up and down with the other hand Tube, you can adjust up and down the comfortable height suitable for their own movement.
-
Page 18: Instructions Of The Electronic Watch
F I T NE SS SE RVI CE SYST E M H OME PAG E M a i n C o n t r o l I n t e r f a c e F u n c t i o n D e s c r i p t i o n... - Page 19 1.2 Function Description of Setting Interface 1.2.1 System Settings Description 1.2.2 Panel Setting Instructions...
- Page 20 1.2.3 De v i c e re s to ra t i o n i n s t r u c ti o n s Fault reporting Online hotline and after-sales contact information TO· 《 Help manual 》 Help&Manual Restore factory settings System formatting restore factory settings ·Help manual...
-
Page 21: Dowload The App Instructions
Dowload the APP instructions 1) Scan the QR code below and choose to download the YIFITAPP according to your mobile phone system type 2) Download and install and complete the registration and login 3) Follow the APP prompt to guide the connected device to use... -
Page 22: Instructions Of The Electronic Watch
I NST RU CT I ONS OF T H E E L E CT RONI C WAT CH Stretch motion recommendation, The right chart lists the correct posture for several basic stretching movements. Do stretching movements slowly, not suddenly. Touch your toes lightly to stretch them When standing, the knees are slightly curved, and the hips above are slowly bent forward. - Page 23 Two, How to improve the effect of exercise Like muscle exercise, aerobic exercise requires more blood flow and a higher heart rate, which improving the function of the cardiovascular system. Heart rate is generally judged by your pulse reading, your pulse is safe and effective, between the maximum heart rate of 87 % to 72% is called the training target area, training target should be gradually improved by making a training plan, at least 3-4 times a week, 15-20 minutes Warning: Do not try to exercise beyond the target heart rate, must gradually, if a history, under...
Need help?
Do you have a question about the MIC21 and is the answer not in the manual?
Questions and answers