Table of Contents
Advertisement
Quick Links
Advertisement
Table of Contents

Related Manuals for FRENCH FITNESS FF-AR


Summary of Contents for FRENCH FITNESS FF-AR
- Page 1 FF-AR FRENCH FITNESS FF-AR AIR ROWER OWNER’S MANUAL...
- Page 2 ...
-
Page 3: Table Of Contents
TABLE OF CONTENTS PRODUCT INFORMATION AND PARTS ............. 4 INSTRUMENT DESCRIPTION ................5 PRODUCT EXPLODED VIEW ................6 ATTACHED LIST ....................7 FRONT / FRONT SUPPORT ................8 CONNECTING SADDLE SLIDE RAILS AND FLY ........... 9 SEPARATE SADDLE RAIL AND BODY HEEL............10 ROWING MACHINE STORAGE METHOD ............ -
Page 4: Product Information And Parts
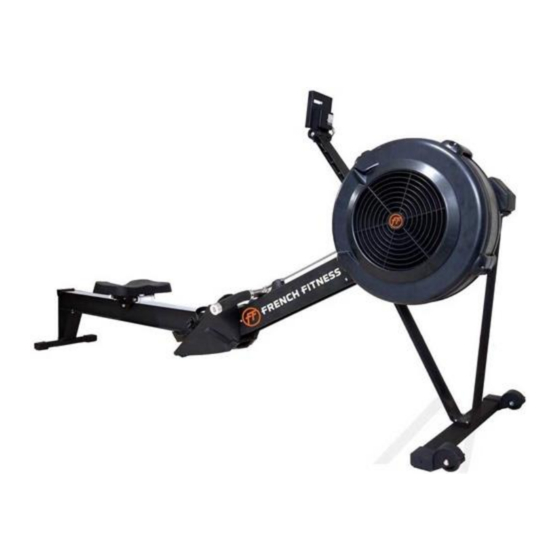
PR O DU C T IN F O R MATION A N D PA R TS Instrument panel Name of each part Fly-catching Rowing knob Saddle Slide rails Front support Back support Foot- xing plate Product information Saddle type Foot fixed, slide rail saddle Display information Time, Frequency, Distance, Calories, Total Distance Exercise intensity control... -
Page 5: Instrument Description
I N S TR U ME N T D E S CR I PT IO N INTERVAL 20/10 INTERVAL 10/20 REOOVERY ON/OFF TOTAL RESET Detail of fuction ■ Auto-power o ■ Time When you start a workout, press any button to turn on the instrument panel. Shows the total time that you have begun to If you do not use it for 4 minutes, the instrument panel will turn off automatically play silver. -
Page 6: Product Exploded View
PR O DU C T E XP LOD E D V I E W This page is for replacement parts and A / S. -
Page 7: Attached List
ATTACHE D L IS T This page is for replacement parts and A / S. Part Name Part Name... -
Page 8: Front / Front Support
F R ON T / FR ON T S UPP OR T Remove bolts and washers from front support The bolts and nuts used for assembly are attached to the front support (5). Remove bolt and washer from front support (5). Front support rst combination On the groove of the front support (5), connect the short support (7) column and the long support (4) column with bolts, washers and wrenches as shown. -
Page 9: Connecting Saddle Slide Rails And Fly
CONNECTING SADDLE SLIDE RAILS AND FLY Open the y-heel safety cap Between the feet of the assembled ywheel, the safety cap opens up to make the sound of the driver. Fly- ll and slide-lift Hold the foot strap of the opened y's hand with your safety cap and hold the saddle slide with your right hand. -
Page 10: Separate Saddle Rail And Body Heel
SEPARATE SADDLE RAIL AND BODY HEEL Open the ywheel safety cap Between the feet of the assembled flywheel, open the safety cap so that it clicks up. Lift the slide Lift the slide slightly and remove it from the main body. Caution * Always keep the safety cap locked when the ywheel and slide rail are connected. -
Page 11: Rowing Machine Storage Method
ROWING MACHINE STORAGE METHOD Be sure to separate the slide rail and y heel and place them as shown in the picture. Keep the ywheel down and keep it from shaking. caution * Please do not keep the product in your hands. -
Page 12: Rowing Machine Movement Posture
ROWING MACHINE MOVEMENT POSTURE The rst step of the lever (CATCH) posture adjustment: Do not straighten the spine, bend it below 30 degrees, and comfortably grasp the handle with one wrist. Medium (MIDDLE) posture Intermediate posture Use your leg muscles to hold the foot while keeping your arms straight. -
Page 13: Notes On Using Rowing Machines
NOTES ON USING ROWING MACHINES After you nish the rowing exercise, please hang the handle on the handle or the chain hook. Handle rack Chain hook Oil does not need to be injected into the handle chain. Always use the heel shaft lock mode when moving or using the rowing... - Page 14 NOTE S O N U S IN G R OWI NG M ACH IN E S Handle hanger Don't suddenly undo the handle. Hold the handle with both hands and pull with even force. May cause damage or failure. Do not pull the handle with one hand. Never turn o the handle or pull the handle to the left or right.
- Page 15 N OT E S ON U S I N G R OW IN G M AC H I N E S Do not allow children, companion animals, or ngers to Be careful not to get your clothes between the touch the saddle during the rowing workout. Saddle saddles.
Need help?
Do you have a question about the FF-AR and is the answer not in the manual?
Questions and answers