Advertisement
Table of Contents
If you received this item in a box that has printed on the
sides the REF numbers:
7306 TO 9999:
REF No. 7306
START ON THE NEXT PAGE UNTIL PAGE 12.
5000 TO 7305:
REF No. 5000
FOR QUESTIONS OR CUSTOMER SUPPORT PLEASE CONTACT US AT
support@rtaproducts.com
RTA-3802-GLS
ATTENTION!
START ON PAGE 13 UNTIL THE END.
REF No. 9999
TO
REF No. 7305
TO
Advertisement
Table of Contents

Related Manuals for RTA Products TECHNI MOBILI RTA-3802


Summary of Contents for RTA Products TECHNI MOBILI RTA-3802
- Page 1 RTA-3802-GLS ATTENTION! If you received this item in a box that has printed on the sides the REF numbers: 7306 TO 9999: REF No. 7306 REF No. 9999 START ON THE NEXT PAGE UNTIL PAGE 12. 5000 TO 7305: REF No. 5000 REF No.
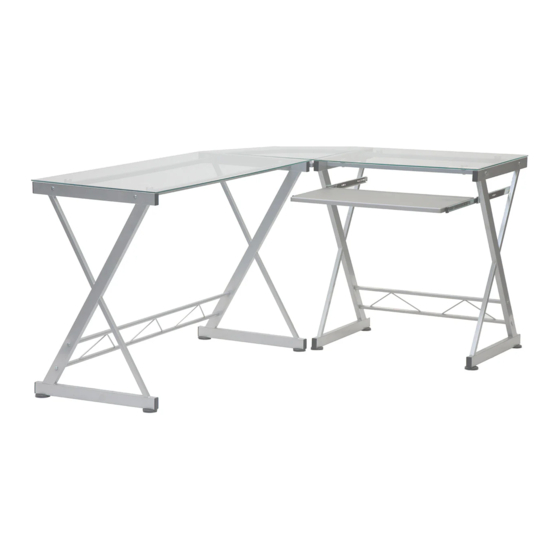
- Page 2 TEMPERED GLASS L-SHAPE CORNER DESK WITH PULL OUT KEYBOARD PANEL MODEL RTA-3802 ASEEMBLY INSTRUCTIONS REV.OL-7306-0523 Thank you for purchasing our product FRENCH VIDEO ARABIC Scan QR to view full Scan QR to view the Scan QR to view the assembly video manual in French manual in Arabic...
-
Page 3: Main Parts List
& Replacement Parts within the hardware listed below. 48 Contiguous United States: RTA Products will replace the part free of charge, while the customer is responsible Please email us at: for shipping costs plus any International local taxes or duties. -
Page 4: Hardware List
RTA-3802 MAIN PARTS LAYOUT (For reference) HARDWARE LIST INCLUDED TOOLS QTY DESCRIPTION ITEM PART Phillips Screwdriver M6x8 M5 Allen wrench M6x15 NOTE M6x25 If you decide to use your own power driver: M6x35 • Make sure to have the appropriate Phillips and hex bits. - Page 5 RTA-3802 BEFORE YOU START THE ASSEMBLY, PLEASE READ THE FOLLOWING TIPS AND WARNINGS. • The sections are interchangeable, however, the keyboard tray can only be assembled on the short section of the desk. • Do not discard this manual or any of the packaging material until the unit is completely assembled.
-
Page 6: Assembly Steps
RTA-3802 ASSEMBLY STEPS STEP 1 Install the glide studs 10 into the bottom of all the legs 1, 2, 3 and 4 all the way in; you can make leveling adjustments after the unit is fully assembled. ( T o ( T o ( T o ( T o... - Page 7 RTA-3802 STEP 3 With the help of another person, use screws D to assemble to the the Left leg 3 This step and the Right leg 4, the short back support 8 at the bottom, and the short bars 6 requires of at the top.
- Page 8 RTA-3802 STEP 5 Identify the FRONT of the sliders 9A, and assemble them to the legs 3 and 4 Hardware with screws E for the BACK, and screws F for the FRONT. M4x12 M4x22 Tools (included) (Front) (Back) (Both pieces are the same) E for the BACK holes F for the FRONT holes...
- Page 9 RTA-3802 STEP 6 OPTION A This step requires of • With the help of another person, place the sections close to each 2 persons other in "L" with the short section positioned on the LEFT. Hardware • Assemble the corner frame 11 to the legs 1 and 4 by inserting the bolt H through the corner frame and the legs, and the screw B M6x15 catching the bolt on the other side as shown.
- Page 10 RTA-3802 STEP 7 This step With the help of another person, carefully place the long glass top 12 over the requires of bars 5 from the long frame, and the short glass top 13 over the bars 6 from the 2 persons short frame, making the round metal discs coincide with the holes.
- Page 11 RTA-3802 STEP 8 First attach the suction cups I to the corner frame 11. Hardware Then carefully place the corner glass 14 over the corner frame and secure it with screw A from underneath. The screw goes through the frame and into the M6x8 metal disc on the glass.
- Page 12 RTA-3802 P.10 P.10 STEP 9 Place the keyboard 15 panel upside-down with its front towards you, and Hardware assemble on the sides the sliders 9B with screws G, paying attention to the orientation as shown in the illustration. The screws go through the tabs on the M4x14 sliders and into the wood of the panel.
- Page 13 RTA-3802 P.11 P.11 WEIGHT LIMITS 66 Lbs 66 Lbs (30 Kg) (30 Kg) 22 Lbs (10 Kg) WARNINGS • Do not exceed the indicated weight limits. • Do not expose the surfaces to direct sunlight or to extreme environmental conditions. •...
- Page 14 RTA Products LLC will replace any defective part, at its discretion, and without charge to the original purchaser other than the freight from the end consumer to RTA Products.
- Page 15 RTA-3802 P.13 P.13 L-SHAPED GLASS COMPUTER DESK MODEL: RTA-3802 Thanks for purchasing one of our products, please read carefully the assembly instructio�s before the installation (Attention:Do r:,ot tighten the screws before all screws are in place)
- Page 16 P.14...
- Page 17 P.15...
- Page 18 P.16...
- Page 19 P.17...
- Page 20 P.18...
- Page 21 P.19...
- Page 22 Tight well all the Screws and enjoy your unit P.203 Ajuste bien todos los T omillos y disfrute su unidad. Cleaning: Surfaces must be cleaned with a solution of a smooth soap and water, then cleared with a dry towel. Do not use solvents over Surfaces or structural tubes.
- Page 23 RTA-3802 P.21 P.21 WEIGHT LIMITS 66 Lbs 66 Lbs (30 Kg) (30 Kg) 22 Lbs (10 Kg) WARNINGS • Do not exceed the indicated weight limits. • Do not expose the surfaces to direct sunlight or to extreme environmental conditions. •...
- Page 24 RTA Products LLC will replace any defective part, at its discretion, and without charge to the original purchaser other than the freight from the end consumer to RTA Products.
Need help?
Do you have a question about the TECHNI MOBILI RTA-3802 and is the answer not in the manual?
Questions and answers