
Related Manuals for Humanscale float mini


Summary of Contents for Humanscale float mini
- Page 1 Assembly Instructions North America: +1 800 400 0625 Europe: +353 (0)1 858 0910 Asia Pacific: +8522581 0570...
-
Page 2: Parts Included
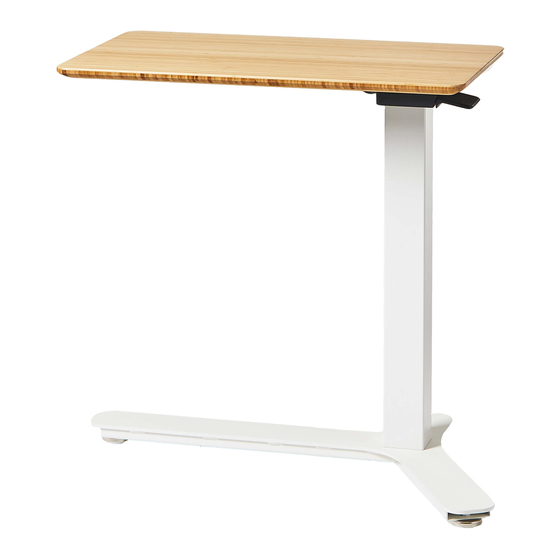
Tools Required phillips head screwdriver Parts Included ① ② ③ Mounting Plate Work Surface ④ ⑤ ⑥ Column with Base 3x Glides 3x Casters Actuator *Optional ⑦ ⑨ ⑫ 3x M6x25mm Screws 4x #8x38mm Screws 2x Cable Clip ⑧ ⑩ ⑬... - Page 3 Assembly Instructions Attach mounting plate to column Assemble the mounting plate onto the column with the M6x35mm (4) screws using the 4mm hex key provided. Mounting location Cable exit, this direction Attach work surface Place the work surface upside down on a protective surface. Secure the mounting plate onto the worksurface with the #10x19mm (9) screws provided.
- Page 4 Attach base Assemble the base to the column with the M6x25mm (3) screws using the 4mm hex key provided. *This step may require 2 people for safety in order to balance the base. Attach glides/ casters Install glides or casters into the indicated holes on bottom of base. For casters, ensure full installation by rotating fixed nut on threaded stem into holes of base using the 12mm open wrench provided.
- Page 5 Attach height actuator Secure the actuator to the worksurface in your desired location using the #8x38mm (4) screws provided. Refer to the hole locations below. For right handed actuation For left handed actuation Attach cable clip Secure the cable clip using the #6x16mm screw provided. Hole location shown below . (Base not visible) (1 extra cable clip and screw included) For left handed actuation For right handed actuation...
-
Page 6: Instructions D'assemblage
Instructions d'assemblage Instructions d’assemblage Français Fixez la plaque de montage à la colonne Outils nécessaires Assemblez la plaque de montage sur la colonne avec les 4 vis M6 de 35 mm à l’aide tournevis cruciforme de la clé hexagonale fournie. Pièces incluses Fixez la surface de travail ①... -
Page 7: Instrucciones Importantes De Seguridad
Instrucciones de montaje Instrucciones de montaje Español Fijar la placa de montaje a la pata Fije la placa de montaje a la pata con los Herramientas necesarias tornillos M6x35 mm (4) utilizando la llave hexagonal de 4 mm provista. destornillador de estrella Colocar la superficie de trabajo Piezas incluidas Coloque la superficie de trabajo boca abajo... - Page 8 For our terms and conditions please go to https://www.humanscale.com/about/legal-information/terms-conditions.cfm © 2021 Humanscale Corporation. The text and artwork are copyrighted materials. All rights reserved. The Humanscale mark and logo are trademarks of Humanscale Corporation and are registered in the United States and certain other countries.
Need help?
Do you have a question about the float mini and is the answer not in the manual?
Questions and answers