Advertisement
Support and E-Warranty Certificate www.vevor.com/support
VEGETABLE CUTTER
INSTRUCTION MANUAL
We continue to be committed to providing you with tools at a competitive price. "Save Half",
"Half Price" or any other similar expressions used by us only represent an estimate of savings
you might benefit from buying certain tools with us compared to the major top brands and do
not necessarily mean to cover all categories of tools offered by us. You are kindly reminded to
verify carefully when placing an order with us if you are actually saving half compared to the
top major brands.
Advertisement
Table of Contents

Subscribe to Our Youtube Channel
Summary of Contents for VEVOR JKC-300
- Page 1 Support and E-Warranty Certificate www.vevor.com/support VEGETABLE CUTTER INSTRUCTION MANUAL We continue to be committed to providing you with tools at a competitive price. "Save Half", "Half Price" or any other similar expressions used by us only represent an estimate of savings you might benefit from buying certain tools with us compared to the major top brands and do not necessarily mean to cover all categories of tools offered by us.
- Page 2 CustomerService@vevor.com This is the original instruction, please read all manual instructions carefully before operating. VEVOR reserves a clear interpretation of our user manual. The appearance of the product shall be subject to the product you received. Please forgive us that we won't inform you again if there are any technology or software updates on our product.
- Page 3 Symbol Symbol Description Warning - To reduce the risk of injury, user must read instructions manual carefully. This symbol, placed before a safety comment, indicates a kind of precaution, warning, or danger. Ignoring this warning may lead to an accident. To reduce the risk of injury, fire, or electrocution, please always follow the recommendation shown below.
- Page 4 Important Assurance WARNING: Before operating this device, please read this instruction manual completely and keep it handy for future reference. Always follow basic safety precautions when using these devices. These include: READ All OPERATING INSTRUCTIONS AND PRODUCT SAFETY LABELS! FAILURE TO FOLLOW ALL INSTRUCTIONS MAY RESULT IN SERIOUS INJURY OR PROPERTY DAMAGE! CHECK FOR DAMAGED PARTS: Before using the machine, check whether all parts work normally and perform the expected functions.
- Page 5 11. DO NOT USE WITH EXTENSION CORD. Always plug directly into a grounded wall receptacle. 12. Place the machine on a firm and stable surface. Ensure that the grinder is not placed near the edge of the worktop, where it can be easily pushed off or fall. 13. To reduce the risk of unintentional starting, check that the control is OFF befor e plugging the cord into wall outlet. To disconnect, turn the controller to OFF, t hen remove plug from wall outlet. 14. NEVER plug the machine in where water may flood the area. 15. To protect against the risk of electrical shock, DO NOT submerge the machine in water or other liqui ds. Be sure the grinder is disconnected from the power source before cleanin 16. The use of attachments or parts not specifically recommended or sold by the manufacturer for this grinder will void the warranty and may cause fire, electri c shock or injury. 17. DO NOT use the machine for other than intended use. 18. DO NOT attempt to cut bones, nuts or other hard items. It only use for fruits and vegetables.
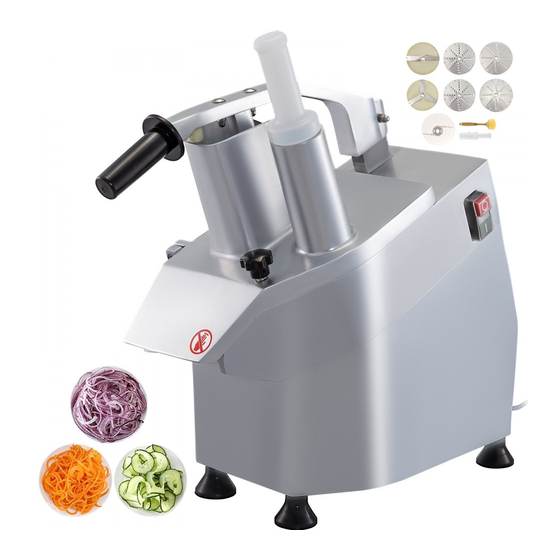
- Page 6 Configuration & Accessories H3*1pc Shredder disc-3mm H4*1pc Shredder disc-4mm - 5 -...
-
Page 7: Technical Parameter
H7*2pcs Shredder disc-7mm P2*1pc Slicing disc-2mm P4*1pc Slicing disc-4mm Pusher bar Brush Rubber Gloves 10 couple Technical Parameter Continuous working RATINGS Capacity time 110V/60Hz 280r/min 550W ≥300KG/H ≥4hours 230V/50Hz 270r/min Operation Instructions 1.Install the handle - 6 -... -
Page 8: Clean And Maintenance
After unpacking, place the machine on a horizontal table top and install the handle at the end of the handle of the machine. 2. Setting the discs Rotate the knob and open the cover.Set the plastic ejecting disc first, then the disc elected for the cutting.Close the cover and reverse the rotation of the handle. - Page 9 blade is prolonged. 3.Clean the machine, and above all where the discs rest, with a cloth or a sponge wet with warm water, accurately remove all wastes to prevent the discs from changing their position. 4.Clean the surfaces with water and soap, alcohol, detergents without abrasives or substances based on chlorine or soda.Never use abrasives, steel wool, or similar products, as they may damage the paint.
-
Page 10: Explosion Diagram
Explosion Diagram - 9 -... -
Page 11: Environmental Protection
Environmental Protection This product is subject to the provision of European Directive 2012/19/EC. The symbol showing a wheelie bin crossed through indicates that the product requires separate refuse collection in the European Union. This applies to the product and all accessories marked with this symbol. Products marked with this symbol cannot be discarded with normal household waste but must be taken to an electrical and electronic equipment collection point for recycling. - Page 12 Support and E-Warranty Certificate www.vevor.com/support...


Need help?
Do you have a question about the JKC-300 and is the answer not in the manual?
Questions and answers