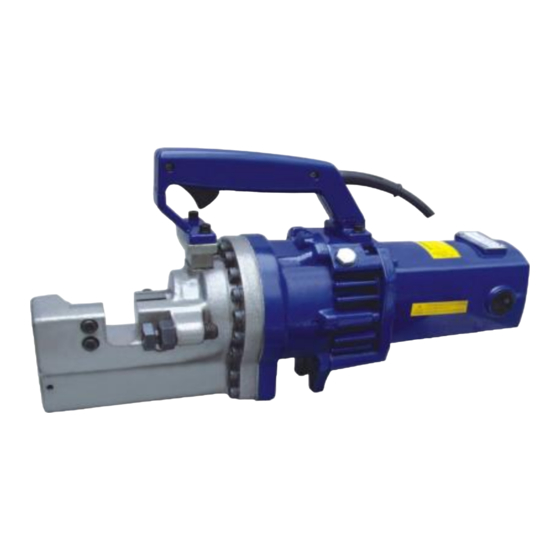
VEVOR RC-16 User Manual

VEVOR RC-16 User Manual

Electric rebar cutter

Advertisement

Technical Support and E-Warranty Certificate www.vevor.com/support
ELECTRIC REBAR CUTTER
USER MANUAL
MODEL: RC-16 RC-20 RC-22 RC-25
We continue to be committed to provide you tools with competitive price.
"Save Half", "Half Price" or any other similar expressions used by us only represents an
estimate of savings you might benefit from buying certain tools with us compared to the major
top brands and doses not necessarily mean to cover all categories of tools offered by us. You
are kindly reminded to verify carefully when you are placing an order with us if you are
actually saving half in comparison with the top major brands.

Advertisement

Table of Contents
loading
Need help?

Need help?

Do you have a question about the RC-16 and is the answer not in the manual?

Questions and answers

Subscribe to Our Youtube Channel

Summary of Contents for VEVOR RC-16

  • Page 1 Technical Support and E-Warranty Certificate www.vevor.com/support ELECTRIC REBAR CUTTER USER MANUAL MODEL: RC-16 RC-20 RC-22 RC-25 We continue to be committed to provide you tools with competitive price. "Save Half", "Half Price" or any other similar expressions used by us only represents an estimate of savings you might benefit from buying certain tools with us compared to the major top brands and doses not necessarily mean to cover all categories of tools offered by us.
  • Page 2 CustomerService@vevor.com This is the original instruction, please read all manual instructions carefully before operating. VEVOR reserves a clear interpretation of our user manual. The appearance of the product shall be subject to the product you received. Please forgive us that we won't inform you again if there are any technology or software updates on our product.
  • Page 3: Table Of Contents

    Read this instructions carefully before attempting to use cutters. Ignorance of proper operating procedure can lead to accidents. If in doubt about any procedure, contact your nearest authorized agent. Contents General Safety Precautions ..................2 Parts and Specifications..................8 Operating Instructions ...................9 Pre-use Checks ....................9 Warm up ......................10 Stopper Adjustment ..................10...
  • Page 4 Symbol Symbol Description Warning - To reduce the risk of injury, the user must read instructions manual carefully. This symbol, placed before a safety comment, indicates a kind of precaution, warning, or danger. Ignoring this warning may lead to an accident. To reduce the risk of injury, fire, or electrocution, please follow the recommendation below.
  • Page 5 General Power Tool Safety Warnings - Electrical safety a) Power tool plugs must match the outlet. Never modify the plug in any way. Do not use any adapter plugs with earthed (grounded) power tools. Unmodified plugs and matching outlets will reduce risk of electric shock. b) Avoid body contact with earthed or grounded surfaces, such as pipes, radiators, ranges and refrigerators.
  • Page 6 injury. e) Refrain from overreaching. Keep proper footing and balance at all times. This enables better control of the power tool in unexpected situations. f) Dress properly. Do not wear loose clothing or jewelry. Keep your hair and clothing away from moving parts. Loose clothes,jewelry or long hair can be caught in moving parts.
  • Page 7 performed. Use of the power tool for operations different from those intended could result in a hazardous situation. h) Keep handles and grasping surfaces dry, clean and free from oil and grease. Slippery handles and grasping surfaces do not allow for safe handling and control of the tool in unexpected situations.
  • Page 8 Guard against electric shock To avoid possible electric shock, do not handle the cutter with wet hands or use the cutter in rain or damp places. In addition, be aware of all power lines, electric circuits, and other hazards that may be contacted, especially those below the surface or otherwise hidden from view.
  • Page 9: Parts And Specifications

    When not in use, store the cutter and accessories in a dry place where unauthorized people can't access them. Parts and specifications Main Parameters Model RC-16 RC-20 RC-22 RC-25 Voltage ± 5% 110VAC 110VAC 110VAC 110VAC Wattage 900 W 1250 W...
  • Page 10: Warm Up

    2. Check condition of cutter blocks and tightness of cutter block bolts. ! Caution: Using loose or cracked cutter blocks may result in injury to operators as well as damage to unit. 3. Check that the power source is appropriate for the cutter. Care: If voltage is too high , the motor will burn out.
  • Page 11: Cutting

    Insert rebar fully into U-shaped support. Make sure that rebar is resting on the base of the stopper. Keeping rebar at right angels (90°) to front cutter block, screw out stopper until it touches the rebar. Once set, the stooper needs no further adjustment while cutting rebar of the same diameter, but must be re-set for a different size rebar.
  • Page 12: Maintenance

    advance piston. Unplug unit. And check piston and housing for accumulated dust iron filings that may be jamming the piston. After cleaning, piston still does not automatically retract when fully extended, the piston itself may be damaged. Return the unit to an authorized agent for repair. Maintenance Cutter blocks Before using, always check that the two bolts on each cutter block are properly...
  • Page 13: Oil Change

    it will cause diarrhoea and vomiting. In case of eye contact, rinse in clean water for at least 15 minutes and consult a physician. In case of skin contact, wash thoroughly with soap and water. In case of ingestion, consult a physician immediately. Do not deliberately induce vomiting.
  • Page 14: Bolt Tightness

    Unplug unit and remove oil-plug . Top up oil level and replace plug. 3.Finally follow procedure for oil level check. Note: Dispose of hydraulic oil following local regulations. Do not pour into the sea, river, lake or drains. Bolt tightness Once a week or after every 500 cuts, check the tightness of all bolts, especially those securing the housing to the cylinder.
  • Page 15 - 14 -...
  • Page 16 Parts Name Parts Name Parts Name Tapping Screw Cylinder Spring M4×60 Ball Bearing Cutter Head Stator Coil Piston Air Bag Motor Housing Return Spring Locating Sleeve Oil Valve Foot Stand Hexagon Socket Valve Spring Screw Screw M5×85 Hexagon Socket Spring Guide Gasket Set Screw M4×5 Pump Seal...
  • Page 17 Hexagon Socket Rubber Push Snap Ring Screw M5 x 18 Button Snap Ring Cutter Block / Blade Housing Cover Pump Case Oil Tapping Screw Spring Washer Ф5 Seal 15×25×7 M4x20 Hexagon Socket Screw M5×16 Bearing 6002 Spring Compound Hex Socket Screw Safety Cap Gasket Ф10 M10x40...
  • Page 18 Parts Name Parts Name Parts Name Cutter Head Piston Cable Armor Gasket Ring Spring 40×50×6 Oil Valve Cutter Block / Spring Gum Washer Blade Air Bag Spring Guide Bearing 6200 Oil Seal Wave Washer Filter Magnet Bolt M4*8 Screw Gasket Bolt M8*25 O Ring Pump Case...
  • Page 19 Cutter Block / Compound Gasket Bolt M6*20 Blade Ф10 Hexagonal Oil Seal 20×35×8 Bolt M6*20 Screw Bearing 104 Bolt M6*25 Big Spring Connecting Block Bolt M6*50 Gasket Handle Bolt M6*20 Cutter Rod Handle Cover Washer Gasket Ring Photosphere Bolt M4*12 80×95×9 Ф4.763 Return Shaft...
  • Page 20 Technical Support and E-Warranty Certificate www.vevor.com/support...

This manual is also suitable for:

Rc-20Rc-22Rc-25

Table of Contents