Table of Contents
Advertisement
Quick Links
CD-3604JK
2D Image Scanner
User Manual
Package Contents
CD-3604JK 2D Image Scanner with Mounting Bracket
1 #6/32 Screw
USB cable
User Manual
CD-3604JK Scanner Module
Trigger Button
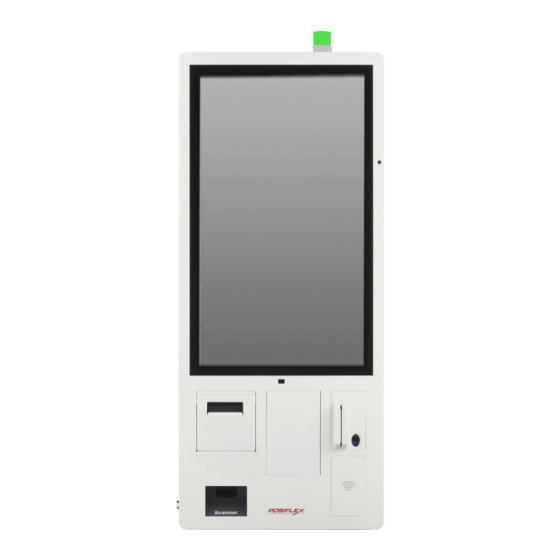
Installing CD-3604JK to JK Series Kiosk
1.
Connect the RJ45 connector of the USB cable to the scanner.
2.
Unlock and open the touch monitor.
For JK-24xx/27xx Series:
Open the touch monitor like the door refer to the below picture.
CD-3604JK Ver. A0
1
Scan Window
w/ Object Detector
Beeper Hole
1
Mounting Screw Hole
Interface Cable Connector
Advertisement
Table of Contents

Summary of Contents for POSIFLEX CD-3604JK
- Page 1 CD-3604JK 2D Image Scanner User Manual Package Contents CD-3604JK 2D Image Scanner with Mounting Bracket 1 #6/32 Screw USB cable User Manual CD-3604JK Scanner Module Trigger Button Scan Window w/ Object Detector Mounting Screw Hole Beeper Hole...
- Page 2 For JK-32xx Series: Hold two sides of the touch monitor and then gently pull it out towards you slowly. Once the crank rod stopper drops down slowly begin to release the touch monitor until it stops. Crank Rod Stopper for Touch Monitor...
- Page 3 Align the screw hole on the scanner bracket with the screw hole under the thermal printer, and then fix the scanner bracket to the kiosk with one #6/32 screw. Please refer to the picture below. For JK-24xx/27xx Series: For JK-32xx Series:...
-
Page 4: Scanner Maintenance
Connect the USB connector of the cable to the system computer. You can refer to the Cable Routing sticker on the system computer. Remove the dummy door inside the touch monitor, and then fix the 2D scanner bracket to the touch monitor with four hex nuts. For JK-24xx/27xx Series: For JK-32xx Series: Scanner Maintenance... -
Page 5: Default Settings
Problem Diagnostic Tips The scanner does not accept more Determine whether the required barcode types than two or three barcode labels. are enabled or not. A stray barcode is sitting somewhere in the scanner field of view. Remove all barcode labels from the scanner’s scan volume and try again. -
Page 6: Firmware Version
programming barcode, or reboot the engine. Enter Setup Exit Setup Trigger Mode The scanner for JK series model is auto trigger by default. The manual trigger button is for scanner setup. It is highly recommended that the scanner setup is implemented by professional technicians. - Page 7 USB HID-KBW (default) $>:S0F0116.<$ USB HID POS $>: S0F0516.<$ USB Virtual COM $>: S0F0216.<$ RS232 $>: S0F0016.<$ Illumination A couple of illumination options are provided to improve the lighting conditions during every image capture: Before setting, please scan the Enter Setup barcode on P.6. After setting, please scan the Exit Setup barcode on P.6.
-
Page 8: Good Read Beep Frequency
Always On $>:S0C0800.<$ Aiming When scanning/capturing image, the engine projects an aiming pattern which allows positioning the target barcode whining its field of view and thus makes decoding easier. Before setting, please scan the Enter Setup barcode on P.6. After setting, please scan the Exit Setup barcode on P.6. $>:S300000.<$ Reading On (Lit when reading, default) $>:S301000.<$... - Page 9 $>:SFFDA27.<$ Medium $>:SFF4B27.<$ Loud (default) $>:SFF2527.<$ Prompt Tone Duration Before setting, please scan the Enter Setup barcode on P.6. After setting, please scan the Exit Setup barcode on P.6. 40ms (Short) $>:SFF1F28.<$ 80ms (Middle) (default) $>:SFF3E28.<$ 120ms (Long) $>:SFF5D28.<$ Good Read Tone Sound Before setting, please scan the Enter Setup barcode on P.6.
- Page 10 $>:S030018.<$ Medium $>:S030118.<$ Loud $>:S030218.<$ Enabling/Disabling of readable codes Before setting, please scan the Enter Setup barcode on P.6. After setting, please scan the Exit Setup barcode on P.6. Enable All Barcodes $>:S010187.<$ Disable All Barcodes $>:S010087.<$ Enable All 1D Codes $>:S020287.<$ Disable All 1D Codes $>:S020087.<$...
- Page 11 Enable All 2D Codes $>:S040487.<$ Disable All 2D Codes $>:S040087.<$ Enable Code128/AIM128/EAN128/NL128 (default) $>:S010188.<$ Disable Code128/AIM128/EAN128/NL128 $>:S010088.<$ Enable UPC/EAN/ISSN/ISBN (default) $>:S010189.<$ Disable UPS/EAN/ISSN/ISBN $>:S010089.<$ Enable Codabar $>:S01018C.<$...
- Page 12 Disable Codabar (default) $>:S01008C.<$ Enable Code 39 (default) $>:S01018A.<$ Disable Code 39 $>:S01008A.<$ Enable Code 32 (default) $>:S0101AB.<$ Disable Code 32 $>:S0100AB.<$ Enable Code 93 (default) $>:S01018D.<$ Disable Code 93 $>:S01008D.<$...
- Page 13 Enable Code 11 $>:S01018F.<$ Disable Code 11 (default) $>:S01008F.<$ Enable ITF-25/ITF-14/ITF-6/Deutsche12/Deutsche14 (default) $>:S01018B.<$ Disable ITF-25/ITF-14/ITF-6/Deutsche12/Deutsche14 $>:S01008B.<$ Enable Industrial 25 $>:S010193.<$ Disable Industrial 25 (default) $>:S010093.<$ Enable Matrix 25 $>:S01018E.<$...
- Page 14 Disable Matrix 25 (default) $>:S01008E.<$ Enable NEC 25/Japan Matrix 25 $>:S01019E.<$ Disable NEC 25/Japan Matrix 25 (default) $>:S01009E.<$ Enable Standard 25 $>:S010192.<$ Disable Standard 25 (default) $>:S010092.<$ Enable Data Logic 25 $>:S01019F.<$ Disable Data Logic 25 (default) $>:S01009F.<$...
- Page 15 Enable MSI-Plessey $>:S010191.<$ Disable MSI-Plessey (default) $>:S010091.<$ Enable Plessey $>:S0101A0.<$ Disable Plessey (default) $>:S0100A0.<$ Enable RSS-EXP/RSS_14/GS1 Data $>:S010190.<$ Disable RSS-EXP/RSS_14/GS1 Data (default) $>:S010090.<$ Enable Telepen $>:S010194.<$...
- Page 16 Disable Telepen (default) $>:S010094.<$ Enable Pharma Code One-Track $>:S0101A1.<$ Disable Pharma Code One-Track (default) $>:S0100A1.<$ Enable Pharma Code Two-Track $>:S0101A2.<$ Disable Pharma Code Two-Track (default) $>:S0100A2.<$ Enable AZTEC $>:S01019A.<$ Disable AZTEC (default) $>:S01009A.<$...
- Page 17 Enable CODABLOCK A $>:S01019C.<$ Disable CODABLOCK A (default) $>:S01009C.<$ Enable CODABLOCK F $>:S01019D.<$ Disable CODABLOCK F (default) $>:S01009D.<$ Enable Data Matrix (default) $>:S010197.<$ Disable Data Matrix $>:S010097.<$ Enable MaxiCode $>:S010199.<$...
- Page 18 Disable MaxiCode (default) $>:S010099.<$ Enable PDF417 (default) $>:S010195.<$ Disable PDF417 $>:S010095.<$ Enable Micro PDF $>:S0101A3.<$ Disable Micro PDF (default) $>:S0100A3.<$ Enable Micro QR $>:S010198.<$ Disable Micro QR (default) $>:S010098.<$...
- Page 19 Enable Han Xin Code $>:S01019B.<$ Disable Han Xin Code (default) $>:S01009B.<$ Enable DOTCODE $>:S0101AE.<$ Disable DOTCODE (default) $>:S0100AE.<$ Allow ID Card Reading $>:S0101AC.<$ Prohibit ID Card Reading (default) $>:S0100AC.<$ Allow Passport Reading $>:S0202AC.<$...
-
Page 20: Driver Download
**Test conditions: Scan Distance=(min. DOF + max. DOF)/2; T=25°C; Illumination=200lux using incandescent lamp. ※ The product information and specifications are subject to change without prior notice. To get the detailed information of the CD-3604 series, please check this model from Posiflex Global Website. (https://download.posiflex.com/en- global/Download/index/manualUinstall_guide/Kiosk/CachetJK-2400Series). Or download...


Need help?
Do you have a question about the CD-3604JK and is the answer not in the manual?
Questions and answers