Advertisement
Quick Links
CD-3601K/3621K
2D Image Scanner
User Manual
CD-3621K for TK-21xx Series Kiosk
Package Contents
CD-3621K 2D Image Scanner
USB cable
CD-3601K for TK-32xx Series Kiosk
Package Contents
CD-3601K 2D Image Scanner with Mounting Bracket for TK-32xx
Series Kiosk
USB cable
CD-3601K/3621K Ver. C0
1
Firmware Version
Advertisement

Related Manuals for POSIFLEX CD-3601K


Summary of Contents for POSIFLEX CD-3601K
- Page 1 CD-3621K for TK-21xx Series Kiosk Package Contents CD-3621K 2D Image Scanner USB cable CD-3601K for TK-32xx Series Kiosk Package Contents CD-3601K 2D Image Scanner with Mounting Bracket for TK-32xx Series Kiosk USB cable Firmware Version CD-3601K/3621K Ver. C0...
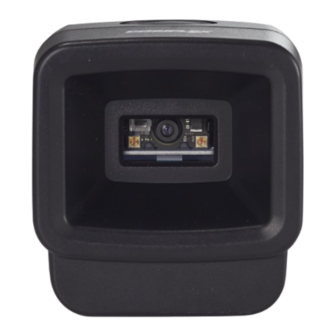
- Page 2 Parts of the 2D Image Scanner CD-3601K Scanner Module Trigger Button Scan Window w/ Object Detector Mounting Screw Hole Beeper Hole Interface Cable Connector CD-3621K Scanner Module Beeper Interface Scan Window Cable w/ Object Detector Connector Installing CD-3621K to TK-21xx Series Kiosk Turn the key of the belly system unit to the right.
- Page 3 (1) Push upwards the pusher on the left side of the printer in the belly system unit and then (2) open the monitor. Remove the bracket inside the kiosk with four hex nuts. Fix the scanner in the belly system from inside with four original hex nuts.
- Page 4 Connect the speakers with the speaker cables from the main board. Please refer to the picture. Connect the “USB to RJ45 cable” with scanner and main board. Put the cable in order through cable clamps like the picture. Connect the “USB to RJ45 cable”...
- Page 5 10. Push the front door of the belly system unit to slide close like a drawer. Installing CD-3601K to TK-32xx Series Kiosk Turn key to the right, then open the front door. Hold two sides of the monitor to pull out the monitor from the bottom side.
- Page 6 Put the scanner with mounting bracket inside the kiosk, and then fix it with four hex nuts. Put the speaker on the mounting bracket, and then fix it with two M3-8L screws. Connect the “USB to RJ45 cable” to the scanner. Route the cable like the picture on the right side.
- Page 7 Route the cable and then connect the cable to the main board refer to the below picture.
- Page 8 Pull the monitor out a bit, lift the crank stopper up with one finger, and then push the monitor back to the back chassis until the monitor is stuck. Pull the monitor out a bit, lift the crank stopper up Push the a little monitor back to...
- Page 9 Scanner Maintenance The scanner is designed for long-term trouble-free operation and rarely requires any maintenance. Only an occasional cleaning of the scanner window is necessary in order to remove dirt and fingerprints. Wipe the scan window with a soft lint-free cloth and a non-abrasive cleaner to avoid the scan window from being scratched and damaged.
- Page 10 Problem Diagnostic Tips A barcode is read by the scanner but The communication settings of the system port and not accepted by the POS system. the scanner do not match. Adjust the settings to make them match to each other. The scanner is not installed well.
- Page 11 Defaults Barcode Setting ✽ The setting barcodes are not used for user interface switch but only for customer defaults setting. RS232 USB-HID USB-VCP Buzzer Settings Disable buzzer Enable buzzer...
- Page 12 Buzzer loudness: Loud Buzzer loudness: Normal Trigger Mode Auto Trigger The Auto Trigger option is a function that automatically detects a scanned target and starts reading. There are three methods for detecting a target code. 1. Green aiming detection When a target code falls within the aiming range while the green aiming light is emitted, the target is detected.
- Page 13 Red Illumination Detection No Illumination Detection Manual Trigger (Disable Auto Trigger) The Manual Trigger (Disable Auto Trigger) option is a function that detects a scanned target and starts reading by manually pressing the trigger button of the scanner. The Disable Auto Trigger (Manual Trigger) option is available ONLY for a scanner that has a trigger button, for example, CD-3200 series and CD-3600 series.
- Page 14 Enable Interleaved 2of5 Enable Chinese Post Matrix 2of5 Enable POSTNET Enable MSI/Plessey Enable UK/Plessey Enable Code 128 Enable GS1-Databar Enable GS1-Databar Limited Enable GS1-Databar Expanded Enable QR Code...
- Page 15 Enable PDF417 Setting Code Specific Options UPC-A, No leading zero, transmit CD UPC-A, No leading zero, not transmit CD UPC-A, Leading zero, transmit CD UPC-A, Leading zero, not transmit CD Options for UPC-E UPC-E, No leading digit, transmit CD UPC-E, No leading digit, not transmit CD UPC-E, Leading digit, transmit CD UPC-E, Leading digit, not transmit CD...
- Page 16 Options for EAN-13 and EAN-8 EAN-13 not transmit CD EAN-13 transmit CD EAN-8 not transmit CD EAN-8 transmit CD Disable ISBN translation Enable ISBN translation Case Conversion No case conversion Convert to upper case Convert to lower case...
- Page 17 Floodlight and Aiming Options Disable floodlight Enable floodlight Alternating floodlight Baud Rate Settings 9600 baud 19200 baud 38400 baud 57600 baud Data, Parity and Stop Bits 7 data bits...
- Page 18 8 data bits No parity Even parity Odd parity 1 stop bit 2 stop bits Handshaking Barcode Setting No handshake Busy/ready XON/XOFF...
- Page 19 ACK/NAK Flow Control time out 200ms Intercharacter Delay for RS232 No delay 20 ms delay 50 ms delay 100 ms delay Keyboard Wedge/USB Options With keyboard Without keyboard...
- Page 20 Keyboard Language German French Dutch Japanese Special Options Do not use numpad Use numpad Auto numlock mode No CAPSLOCK mode...
- Page 21 CAPSLOCK mode Auto CAPSLOCK mode Intercharacter Delay for Wedges/USB No delay Delay = 1 Delay = 3 Delay = 5 Delay = 7 Delay = 9...
- Page 22 DataMatrix 30~150mm (Resolution(0.31mm)) (Measured from the front end of the scanner) ※ The product information and specifications are subject to change without prior notice. To get the detailed information on CD-3601K_3621K, please check this model from Posiflex Global Website.
Need help?
Do you have a question about the CD-3601K and is the answer not in the manual?
Questions and answers