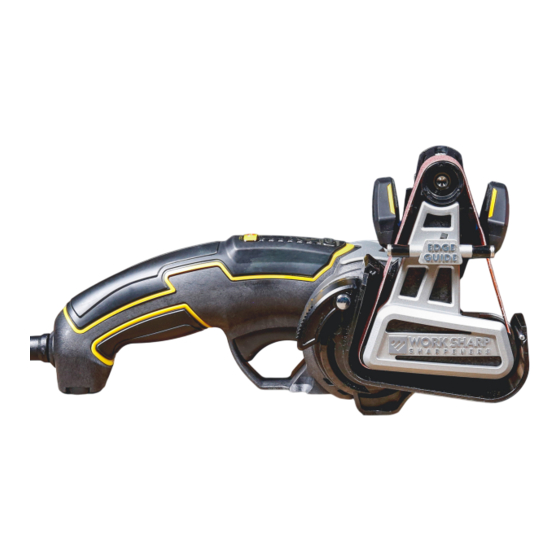
Summary of Contents for Work Sharp KEN ONION EDITION KNIFE & TOOL SHARPENER MK.2
Page 1
U S E R ’ S G U I D E F O R T H E KEN ONION EDITION KNIFE & TOOL SHARPENER MK.2 W S K T S - K O 2 WAT C H D E M O •...
Page 2
KEN ONION DESIGNED, WORK SHARP ENGINEERED Work Sharp partnered with legendary hall-of-fame knife maker Ken Onion to develop new, innovative sharpeners! The combination of Work Sharp engineered and Ken Onion’s industrial design has created a fast, easy and stylish way to sharpen all your knives and tools with precision and repeatability.
SAFETY INFORMATION • WARNING! You will be creating incredibly sharp knives with this sharpener. Always keep your fingers, hands, and body clear of the knife edge. Failure to follow these warnings could result in severe injury or death. GENERAL POWER TOOL SAFETY WARNINGS •...
Page 5
3) PERSONAL SAFETY a) Stay alert, watch what you are doing and use common sense when operating a power tool. Do not use a power tool while you are tired or under the influence of drugs, alcohol or medication. A moment of inattention while operating power tools may result in serious personal injury.
Have your power tool serviced by a qualified repair person using only identical replacement parts. This will ensure that the safety of the power tool is maintained. WORK SHARP Mail ........210 E. Hersey St. Ashland OR 97520 USA Phone ........1 (800) 597-6170 Fax .........1 (541) 552-1377...
• Extended, continuous use beyond 30 minutes per hour. WARRANTY This sharpener is covered by Work Sharp’s 3-year warranty. We stand behind and support our products – contact us if you need assistance, parts, or service. Warranty for consumer not industrial or commercial use, excludes abrasives.
SHARPENING BASICS WHAT EDGE ANGLE AND WHY? Our recommendations (found in the Sharpening Reference Chart, pg 15) are based on our extensive testing and driven by three primary factors: 1) Optimizing the edge angle for the intended purpose of the knife. 2) Optimizing edge retention for the knife’s purpose.
ANGLE CHANGES - WHAT TO EXPECT WITH A DECREASED ANGLE DURATION: If you are sharpening a knife to an angle lower than the factory grind (ex.: factory 25° sharpening to a 15°), you should expect this process to take longer. This is due to the amount of material being removed to “thin” the edge. BEVEL HEIGHT: You should also expect the look of your edge to change if you are decreasing the edge angle.
Page 10
GETTING TO KNOW YOUR KEN ONION SHARPENER SHARPENING GUIDE SLOTS SCISSOR GUIDE EDGE GUIDES CORD POWER SWITCH SHARPENING CASSETTE ROTATION LEVER SHARPENING CASSETTE ANGLE ADJUSTMENT MOTOR SPEED CONTROL KNOB Continuous Run ANGLE INDICATOR Speed Indicators REPLACEABLE LEATHER LINED GUIDES Power Off BELT TENSIONER RELEASE BUTTON HANDLE...
Page 11
1. SHARPENING CASSETTE POSITIONS Squeeze and hold sharpening cassette rotation lever and rotate the cassette up, clockwise to the SHARPEN or GRIND position. 45° 45° PARKED* SHARPEN GRIND** Warning! Do not energize tool while in the • parked position. Keep fingers, hands, and body clear of the belt.
Page 12
2. KNIFE SHARPENING GUIDE ADJUSTMENT ANGLE INDICATOR LINE 15° - 30° in 1/2° increments. Angle is measured per side of the knife (ex. 20° per side equals a 40° inclusive edge angle). Align desired angle with the indicator line on the guide. 3.
Page 13
Notice: Only use abrasives recommended for this tool in accordance with these instructions. ABRASIVE BELT WEAR: Belt discoloration is not an indicator of wear. Engineered belts expose new abrasive as they break down. Used belts may take extra strokes, but will continue to remove material. These belts will keep going longer than you think.
SHARPENING REFERENCE CHART KITCHEN KNIVES PULL RATE: 1” OF BLADE PER SECOND • USE EDGE GUIDE ANGLE SPEED 6000 WESTERN 20° ASIAN 16° PARING 20° CLEAVER 30° BREAD *10 Strokes = 5 per side OUTDOOR KNIVES PULL RATE: 1” OF BLADE PER SECOND • NO EDGE GUIDE ANGLE SPEED 6000...
SHARPENING OUTDOOR KNIVES Reference Belt Information, pg 12 and the Sharpening Reference Chart, pg 15 for recommended angle settings, belt selection, stroke count, speed and choice of edge type. 1. PLACE THE BLADE IN THE GUIDE WITH POWER OFF, insert blade into right side of sharpening guide all the way to the heel of the edge.
Page 17
3. REPEAT AND FEEL FOR BURR BURR Continue sharpening on right side of guide. Check for a burr every 2-3 strokes (see picture). Sharpen until a burr is created along the entire length of the edge. CHECK FOR A BURR BY BRUSHING If burr is not yet raised, See “...
SHARPENING SERRATED KNIVES Most serrated knives have a flat side and a bevel side on the blade; SHARPEN ONLY THE FLAT SIDE. FLAT SIDE BEVELED SIDE ONLY USE THE FINEST GRIT 6000 BELT FOR SERRATED SHARPENING. Place flat side of blade at the bolster / handle against the fine grit abrasive belt.
SHARPENING FILLET KNIVES Reference the SHARPENING REFERENCE CHART, pg 15 for recommended angle settings, belt selection and speed. Otherwise sharpening a filet knife is the same as other knives. Use the Edge Guide to help support these long, flexible blades during sharpening to ensure a consistent sharpening along the entire edge.
SHARPENING KITCHEN KNIVES Reference the Sharpening Reference Chart, pg 15 for recommended angle settings, belt selection, stroke count, speed and choice of edge type. MOST KITCHEN KNIVES SHOULD BE SHARPENED WITH THE EDGE-GUIDE. NO BOLSTER BOLSTER HEEL HEEL 1. PLACE THE BLADE IN THE GUIDE WITH POWER OFF, insert blade into right side of sharpening guide all the way to the heel of the blade.
SHARPENING SCISSORS Sharpen ONLY THE BEVELED SIDE of your scissors. Marking the beveled side with a black marker will make it easier to see when the cutting edge has been fully sharpened along entire edge. Use the 6000 grit belt at speed 3 to hone or touch-up scissors. Use the belt at speed 3 to sharpen damaged scissors.
GRINDING Remove Sharpening Guide. Pull up firmly. Ensure the Edge Guide is in the parked position and that the Knife Sharpening Guide has been removed before grinding. Push Cassette Lock Release Lever to rotate cassette to grind mode. Use the P120 belt and speed 6 for light sharpening and grinding tasks.
PRUNING SHEARS Remove Sharpening Guide. Pull up firmly. Ensure the Edge Guide is in the grinding position. Use the 6000 grit abrasive belt at speed 3 to hone the cutting blade. Use the grit abrasive belt at speed 3 to sharpen a damaged or dull cutting blade.
Page 24
Phone: 1 (800) 597-6170 Fax: 1 (541) 552-1377 Email: info@worksharptools.com Visit: Worksharptools.com WORK SHARP® is a registered trademark of Darex, LLC PP0004877 Rev 2 12/23 S H A R P E N I N G N O T E S...
Page 25
U S E R ’ S G U I D E F O R T H E KEN ONION EDITION BLADE GRINDING ATTACHMENT MK.2 W S S A K O 8 1 1 2 2 THIS ATTACHMENT IS ONLY FOR USE WITH THE KEN ONION EDITION KNIFE AND TOOL SHARPENER MK.2 WAT C H D E M O...
Page 26
GERMAN . . . . . . . . . . . . . . . . . . . . . . . . . . . . . . . . . . . . . . . . . . . . . . . . . . . . . . . . . . . 22 KEN ONION DESIGNED, WORK SHARP ENGINEERED “I am proud to be affiliated with this company, I am proud to be affiliated with...
Consult the WSKTS – Ken Onion Edition MK2 User Guide for Safety and Operation of the power unit. WARRANTY This sharpener is covered by Work Sharp’s 3-year warranty. We stand behind and support our products – contact us if you need assistance, parts, or service. Warranty for consumer not industrial or commercial use, excludes abrasives.
GETTING TO KNOW YOUR BLADE GRINDING ATTACHMENT ADJUSTABLE CONVEX PULLEY POSITIONS (3) BELT SUPPORT 90° GRIND PLATE FLANGE STORAGE REFERENCE PLATE BELT GUARD BELT TRACKING BELT TENSIONER BENCH MOUNT TAB BENCH MOUNT TAB ANGLE INDICATOR 10° 15° ANGLE CONTROLLED 90° PLATEN KNIFE SHARPENING 20°...
Page 29
1. INSTALLATION Unplug sharpener from power supply. Remove belt. Press the lock release lever and rotate the Knife Sharpening Cassette to remove the Cassette. POP! Install the Belt Support Flange onto the Motor Shaft. Rotate counter clockwise until snug. Install the Blade Grinding Attachment by aligning the chassis to the keyed “ON/OFF”...
Page 30
2. BELT INFORMATION BELT NAME GRIT COLOR APPLICATION Extra-Coarse grit belt for tool sharpening and Extra-Coarse P120 knife repair. Coarse DARK GREY Coarse grit belt for knife shaping. Medium LIGHT GREY Medium grit belt for knife sharpening. Fine WHITE Fine grit belt for honing knives and scissors. MEDIUM Ultra-Fine grit belt for serrations, polishing, Ultra-Fine...
Page 31
Loop the next belt around the Belt Guard first and then around the Pulleys. Release the Tensioner Lever. Track the belt by rotating the Tracking Knob to center the Abrasive Belt over the Pulleys. Clockwise moves the belt to the left, counterclockwise moves the belt to the right.
Select and mount an abrasive belt based on the task at hand (see Belt Change Section for details.) Once desired belt is installed, Turn on power by squeezing the Power Switch under the handle (see Speed Control Adjustment section for details). •...
SHARPENING Place the spine of the blade flat onto the Reference Plate. While keeping the blade flat, move up onto the belt surface PRIMARY BEVEL between the top two Pulleys and place the heel of the blade edge onto the abrasive. Note: The 90°...
Page 34
Continue sharpening the same side of the blade BURR until a burr is raised along the entire edge. Count the number of strokes this takes. Repeat the same number of strokes on the other side of the blade. Continue up the grit scale until the desired sharpness is achieved.
90° GRIND PLATE This feature can be used for multiple purposes such as, but not limited to, chamfering edges, flattening a knife spine, creating a flat edge grind, etc. Use light pressure. Let the abrasives do the work for you. KNIFE SPINE KNIFE SPINE Notice:...
Page 36
Je suis très content de tous les projets sur lesquels nous avons travaillé, car je sais que Work Sharp y consacre à chaque fois tout son amour, sa passion et sa compassion. Merci d’avoir acheté ce produit, et merci de nous faire confiance pour aiguiser tous vos couteaux et lames ».
GARANTIE Cette affûteuse est couverte par la garantie Work Sharp pendant une durée de 3 ans. Nous croyons en nos produits et offrons une assistance complète pour chacun d’entre eux. N’hésitez pas à nous contacter pour toute demande d’assistance, de pièces ou de réparation.
PRÉSENTATION DE L’ACCESSOIRE DE MEULAGE DE LAMES POSITIONS DE POULIE POUR RÉGLAGE DE LA CONVEXITÉ (3) RANGEMENT DE LA BRIDE PLAQUE DE MEULAGE DE SUPPORT DE COURROIE À 90° PLAQUE DE RÉFÉRENCE GARDE DE COURROIE ALIGNEMENT DE TENDEUR DE LANGUETTE POUR LANGUETTE POUR COURROIE COURROIE...
Page 39
1. INSTALLATION Débranchez l’affûteur de l’alimentation électrique. Retirez la courroie. Enfoncez le levier de libération du verrou et faites pivoter la cassette d’affûtage de couteaux, puis retirez-la. POP! Installez la bride de support de courroie sur l’entraînement. Faites tourner dans le sens antihoraire jusqu’à...
Page 40
2. INFORMATIONS RELATIVES AUX COURROIES NOM DE LA GRAINS COULEUR UTILISATIONS COURROIE Grains extra-grossiers pour l’affûtage des Extra Gros P120 ROUGE outils et la réparation des couteaux. Gros GRIS FONCÉ Gros grains pour le façonnage des couteaux. Moyen GRIS CLAIR Grain moyen pour l’affûtage des couteaux.
Page 41
Faites passer la nouvelle courroie autour de la garde de courroie, puis autour des poulies. Débloquez le levier tendeur. Alignez la courroie en faisant tourner le bouton d’alignement pour centrer la courroie abrasive par-dessus les poulies. Tournez dans le sens horaire pour déplacer la courroie vers la gauche, et dans le sens antihoraire pour la déplacer vers la droite.
Choisissez et installez une courroie abrasive en fonction de la tâche à effectuer (voir la section Changement de courroie pour plus d’informations). Une fois la courroie de votre choix installée, mettez l’outil sous tension en appuyant sur l’interrupteur d’alimentation placé sous la poignée (voir la section Réglage du contrôle de vitesse pour plus d’informations).
AFFÛTAGE Placez le dos de la lame à plat sur la plaque de référence. Tout en gardant la lame bien à plat, déplacez-la sur la surface de la BISEAU PRINCIPAL courroie entre les deux poulies du dessus, et placez le talon de la lame sur la partie abrasive.
Page 44
Continuez à affûter la lame du même côté jusqu’à ce BAVURE qu’un morfil se forme tout le long du bord. Comptez le nombre de passes nécessaires. Répétez le même nombre de passes sur l’autre côté de la lame. Continuez à augmenter le niveau de grain jusqu’à obtenir le degré...
PLAQUE DE MEULAGE À 90° Cette fonctionnalité peut être utilisée à plusieurs fins, notamment pour chanfreiner des bords, aplatir le dos d’un couteau, créer un bord rodé plat, etc. Exercez une légère pression. Laissez les bandes abrasives faire le travail. KNIFE SPINE DOS DU COUTEAU Avis :...
Page 46
Projekte, an denen wir gemeinsam gearbeitet haben, denn ich weiß, wie viel Liebe, Herz und Mitgefühl in allem steckt, was Work Sharp macht. Vielen Dank für Ihren Kauf und Ihr Vertrauen in unsere Fähigkeit, Ihre Messer zu schärfen.“...
SICHERHEITSHINWEISE • WARNUNG! Beachten Sie alle Sicherheitshinweise, Anweisungen, Abbildungen und Spezifikationen, die diesem Elektrowerkzeug beiliegen. Die Nichtbeachtung der folgenden Anweisungen kann zu Stromschlag, Brand und/ oder schweren Verletzungen führen. Bewahren Sie alle Sicherheitshinweise und Anweisungen zum späteren Nachschlagen auf. Der Begriff „Elektrowerkzeug“ in den Warnhinweisen bezieht sich auf Ihr netzbetriebenes (kabelgebundenes) oder batteriebetriebenes (schnurloses) Elektrowerkzeug.
IHR MESSERSCHLEIFAUFSATZ EINSTELLBARE KONVEXE RIEMENSCHEIBENPOSITIONEN (3) LAGERUNG DES 90°-SCHLEIFPLATTE BANDTRÄGERFLANSCHES REFERENZPLATTE BANDSCHUTZ BANDFÜHRUNG BANDSPANNER LASCHE FÜR LASCHE FÜR WERKBANKMONTAGE WERKBANKMONTAGE WINKELANZEIGE 10° 15° MESSERSCHÄRFEN MIT WINKELFÜHRUNG SCHLEIFEN MIT 20° DER 90°-PLATTE 25° 30° LOCKERES ALTERNATIVE BANDSCHLEIFEN REFERENZPLATTE 35° (HÖHENVERSTELLBAR) KNOPF ZUR MONTAGEMARKIERUNGEN WINKELEINSTELLUNG BANDTRÄGERFLANSCH...
Page 49
1. INSTALLATION Ziehen Sie den Netzstecker des Schleifgeräts aus der Steckdose. Nehmen Sie das Schleifband ab. Drücken Sie den Entriegelungshebel und drehen Sie die Kassette für das Messerschärfen, um sie zu entfernen. POP! Setzen Sie den Bandträgerflansch auf den Antrieb. Drehen Sie ihn gegen den Uhrzeigersinn, bis er fest sitzt.
Page 50
2. GÜRTELINFORMATIONEN GÜRTELNAME KORN FARBE ANWENDUNG Extra-Grob P120 Werkzeugschärfen und Messerreparatur. Grob DUNKELGRAU Messerformung. Mittel HELLGRAU Messer schärfen. Fein WEISS Schärfen von Messern und Scheren. Ultra-Fein 12000 MITTELGRAU Verzahnung, Polieren, und streichriemen. Abmessungen des Schleifbandes: 2.54cm x 20.32cm Ersatzriemen und mehr finden Sie unter: www.worksharptools.com •...
Page 51
Legen Sie das nächste Band zuerst um den Bandschutz und dann um die Riemenscheiben. Lassen Sie den Spannhebel los. Führen Sie das Band nach, indem Sie den Nachführknopf drehen, um das Schleifband über den Riemenscheiben zu zentrieren. Im Uhrzeigersinn bewegt sich das Band nach links, gegen den Uhrzeigersinn nach rechts.
Wählen und montieren Sie ein Schleifband, das der jeweiligen Aufgabe entspricht (siehe Abschnitt „Schleifbandwechsel“). Sobald das gewünschte Band installiert ist, schalten Sie das Gerät ein, indem Sie den Netzschalter unter dem Griff drücken (siehe Abschnitt „Einstellung der Geschwindigkeit“ für weitere Einzelheiten). •...
SCHÄRFEN Legen Sie den Rücken der Klinge flach auf die Referenzplatte. Fahren Sie mit flachgehaltener Klinge die Bandoberfläche zwischen den beiden oberen Riemenscheiben nach oben und PRIMÄRFASE setzen Sie die Klingenwurzel auf das Schleifmittel. Anmerkung: Die 90°-Referenzplatte kann angehoben werden, RÜCKEN um als alternative Referenzplatte für das winkelgeführte Schärfen verwendet zu werden.
Page 54
Fahren Sie mit dem Schärfen der gleichen Messerseite GRAT fort, bis sich ein Grat entlang der gesamten Schneide gebildet hat. Zählen Sie die Anzahl der dafür erforderlichen Striche. Wiederholen Sie die gleiche Zahl der Striche auf der anderen Messerseite. Erhöhen Sie die Körnung, bis die gewünschte Schärfe PRÜFEN SIE, OB EIN GRAT erreicht ist.
90°-SCHLEIFPLATTE Diese Funktion kann für verschiedene Zwecke verwendet werden, z. B. zum Abschrägen von Schneiden, Abflachen eines Messerrückens, Erstellen eines flachen Schneidenschliffs usw. Verwenden Sie leichten Druck. Lassen Sie die Schleifmittel die Arbeit für Sie machen. KNIFE SPINE MESSERRÜCKEN Hinweis: Nur zum Schleifen zu verwenden, wenn sich die 90°-Schleifplatte in der untersten Position befindet.
Page 56
Email: info@worksharptools.com Visit: Worksharptools.com WORK SHARP® is a registered trademark of Work Sharp, LLC WORK SHARP® est une marque de commerciale de Work Sharp, LLC WORK SHARP® ist ein eingetragenes Warenzeichen Work Sharp, LLC PP0004944 Rev 0 10/23 L O C K E R E S B A N D S C H L E I F E N...
Page 57
DO NOT PRINT KEY Booklet dimensions SPOT COLOR: NOTES: WORK SHARP 215.9mm x 139.7mm 210 E. HERSEY ST. CUT: ASHLAND, OR 97520 PHONE: (+1) 541-552-1301 CREASE/FOLD: FAX: 541-552-1377 PANTONE 7409C BLEED LINE: TITLE: WSKTS-KO BGA User Guide EFG 157 GSM Coated Art paper cover...
Need help?
Do you have a question about the KEN ONION EDITION KNIFE & TOOL SHARPENER MK.2 and is the answer not in the manual?
Questions and answers