
Subscribe to Our Youtube Channel
Related Manuals for Holman 4A934


Summary of Contents for Holman 4A934
- Page 1 Instruction Guide 4A934 Holman Rancho Cordova, CA 95742 800-343-7486 InstallationSupport@Holman.com 20231031R4 DATE: __________________...
-
Page 2: Table Of Contents
Step 11 – Install Ladder Hooks ......................9 Before You Begin • Read all instructions prior to installing or assembling any Holman product. • To install on a truck cap, 408SC mounting kit is required. • Find your truck cap roof mounting locations prior to rack assembly. -
Page 3: Parts List
Instructions – 4A934 Parts List For Technical Support Call: 800-343-7486, Monday-Friday, 7AM - 4 PM (PST) Page 2... -
Page 4: Hardware
Instructions – 4A934 Hardware For Technical Support Call: 800-343-7486, Monday-Friday, 7AM - 4 PM (PST) Page 3... -
Page 5: Step 1 - Assemble Feet
Instructions – 4A934 DO NOT EXCEED MANUFACTURERS WEIGHT CAPACITY FOR ROOF. Step 1 – Assemble Feet • Measure width between installed mounts on vehicle. • On the cross bows, use the slots that correspond to the measured distance between the mounts. -
Page 6: Step 2 - Install End Stop
Instructions – 4A934 Step 2 – Install End Stop NOTE: Skip the following end stop installation instructions if adding 4A943 to the drivers side. • Using two 5/16” carriage bolts, two 5/16” washers and two 5/16” lock nuts, bolt the end stop to the exposed end of each bow as shown below. -
Page 7: Step 4 - Mount Rack
Instructions – 4A934 Step 4 – Mount Rack • Place both bows on top of installed brackets. • Bolt feet to brackets using 5/16” carriage bolt, 5/16” flat washers and a 5/16” lock nut. Be sure to have the front bow in the front of the vehicle. -
Page 8: Step 6 - Install Hex Tube
Instructions – 4A934 Step 6 – Install Hex Tube • Remove the 5/16” x 2” flanged head screws, 5/16” washers, and 5/16” lock nuts from the front bow as shown below. • Align the hex tube assembly so the holes in the hexagonal bar line up with holes in front pan receiver. -
Page 9: Step 7 - Install Latch
Instructions – 4A934 Step 7 – Install Latch • Move rear pan assembly out of the way to expose the end of the cross member. • Using 5/16” x 3/4" carriage bolts, 5/16” flat washers and 5/16” lock nuts, fasten the latch assembly to... -
Page 10: Step 9 - Install Ladder Stop
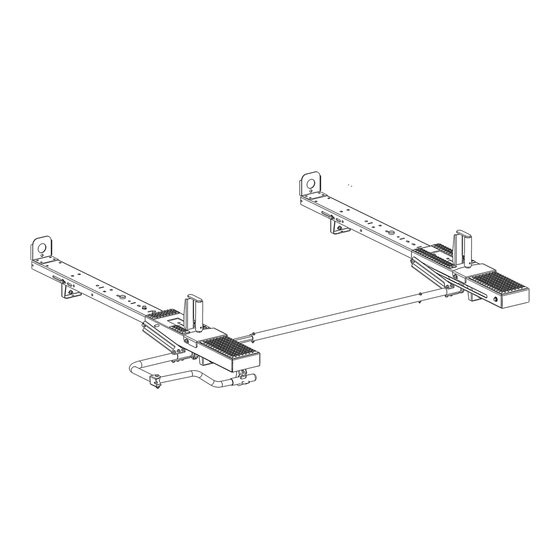
Instructions – 4A934 Step 9 – Install Ladder Stop • Using the hardware in both bows, bolt ladder stop in orientation shown. Be sure to place the tab on the ladder stop into the slot on the bow. • Ladder stop may be installed on... - Page 11 Instructions – 4A934 • Using a 1/4" x 1" hex head, a 1/4” lock washer and a 1/4" flat washer, bolt ladder hook assembly to ladder hook weldment using the previously determined mounting location. • Tighten. AT LEAST 1/4” DO NOT USE IMPACT WRENCH! Rack shown assembled for clarity.
Need help?
Do you have a question about the 4A934 and is the answer not in the manual?
Questions and answers