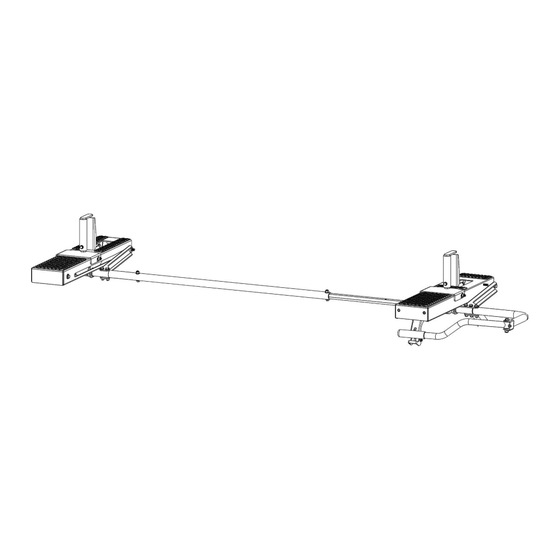
Summary of Contents for Holman 4A943
- Page 1 Instruction Guide 4A943 Holman Rancho Cordova, CA 95742 800-343-7486 InstallationSupport@Holman.com 20231031R3 DATE: ________________...
-
Page 2: Table Of Contents
Step 12 – Install Ladder Hooks ...................... 15 Before You Begin • Read all instructions prior to assembling or installing any Holman product. • Always locate your installation locations prior to performing any work. • Have rack with bows installed on vehicle prior to installing this rack add-on. -
Page 3: Parts List
Instructions – 4A943 Parts List For Technical Support Call: 800-343-7486, Monday-Friday, 7AM - 4 PM (PST) Page 2... -
Page 4: Parts (Continued)
Instructions – 4A943 Parts (Continued) For Technical Support Call: 800-343-7486, Monday-Friday, 7AM - 4 PM (PST) Page 3... -
Page 5: Hardware
Instructions – 4A943 Hardware For Technical Support Call: 800-343-7486, Monday-Friday, 7AM - 4 PM (PST) Page 4... -
Page 6: Hardware (Continued)
Instructions – 4A943 Hardware (Continued) For Technical Support Call: 800-343-7486, Monday-Friday, 7AM - 4 PM (PST) Page 5... -
Page 7: Step 1 - Remove End Stops
Instructions – 4A943 DO NOT EXCEED MANUFACTURERS WEIGHT CAPACITY FOR ROOF! Step 1 – Remove End Stops • If installed, remove end stops at the end of each bow, opposite from the pan mechanism. • Repeat for second bow. Step 2 – Determine Front and Rear Pan The front pan will have a slot in the pan. -
Page 8: Step 3 - Mount Cantilever Mechanism
Instructions – 4A943 Step 3 – Mount Cantilever Mechanism • Using existing hardware attached to damper bracket assembly, mount cantilever mechanism to the under side of the rear bow in the location shown. Be sure the two bushings are in place. -
Page 9: Step 4 - Install Dampers
Instructions – 4A943 Step 4 – Install Dampers • Install dampers in orientation shown. • Install one end of each damper to damper bracket assembly using 3/4” clevis pin and cotter pin in orientation shown. • Install a 2” clevis pin, plastic spacer, and cotter pin through the mount on underside of bow. The plastic spacer goes in between two dampers. -
Page 10: Step 5 - Install Latch
Instructions – 4A943 Step 5 – Install Latch • Install latch assembly to the exposed end of the rear bow. • Use 5/16” x 3/4" carriage bolts, 5/16” flat washers and 5/16” lock nuts in orientation shown. • Install wheel assembly. Slide wheel axle in the end of the rear bow. -
Page 11: Step 6 - Install Rear Pan
Instructions – 4A943 Step 6 – Install Rear Pan • Place rear pan on top of wheels and bow. Be sure the wheel caps do NOT come off. • Slide handle hex bar into position shown. • Bolt together using 5/16” x 2” hex head bolts, 5/16” washers, and 5/16” lock nuts, leaving the hole furthest from the pan empty as shown. -
Page 12: Step 7 - Install Front Pan
Instructions – 4A943 Step 7 – Install Front Pan • Place front pan on top of front bow. • Place cantilever housing under bow as shown. • Bolt pan arms to cantilever housing using existing bolts. • At the end of the bow, bolt pan to the bow using 5/16” x 7” hex head bolt, 5/16” flat washers, sleeve bearings and 3/8”... -
Page 13: Step 8 - Install Hex Tube
Instructions – 4A943 Step 8 – Install Hex Tube • Install hex tube to front pan assembly using two 5/16” x 2” hex head bolts, four 5/16” washers, and two 5/16” lock nuts. • Use the end of the hex tube assembly with two exposed holes to mount into front pan. -
Page 14: Step 9 -Attach Handle
Instructions – 4A943 Step 9 – Attach Handle • Attach handle to rear pan using 5/16” x 2” hex head bolt, two 5/16” flat washers and a 5/16” lock nut. • TIGHTEN. Step 10 – Install Ladder Stop • Using the hardware on the bows, bolt the ladder stop in the orientation shown. -
Page 15: Step 11 - Assemble Ladder Hooks
Instructions – 4A943 Step 11 – Assemble Ladder Hooks Note: Before use the ladder hook must be adjusted to an appropriate height for the ladder that will be used. The height of the hook needs to be at least 1/4" greater than the ladder. The ladder should fit loosely on the hook, not snug. -
Page 16: Step 12 - Install Ladder Hooks
Instructions – 4A943 Step 12 – Install Ladder Hooks • Using the hardware and installed studs on the bows, loosen nuts and slide ladder hook into place. • TIGHTEN. GO BACK AND TIGHTEN ALL BOLTS FROM PREVIOUS STEPS. BE SURE HARDWARE IN MOUNTING IS TIGHT.


Need help?
Do you have a question about the 4A943 and is the answer not in the manual?
Questions and answers