
Subscribe to Our Youtube Channel
Related Manuals for Holman 4A824


Summary of Contents for Holman 4A824
- Page 1 Instruction Guide 4A824 Holman Rancho Cordova, CA 95742 800-343-7486 InstallationSupport@Holman.com 20220920R2 DATE: ________________...
-
Page 2: Table Of Contents
Step 1B – Prepare 4A823 Rear Crossbar ................. 3 Step 1C – Install Spacers on 4A823 Rack ................4 Step 2 – Assemble and Install 4A824 Third Crossbar ..............4 Step 2A – Attach Feet to Crossbar ................... 4 Step 2B – Attach End Stops...................... 5 Step 2C –... -
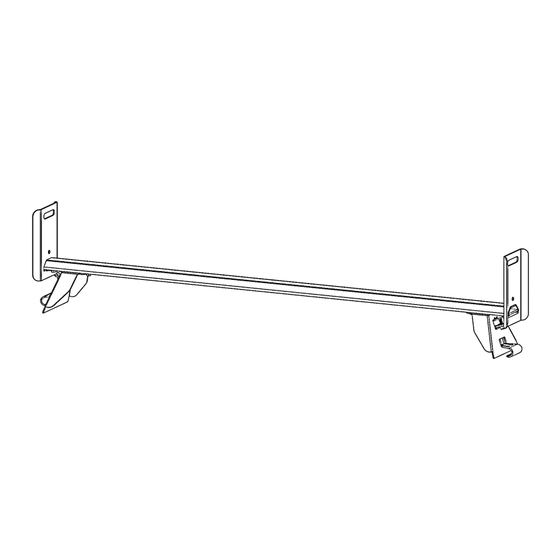
Page 3: Parts
Instructions – 4A824 Parts Hardware For Technical Support Call: 800-343-7486, Monday-Friday, 7AM - 4 PM (PST) Page 2... -
Page 4: Step 1 - Modify Existing 4A823 Rack
Loosen 5/16” hardware between front feet and gutter clamps. Move front crossbar assembly to desired position. Typical distance between front and rear crossbars is 78 inches when 4A824 additional crossbar installed. LOOSELY tighten 5/16” hardware between front feet and gutter clamps. -
Page 5: Step 1C - Install Spacers On 4A823 Rack
5/16” x 1” hex hex head & heads. spacer. Step 2 – Assemble and Install 4A824 Third Crossbar Step 2A – Attach Feet to Crossbar Using a 5/16”-18 x 1” hex head bolt, 5/16” lock washer, and 5/16” flat washer, LOOSELY bolt a mounting plate to a foot assembly. -
Page 6: Step 2B - Attach End Stops
Instructions – 4A824 Slide an assembled foot assembly onto the crossbar with the slanted face facing outward. DO NOT TIGHTEN. Repeat for opposite side of cross bar. Step 2B – Attach End Stops Using a 5/16”-18 x 1” hex head bolt, 5/16” lock washer, and 5/16”... -
Page 7: Step 2C - Install Rack To Vehicle
Instructions – 4A824 Slide an assembled end stop onto a crossbar with the angled flanges facing outward until slider plate aligns with end of crossbar. Be sure to insert slider plate so it cannot rotate. TIGHTEN hardware securing end stop to end of crossbar. -
Page 8: Step 2D - Fasten Foot Assemblies To Crossbows
Instructions – 4A824 Step 2D – Fasten Foot Assemblies to Crossbows Insert gutter clamp through the gutter foot rectangular slots as shown. Position gutter clamp on underside of vehicle rain gutter. LOOSELY clamp the vehicle rain gutter between the gutter clamp and the foot using a 5/16”...
Need help?
Do you have a question about the 4A824 and is the answer not in the manual?
Questions and answers