Subscribe to Our Youtube Channel
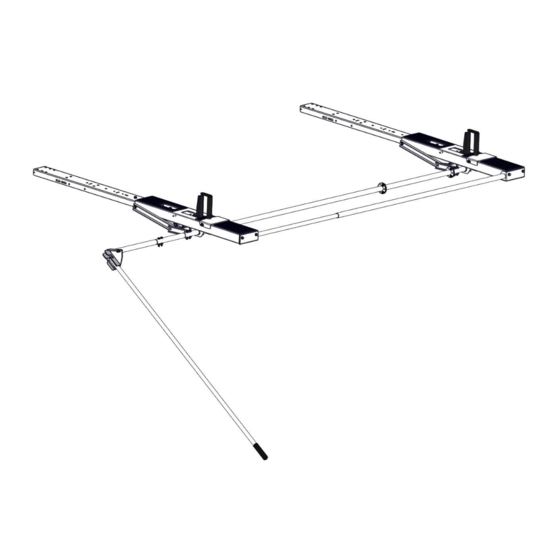
Summary of Contents for Holman 4A99H
- Page 1 Instruction Guide 4A99H Holman Rancho Cordova, CA 95742 800-343-7486 InstallationSupport@Holman.com 20231009R7 DATE: ________________...
-
Page 2: Table Of Contents
Step 9 – Install Clips for Handle ......................14 Step 10 – Test Ladder Rack ....................... 15 Before You Begin • Read all instructions before assembling or installing any Holman product. • Place sealant around all swage connections. • Keep the adjustment guide in vehicle at all times. - Page 3 Instructions – 4A99H Parts For Technical Support Call: 800-343-7486, Monday-Friday, 7AM - 4 PM (PST). Page 3...
- Page 4 Instructions – 4A99H Parts (Continued) For Technical Support Call: 800-343-7486, Monday-Friday, 7AM - 4 PM (PST). Page 4...
- Page 5 Instructions – 4A99H Hardware For Technical Support Call: 800-343-7486, Monday-Friday, 7AM - 4 PM (PST). Page 5...
-
Page 6: Step 1 - Place Front Bow
Instructions – 4A99H Step 1 – Place Front Bow • Place the front bow on top of the installed feet. Be sure bow is centered on the vehicle. • The same slot, but on opposite sides of the bow will be used to attach the bow to the feet. These slots will vary based on which vehicle the ladder rack is being installed on •... -
Page 7: Step 2 - Place Rear Bow
Instructions – 4A99H Step 2 – Place Rear Bow • Place the rear bow on top of the installed feet. Be sure bow is centered on the vehicle. • The same slot, but on opposite sides of the bow, will be used to attach bow to the feet. These slots will vary based on which vehicle the ladder rack is being installed on. -
Page 8: Step 3 - Install Torque Tube
Instructions – 4A99H Step 3 – Install Torque Tube • Measure the minimum distance between the front and rear bow as shown below. • If the distance is approximately 57”, only the long torque tube will be needed. If the distance is approximately 82”, the torque tube and the extension will be needed. -
Page 9: Step 4 - Install End Tube
Instructions – 4A99H Step 4 – Install End Tube • Bolt the end tube to the end of the pan on the front and rear bow using 5/16" x 3/4” hex head bolts, 5/16” lock washers and 5/16" flat washers. -
Page 10: Step 6 - Determine Ladder Stop Locations
Instructions – 4A99H • Insert actuator assembly into the end of the actuator extension as shown below. • Bolt into place using two 5/16” x 1-3/4” hex head bolts, four 5/16” flat washers and two 5/16” lock nuts. • Tighten. - Page 11 Instructions – 4A99H The following are the two positions available on each bow. Extension ladder: Both Extension ladder: Both at Position 2 at Position 1 Stepladder: rear at Stepladder: Rear at Position 1, Front at Position 1, Front at Position 2...
- Page 12 Instructions – 4A99H • Install ladder stop and tighten. REAR Bow Position 1 DO NOT USE IMPACT WRENCH! Position 2 • For each ladder hook in this position, place the ladder hook base around the threaded studs in the desired location and tighten.
-
Page 13: Step 7 - Assemble Ladder Hooks
Instructions – 4A99H Step 7 – Assemble Ladder Hooks Note: Before use the ladder hook must be adjusted to an appropriate height for the ladder that will be used. The height of the hook needs to be at least 1/4" greater than the ladder. The ladder should fit loosely on the hook, not snug. -
Page 14: Step 8 - Install Ladder Hooks
Instructions – 4A99H Step 8 – Install Ladder Hooks • Using the DO NOT USE IMPACT hardware and WRENCH! installed studs on both bows, loosen nuts and slide ladder hook assembly into place. • Tighten. Step 9 – Install Clips for Handle •... -
Page 15: Step 10 - Test Ladder Rack
Instructions – 4A99H Step 10 – Test Ladder Rack • Prior to installing a ladder, place the long handle into the handlebar assembly and test that the ladder rack mechanism works correctly. • Actuating handle requires pushing handle against rubber bumper built into operator arm.


Need help?
Do you have a question about the 4A99H and is the answer not in the manual?
Questions and answers