Subscribe to Our Youtube Channel
Summary of Contents for Holman 4A97L
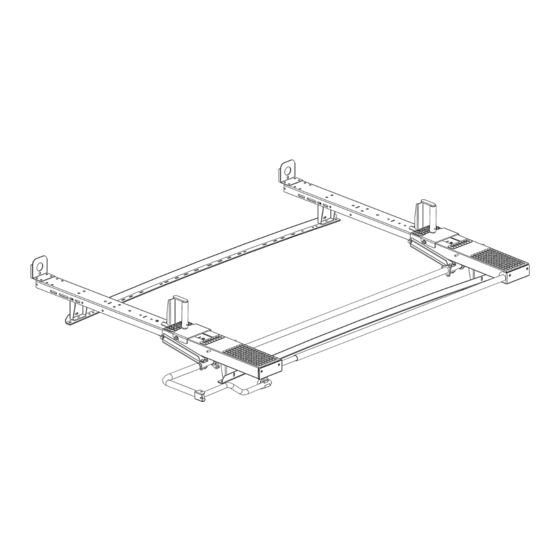
- Page 1 Instruction Guide 4A97L Holman Rancho Cordova, CA 95742 800-343-7486 InstallationSupport@Holman.com 20231004R4 DATE: ________________...
-
Page 2: Table Of Contents
Step 10 – Assemble Ladder Hooks ..................18 Before You Begin • Read all instructions prior to installing any Holman product. • Be sure to apply sealant in the following location. o Between roof and mounting rails, and around the holes in the roof. -
Page 3: Parts List
Instructions – 4A97L Parts List For Technical Support Call: 800-343-7486, Monday-Friday, 7AM - 4 PM (PST) Page 2... - Page 4 Instructions – 4A97L Parts (Continued) For Technical Support Call: 800-343-7486, Monday-Friday, 7AM - 4 PM (PST) Page 3...
-
Page 5: Hardware
Instructions – 4A97L Hardware For Technical Support Call: 800-343-7486, Monday-Friday, 7AM - 4 PM (PST) Page 4... - Page 6 Instructions – 4A97L Hardware (Continued) For Technical Support Call: 800-343-7486, Monday-Friday, 7AM - 4 PM (PST) Page 5...
-
Page 7: Promaster City Rail Installation
Instructions – 4A97L DO NOT EXCEED MANUFACTURERS WEIGHT CAPACITY FOR ROOF ProMaster City Rail Installation • Locate the 6 mounting locations shown on roof of van. • Remove plugs from roof. • Place the rail on the roof so the holes align with the threaded holes in roof. -
Page 8: Nv200/City Express Rail Installation
Instructions – 4A97L DO NOT EXCEED MANUFACTURERS WEIGHT CAPACITY FOR ROOF NV200/City Express Rail Installation • Locate the 4 mounting locations shown on roof of van. • Remove plugs from roof. • Place the rail on the roof so the holes align with the threaded holes in roof and with approximately 1”... -
Page 9: Transit Connect Rail Installation
Instructions – 4A97L DO NOT EXCEED MANUFACTURERS WEIGHT CAPACITY FOR ROOF Transit Connect Rail Installation • Locate 4 mounting locations shown on roof of van. • Remove plugs from roof. • Place the rail on the roof so the holes align with the threaded holes in roof and with approximately 1”... -
Page 10: Metris Rail Installation
Instructions – 4A97L DO NOT EXCEED MANUFACTURERS WEIGHT CAPACITY FOR ROOF Metris Rail Installation • Locate 6 mount locations on van roof, 4 rear and 2 mid-roof, as shown. • Remove plastic cap in these locations indicated to expose threads in the roof. -
Page 11: Assembly Instructions
Instructions – 4A97L Assembly Instructions Step 1 – Install End Stops NOTE: If adding a driver side mechanism, skip this step. • Using 5/16” carriage bolts, 5/16” washers, and 5/16” lock nuts, bolt an end stop to the exposed end of each bow. -
Page 12: Step 3 - Mount Feet To Rails
Instructions – 4A97L Step 3 – Mount Feet to Rails • Locate the four mounting locations on the mount rails as shown below. • Using 5/16” x 1” carriage bolts, 5/16” flat washers and 5/16” lock nuts, bolt the foot to the mount rail in the orientation shown. -
Page 13: Step 4 - Place Bows On Feet
Instructions – 4A97L Step 4 – Place Bows on Feet • Place the front bow on top of the front most mounts on the vehicle and the rear bow on the rear most mounts. • Be sure there is an equal distance from the center of the cross bow to each foot as shown below. -
Page 14: Step 5 - Install Torque Tube
Instructions – 4A97L Step 5 – Install Torque Tube • Bolt the torque tube to the front and the rear bow using a 1/4" x 1” hex head bolt, two 1/4" flat washers and a 1/4" lock nut at each location. -
Page 15: Step 6 - Install Ladder Pan Stiffener
Instructions – 4A97L Step 6 – Install Ladder Pan Stiffener • Using 3/8" x 3/4” hex heads, 3/8” lock washers and 3/8” flat washers, install ladder pan stiffener to the end of each bows pan assembly. • TIGHTEN. FRONT BOW... -
Page 16: Step 7 - Install Ladder Hooks
Instructions – 4A97L Step 7 – Install Ladder Hooks • Determine which location the ladder hook and ladder stop need to be installed. • Notice there are two studs protruding from each ladder pan. Example 1: • Both bows, lower positions are best for extension ladders. - Page 17 Instructions – 4A97L • On the front bow, place the ladder hook base around the threaded studs in the desired location and attach using the pre-installed hardware. • Position the ladder stop near the ladder hook base as shown. Be sure the slot of the ladder stop aligns with the slot in the bow.
-
Page 18: Step 8 - Install Latch
Instructions – 4A97L Step 8 – Install Latch • Move rear pan assembly out of the way to expose the end of the cross member. • Using 5/16” x 1" carriage bolts, 5/16” flat washers and 5/16” lock nuts, bolt through the middle set of square holes as shown. -
Page 19: Step 10 - Assemble Ladder Hooks
Instructions – 4A97L Step 10 – Assemble Ladder Hooks Note: Before use the ladder hook must be adjusted to an appropriate height for the ladder that will be used. The height of the hook needs to be at least 1/4" greater than the ladder. The ladder should fit loosely on the hook, not snug. - Page 20 Instructions – 4A97L GO BACK AND ENSURE ALL HARDWARE IS TIGHT. ASSEMBLY IS COMPLETE For Technical Support Call: 800-343-7486, Monday-Friday, 7AM - 4 PM (PST) Page 19...


Need help?
Do you have a question about the 4A97L and is the answer not in the manual?
Questions and answers