Advertisement
Quick Links
7
7
3
1.
Lay worksurface upside down on soft surface to protect the top. Insert the 4 shoulder
screws into the top (see diagram). Set the metal leg onto the top with glide mounting
holes aligned as on the diagram, then install leg onto the top. Insert the 2 glides
leaving 1/4 inch of adjustment.
2.
Lay end panel and center support upside down on soft surface to protect. Insert the
3 shoulder screws into the end panel (see diagram). Insert the 3 glides leaving 1/4
inch of adjustment.
Assembly Instructions
2
16
Alignement
of levelers
Orenda
Casegoods
TM
P-Top with End Panel
AKTPE
8
Supplied
with
metal leg
2
Supplied
with
metal leg
4
3
3
Advertisement

Subscribe to Our Youtube Channel
Related Manuals for KI Orenda AKTPE


Summary of Contents for KI Orenda AKTPE
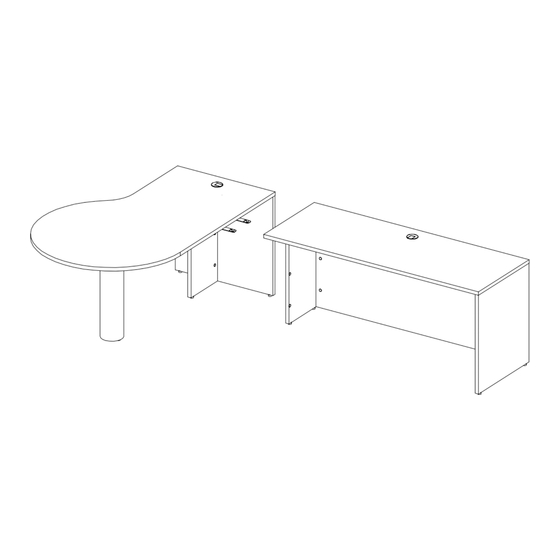
- Page 1 Assembly Instructions Orenda Casegoods P-Top with End Panel AKTPE Lay worksurface upside down on soft surface to protect the top. Insert the 4 shoulder screws into the top (see diagram). Set the metal leg onto the top with glide mounting holes aligned as on the diagram, then install leg onto the top.
- Page 2 Assembly Instructions Orenda Casegoods P-Top with End Panel AKTPE Place center support 1 in place then end 2 , then tighten all camlocks (see diagram). Place adhesive cover over visible hardware. Align arrow orientation to insert part Lock Place suspended top with end panel next to another furniture unit and install splice plates (see diagram).
Need help?
Do you have a question about the Orenda AKTPE and is the answer not in the manual?
Questions and answers