
Related Manuals for Holman 4092L


Summary of Contents for Holman 4092L
- Page 1 Installation Guide 4092L Holman Rancho Cordova, CA 95742 800-343-7486 InstallationSupport@Holman.com 20221114R2 DATE:______________...
-
Page 2: Table Of Contents
9/16” Wrench and Socket Tape Measure Before You Begin Read all instructions prior to assembling or installing any Holman product. Always locate your installation locations prior to performing any work. ENSURE SAFETY WHILE INSTALLING OR DRILLING INTO VEHICLE. -
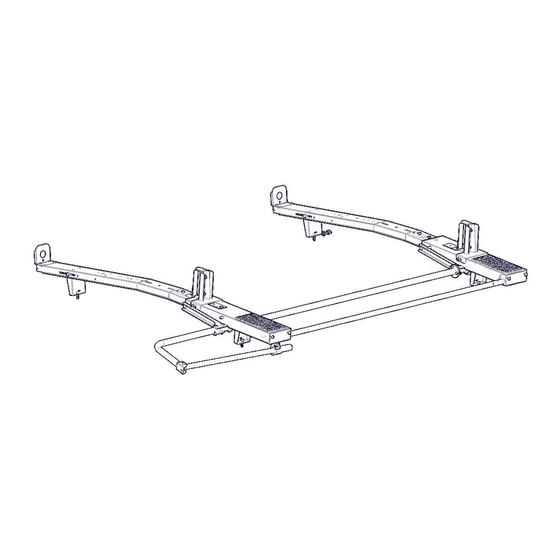
Page 3: Parts
Instructions – 4092L Parts For Technical Support Call: 800-343-7486, Monday-Friday, 7AM - 4 PM (PST) Page 2... -
Page 4: Hardware
Instructions – 4092L Hardware INSTALLATION PREPARATION Mounting kit is sold separately. BE SURE TO HAVE INSTALLED APPROPRIATE MOUNTING KIT PRIOR TO ASSEMBLY OF RACK. For Technical Support Call: 800-343-7486, Monday-Friday, 7AM - 4 PM (PST) Page 3... -
Page 5: Step 1 - Install End Stop
Instructions – 4092L Step 1 – Install End Stop DO NOT install the end stop if installing a double drop down rack. Next bolt the end stop on the driver side of both bows using 5/16” x 3/4” carriage bolts with 5/16”... -
Page 6: Step 3 - Install Torque Tube
Instructions – 4092L Using 3/8” x 3/4” hex head bolts, 3/8” split lock washers and 3/8” flat washers, bolt bow to feet. Repeat on other side. Repeat using front bow. Step 3 – Install Torque Tube NOTE: BE SURE THE BOTH FRONT AND REAR LADDER PANS ARE ALL THE WAY DOWN ON THE BOWS WHILE TIGHTENING. -
Page 7: Step 4 - Install Ladder Pan Support
Instructions – 4092L Bolt torque tube to rear bow assembly using three 1/4”x 7/8” hex head bolts, six 1/4”flat washers and three 1/4” lock nuts. We recommend putting a foam packing block under the front of torque tube to make it level while tightening. -
Page 8: Step 5 - Install Ladder Stops And Ladder Hooks
Instructions – 4092L Step 5 – Install Ladder Stops and Ladder Hooks THE LADDER STOP INSTRUCTIONS DIFFER DEPENDING LADDER TO BE USED. Extension Ladder Set-Up On the front bow, remove 3/8” x 3/4” bolt, 3/8” split lock washer, and 3/8” flat washer from shown location. -
Page 9: Step Ladder Set-Up
Instructions – 4092L Step Ladder Set-Up If installing for a step ladder, move the ladder hook and ladder stop to the upper position ON THE REAR BOW ONLY. Install using the 3/8” hardware into threaded studs farther towards the center of the bow. -
Page 10: Step 7 - Install Handle
Instructions – 4092L Step 7 – Install Handle Attach the handle to the rear bow assembly. Step 8 – Install Rack If you built the rack on the bench, return to step 2. GO BACK AND ENSURE ALL HARDWARE IS TIGHT.
Need help?
Do you have a question about the 4092L and is the answer not in the manual?
Questions and answers