
Subscribe to Our Youtube Channel
Related Manuals for Holman 40822


Summary of Contents for Holman 40822
- Page 1 Instruction Guide 40822 Holman Rancho Cordova, CA 95742 800-343-7486 InstallationSupport@Holman.com 20240206R5 DATE: ________________...
-
Page 2: Table Of Contents
Instructions – 40822 PLEASE READ ALL INSTRUCTIONS AND WARNINGS PRIOR TO ASSEMBLING, INSTALLING, AND USING THIS PRODUCT. Warning Always check for wires, fuel tanks and lines, brake lines and other important vehicle functionality items prior to drilling and installing all products. -
Page 3: Parts List
Instructions – 40822 Parts Assembly Hardware (18-40822-A) For Technical Support Call: 800-343-7486, Monday-Friday, 7AM - 4 PM (PST) Page 2... - Page 4 Instructions – 40822 Installation Hardware (18-40822M) For Technical Support Call: 800-343-7486, Monday-Friday, 7AM - 4 PM (PST) Page 3...
-
Page 5: Mount Hardware (18-40821-M)
Instructions – 40822 Installation Hardware (Continued) For Technical Support Call: 800-343-7486, Monday-Friday, 7AM - 4 PM (PST) Page 4... -
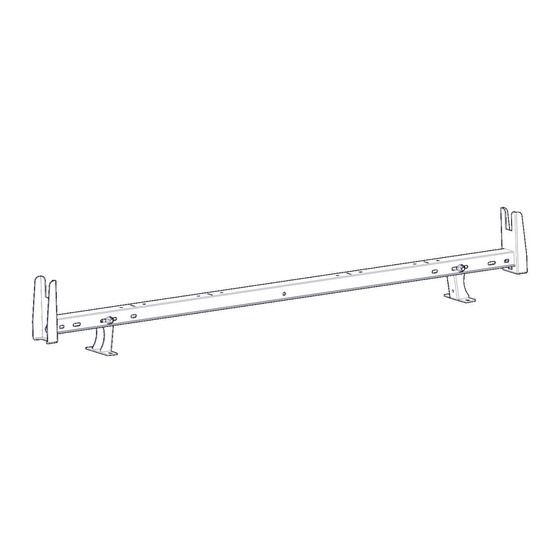
Page 6: Step 1 - Rack Assembly
• Repeat on opposite side. • Do NOT tighten. Wind deflector is shown Wind deflector is shown but not included in 40822 but not included in 40822 Installation Instructions • The following are vehicle specific installation instructions. Follow the instructions for your specific vehicle. -
Page 7: Transit Connect
Instructions – 40822 Transit Connect Step 2 • Locate 2 mounting locations in roof for the crossbar to be installed. • Remove plug from ONLY the desired mounting locations in roof. Step 3 • Be sure to put rubber spacer in between mount foot and roof of van as shown below. -
Page 8: Transit
Instructions – 40822 Transit Step 2 • Locate 2 mounting locations on roof for the crossbar to be installed. • Remove plug from ONLY the desired mounting location in roof. Step 3 • Be sure to put rubber pad and metal plate in between mount foot and roof of van as shown below. -
Page 9: Promaster City
Instructions – 40822 Promaster City Step 2 • Locate 2 mounting locations on roof for the crossbar to be installed. • Remove plug from ONLY the desired mounting locations in roof. Step 3 • Be sure to put rubber spacer in between mount foot and roof of van as shown below. -
Page 10: Nv200/Chevy City Express
Instructions – 40822 NV200/Chevy City Express Step 2 • Locate 2 mounting locations on roof for the crossbar to be installed. • Remove plug from ONLY the desired mounting locations in roof. Step 3 • Be sure to put rubber washer in between mount foot and roof of van as shown below. -
Page 11: Metris
Instructions – 40822 Metris Step 2 • Locate 2 mounting locations on roof for the crossbar to be installed. • Remove plug from ONLY the desired mounting locations in roof. Step 3 • Be sure to put rubber spacer in between mount foot and roof of van as shown below. - Page 12 Instructions – 40822 Step 2 • Locate 2 mounting locations on roof for the crossbar to be installed. Step 3 • Install M8 U-nuts as shown. Step 4 • Bolt through the mount foot into the previously installed M8 U-nuts using M8 x 20mm hex head bolt, 5/16”...
-
Page 13: Sprinter
Instructions – 40822 Sprinter Step 4 • Locate 2 mounting locations in roof for the crossbar to be installed. • Remove plugs from ONLY desired mounting locations in roof. Step 5 NOTE: The low roof sprinter will need the cup in the foot facing inward. -
Page 14: Promaster
Instructions – 40822 ProMaster Step 4 • Be sure to have 40918 preinstalled following the included instructions steps 1-3. Then return to this document and install per step 5 below. • Discard the feet that come with 40918. The feet included in 40821 will be used instead. - Page 15 Instructions – 40822 For Technical Support Call: 800-343-7486, Monday-Friday, 7AM - 4 PM (PST) Page 14...
Need help?
Do you have a question about the 40822 and is the answer not in the manual?
Questions and answers