
Related Manuals for Holman 48301NC


Summary of Contents for Holman 48301NC
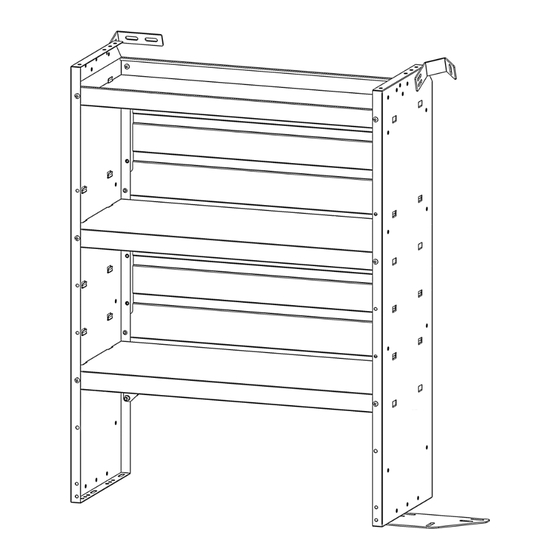
- Page 1 Instruction Guide 48301NC * Shelf not included. Holman Rancho Cordova, CA 95742 800-343-7486 InstallationSupport@holman.com 20230331R3 DATE: ________________...
-
Page 2: Table Of Contents
Step 4 – Install L-Mounting Bracket ....................5 Before You Begin Read all instructions prior to installing any Holman product. Ensure it is safe to drill before drilling anywhere on vehicle. Instructions shown using a 43”H x 32”W shelf. Instructions are the same for the 26”W shelf. -
Page 3: Parts List
Instructions – 48301NC Parts List Hardware For Technical Support Call: 800-343-7486, Monday-Friday, 7AM - 4 PM (PST) Page 2... -
Page 4: Step 1 - Install Bracket To Shelf
Instructions – 48301NC Hardware (Continued) Step 1 – Install Bracket to Shelf Using one 5/16” x 3/4” carriage bolt, one 5/16” flat washer, and one 5/16” lock nut, install the base plate brackets to the bottom of the shelf per the following diagrams. -
Page 5: Step 2 - Install Shelf To Floor
Instructions – 48301NC Step 2 – Install Shelf to Floor Remove D-rings from threaded bosses installed on the floor to the front of and rear of the wheel well. DO NOT DRAG shelf into position. Lift shelf and set into position with hole in bottom of shelf aligned with threaded boss. -
Page 6: Step 3 - Install Rear Door Mount Bracket
Instructions – 48301NC Step 3 – Install Rear Door Mount Bracket Place the door mount bracket against the rear van pillar. Align one of the holes in the door mount bracket to the factory weld nut in the rear van pillar. If installing a 46”... - Page 7 Instructions – 48301NC Using one M8 x 25mm hex bolt, one 5/16” lock washer, and one 5/16” flat washer, bolt the L-mounting bracket to the factory weld nut in side door pillar. The picture shows a 46” high shelf installation.
Need help?
Do you have a question about the 48301NC and is the answer not in the manual?
Questions and answers