Advertisement
- 1 Hi there!
- 2 What's Included
- 3 Specifications
- 4 Lock Anatomy
- 5 Installation Guide
- 6 User Guide
- 7 Troubleshooting
- 8 Documents / Resources
Hi there!
We're so glad you've decided to join us on this journey to create a world without keys. You're officially an igloohomie!
In this guide, you'll find everything you need to get started with your lock.
We hope that we've been as comprehensive and informative as possible. Afterall, we're here to make life easier for you (at least when it comes to your home's access).
If you do not find what you're looking for, we're working on updating it. Or... you could reach out to us at support@igloohome.co because we love interacting with you! Speaking of interaction, let's stay connected regardless. Why don't you join the community of igloohomies worldwide?
Follow us on Facebook


Watch us on YouTube


Or stalk us on Instagram


Maybe network with us on LinkedIn


What's Included

Specifications
| Model | OE1 |
| Weight | Net: 0.4kg, Gross: 0.5kg |
| Material | ABS, PC |
| Modes of Access (Entry) | Bluetooth keys, Existing keys, PIN codes (via Keypad accessory) |
| Modes of Access (Exit) | Multi-Function Button, Thumbturn, Bluetooth keys |
| Power Type | 4 AA alkaline batteries |
| Battery Life | Up to 12 months |
| Emergency Power | 9V Alkaline Battery |
| Battery Operating Temp. | -10°C to 50°C / 14°F to 122°F |
| Operation Temp. | -20°C to 50°C / -4°F to 122°F |
| Certifications | CE, UKCA, FCC, RoHS2 |
| Protocols | Bluetooth 5.0, algoPIN™ technology |
| Usage | Advised to be installed under sheltered areas, not to be exposed to wet weather conditions. |

* DO NOT USE: Heavy Duty, Eveready, GP, or rechargeable batteries. Duracell, Energizer and Panasonic alkaline batteries recommended. Please note that using better batteries will improve the performance and lifespan of the lock.
User Guide
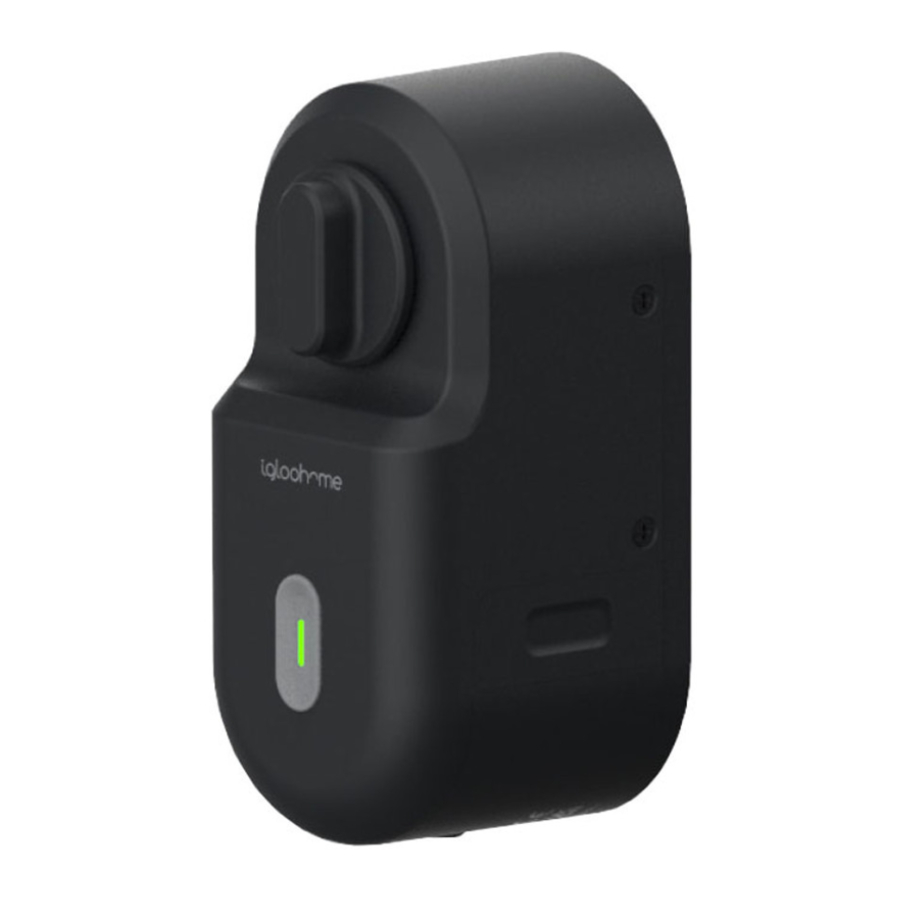
Lock Anatomy

Installation Guide
Requirements for Door/Key/Cylinder/Cassette
Doors
Door opens inwards when you leave the house.

Keys

- Thickness of key: <5mm
- Key head Width: <39mm
- Key head Depth: 38mm
* NOTE: For keys depth above 33mm please use the retrofit extender accessory, for the installation of the retrofit extender.
Thumbturns

- Thumbturn Thickness: Up to 20 - 36mm
- Thumbturn Width: Up to 30mm
- Thumbturn Depth: Up to 29mm
* NOTE: For thumbturns depths above 24mm, please use the retrofit extender accessory, for the installation of the retrofit extender.
Cylinder

- The Retrofit Lock will only work with euro profiled cylinder
- Cylinder should protrude 4mm for stable use, else user will have to use the 3M adhesive tape provided to secure the lock
Cassette
Cassette with backset greater than 35mm

Preparing for Installation
Items needed:

Indoor Use

 Note: The Retrofit Lock is not designed for outdoor use.
Installation Instructions
Retrofit Extender
- Ensure your key fits these dimensions. Otherwise, use the Retrofit Extender during installation.

- Place the Retrofit Extender onto the mounting plate and secure it with four screws.

- Peel off the backing of the adhesive found on the back of the mounting plate. Place it onto the lock cylinder.


Key Installation
- Remove key from cylinder.

- Place mounting plate onto lock cylinder and secure it with the Allen key provided.

- Re-insert key into the lock cylinder. After which, please refer to
![]() and
and ![]() to complete the installation.
to complete the installation.


 and
and  to complete the installation.
Thumbturn Installation
- Remove screw from the lock cassette and remove the cylinder.

- Remove the cylinder plate from the mounting plate.
![]()
- Install the cylinder from the front of the mounting plate.
![]()
- Place the cylinder plate back onto the mounting plate. Secure the mounting plate to the cylinder with the 3 screws.

- Re-install the cylinder and secure it with the screw from the lock cassette. After which, please refer to
![]() and
and ![]() to complete the installation.
to complete the installation.


When installing the back body, ensure that the key or thumbturn is in a vertical orientation.
-
- Install the lock body onto the mounting plate and secure the sides with 4 M3 screws.
![]()
When installing the back body, ensure that the key or thumbturn is in a vertical orientation.

- Install the battery cover and turn the screw to the
![]() position.
position.

- Install the lock body onto the mounting plate and secure the sides with 4 M3 screws.


Parallel Door Sensor Position
- Use a wet wipe or cloth to wipe the area of the door frame where the door sensor will be installed on.

- Peel off the backing of the adhesive on the back of the door sensor.

- Press the door sensor firmly on the clean surface of the door frame. Ensure area is even when mounting the door sensor.

- The maximum distance for detection from the center of the Multi-Function button to the center of the door sensor should be 90mm.
![]()


Perpendicular Door Sensor Position
- If the door frame's depth is >50mm, it is advised to install the door sensor perpendicular to the lock.

- Unscrew the two screws on the back of the door sensor to remove the casing.


-
- Press the door sensor firmly on the clean surface of the door frame. Ensure area is even when mounting the door sensor.

- Press the door sensor firmly on the clean surface of the door frame. Ensure area is even when mounting the door sensor.

Calibrating your Lock
Please install the igloohome app and create an account before setting up your lock for use.
- Ensure door sensor is properly installed and tap <Next>.

- The lock will check your battery level to ensure an optimal calibration experience.

- Turn the thumbturn to unlock, ensure it has been turned to its maximum position.

- Keep the door slightly ajar, ensure the latch bolt is leaning against the door. An audio indicator will notify you to proceed to the next step. Tap <Next> to proceed.

- Close the door fully while keeping it unlocked. An audio indicator will notify you to proceed to the next step. Tap <Next> to proceed.

- The lock will automatically calibrate itself for your door. An audio alert and LED indicator showing green will notify you that the process is complete.

- If you have a handle on the door's exterior, select the option.

- Congratulations, you have completed the calibration!


*Note: You may perform the calibration again from the Settings tab in the igloohome app.
*It is recommended that calibration be done every 9 months.
Testing Lock Functionalities
- Manual Relock and Unlock
Manually rotate the thumbturn of the Retrofit Lock. The movement should feel smooth. - Bluetooth Unlock and Auto Lock
- Ensure Retrofit Lock is in a locked state.
- On the igloohome app, tap the lock icon.
- LED indicator will flash blue, followed by green, with an audio indicator to notify you that the door is unlocked.
- The lock's bolt tongue should automatically extend when the door is completely closed.
User Guide
Features
Bluetooth Key
 | Master Bluetooth Key Unlocks via Bluetooth through the app. |  | Guest Bluetooth Key Time-sensitive Bluetooth keys can be generated and shared with guests. |
Lock
 | Auto Lock Automatically locks when door is closed. Users can configure the delay or deactivate this. Function will only work when door sensor is installed. |  | Auto Unlock Automatically unlock your door when the lock senses your app within the set Bluetooth range. |
 | Manual Relock Rotate the thumbturn or press the multi-function button to extend the bolt tongue. | ||
Battery
 | Low Battery Alert An intuitive audio and LED alert prompts you to change batteries when levels run low. |
Security / Alarms
 | Obstruction Alarm The lock will sound an alarm if the bolt tongue cannot be extended or retracted fully to alert the user of any obstructions. |  | Activity Logs Bluetooth key activity logs are updated in real-time. PIN code activities (only via the Keypad) will be updated when owner syncs lock to app via Bluetooth. |
 | Night Mode Automatically lock your door at a set time during the night for heightened security. |  | Schedulest Schedule the lock to disable the Auto Lock function for easier access throughout the day. |
 | High Torque Mode Available for locks that require more power to extend and retract the bolt tongue smoothly. |
Others
 | Volume Control Volume is adjustable to your preference. Select from 0 (mute) to 5 (loudest). |
Modes of Access
| Modes of access (Entry) | Bluetooth keys, existing keys, PIN codes (via Keypad accessory) |
| Modes of access (Exit) | Bluetooth keys, Thumbturn, Multi-Function Button |
- Bluetooth
This mode requires you to have the igloohome app installed on your mobile phone with a verified account. You can be the owner of the lock of be a recipient of a Guest Bluetooth Key to use this.- On the app, select the lock you're trying to access.
![]()
- Tap the
![]() on the screen.
on the screen.
![]()
- The LED indicator on the lock will flash blue to establish the Bluetooth connection, then green when it is successfully unlocked. You will also hear four ascending tones.
Note: You need to be within Bluetooth range of the lock, and have your Bluetooth services switched on.
![]()
- On the app, select the lock you're trying to access.
- Thumbturn
Rotate the thumbturn to manually unlock the door from the inside.

- Multi-Function Button
- Press the Multi-Function button to unlock
![]()
- The LED Indicator will flash green twice with 4 short ascending tones once unlocked.
![]()
- Press the Multi-Function button to unlock


App Onboarding
- Download the igloohome app
The mobile app is available for free on the App Store and Google Play Store!
App Store
![]()
![www.apple.com]()
Google Play
![]()
![play.google.com]()
- Register for an igloohome account
- Launch the igloohome app and tap [Create new account]
- Fill in the fields shown on the screen.
- Accept the terms of services and privacy policy.
- Tap [Create account].
- Enter the 6-digit OTP sent to your email address.
- Tap [Verify].
- You now have a verified igloohome account!
If you have forgotten your password,- Visit the login page and select [Forgot password?]
- Enter your registered email address.
- Press [Submit].
You will receive an email with a link and instructions on how to reset your password.
- Pair the lock to your account
If you're completely new to igloohome:
Test the lock with the Factory PIN code before you begin the pairing process.- Create a property to associate your lock with.
- Tap on
![]() and select [Add and manage].
and select [Add and manage]. - Tap on[Manage Properties].
- Tap the [+] icon.
- Input the name and region of the property, and tap[Submit].
- Tap on
- Pair the lock to your account.
- Tap on
![]() and select [Add and manage].
and select [Add and manage]. - Tap on the [<] icon.
- Tap on [Add Lock].
- Select the property you created.
- Follow the instructions on the screen.
If you're pairing the lock to an existing igloohome account:- Tap on
![]() and select [Add and manage].
and select [Add and manage]. - Tap on [Add Lock].
- Select the property.
- Follow the instructions on the screen.
- Tap on
- Tap on
- Create a property to associate your lock with.


 and select [Add and manage].
Managing Access via the app
Create Guest Bluetooth Keys
Allow guests and family members to use their smartphones to unlock the door. When you issue a Bluetooth key, you get real-time updates on who has accessed your property.
- On the igloohome mobile app, tap on the
![]() .
. - Tap on [+Access].
- Select [Bluetooth Key].
- Fill in the required fields.
- Tap on [Create Bluetooth Key].
- Tap on [Share].
 .
.Your guest can either scan the unique QR code shown on your screen, or you may share the link via your preferred communication method (Text, Email, WhatsApp, Facebook Messenger etc.) to claim the Bluetooth key.
Your guest will either need to download the igloohome mobile app and register for an account or claim the Bluetooth key with their existing igloohome account.

All Bluetooth keys must be claimed within 1 hour of it being generated. If they are unclaimed within the period, the keys will be considered invalid.
I.e. Generated at 1900hrs today, must be claimed by guest by 2000hrs today.
Bluetooth keys can be revoked by lock owner anytime.
Manage Ecosystem Products via the app
- Keypad
- Pair the Keypad to your account
Before linking the Keypad to a lock, you need to add the device to your account:
*Please ensure you are within Bluetooth range of the Keypad and your Bluetooth function is turned on.- Tap on
![]() and select [Add and manage].
and select [Add and manage]. - Select[Manage Keypads].
- Tap the[+] icon located on the top right of the screen, or tap the [Add Keypad] button located on the bottom of the screen.
- Follow the instructions on the screen.
- Tap on
- Link the Keypad to a lock
*Please ensure you are within Bluetooth range of the lock and Keypad and your Bluetooth function is turned on.- Tap on
![]() and select [Add and manage].
and select [Add and manage]. - Select[Manage Keypads].
- Select the Keypad you want to link.
- Follow the instructions on the screen.
- Tap on
- Pair the Keypad to your account
- Key Fob
- Pair the Key Fob to your account
Before linking the Key Fob to a lock, you need to add the device to your account:
*Please ensure you are within Bluetooth range of the Key Fob and your Bluetooth function is turned on.- Tap on
![]() and select [Add and manage].
and select [Add and manage]. - Select[Manage Key Fobs].
- Tap the[+] icon located on the top right of the screen, or tap the [Add Key Fob] button located on the bottom of the screen.
- Follow the instructions on the screen.
- Tap on
- Link the Key Fob to a lock
*Please ensure you are within Bluetooth range of the lock and Key Fob and your Bluetooth function is turned on.- Tap on
![]() and select [Add and manage].
and select [Add and manage]. - Select[Manage Key Fobs].
- Select the Key Fob you want to link.
- Follow the instructions on the screen.
- Tap on
- Pair the Key Fob to your account
- Bridge
- Link the Bridge to a lock or other ecosystem products
- Tap on
![]() and select [Add and manage].
and select [Add and manage]. - Tap[Bridges].
- Select the Bridge you want to link your lock to.
- Tap[Linked locks and devices].
- Tap the[+] icon located on the top right of the screen.
- Follow the instructions on the screen.
- Tap on
- Unlink the Bridge from a lock or other ecosystem products
- Tap on and select[Add and manage].
- Tap[Bridges].
- Select the Bridge you want to unlink from.
- Tap[Linked locks and devices].
- Tap
![]() next to the selected lock or ecosystem product you want unlinked.
next to the selected lock or ecosystem product you want unlinked.
- Link the Bridge to a lock or other ecosystem products
Night Mode
Automatically lock your door at a set time during the night for heightened security.
Activate Night Mode:

- In the lock settings page tap [Night Mode].
- Toggle the slider to ON.
- Set the start and end times to set the duration for when Night Mode is activated.
- Tap [Apply] to save the settings.
Schedules
Schedule the lock to disable the Auto Lock function for easier access throughout the day.
Activate Schedules:

- In the lock settings page tap [Schedules].
- Toggle the slider to ON.
- Set the start and end times for Schedules to be activated. The activation period is set for all days of the week by default. Select the day of the week to turn Schedules on or off for that particular day.
- Tap [Apply].
High Torque Mode
The High Torque Mode is available for locks that require more power to extend and retract the bolt tongue smoothly.
Activate High Torque Mode:

- In the lock settings page tap [High Torque Mode].
- Toggle the slider to ON.
- Tap [Apply].
Changing Batteries
- Rotate the screw to <unlock>.

- Remove the battery cover.
![]()
- Remove batteries.

- Place new batteries in.

- Place battery cover back and turn the screw to <locked>.


Connect with Airbnb
- Connect with Airbnb
Connecting the lock with Airbnb automates the generation of PIN codes for your guests based on their confirmed reservations.
To activate it:- Connect to your Airbnb listing
- Under [Account Settings], select [Connect with Airbnb], then tap [OK].
- Under [Reservations], click the [Add] icon to select a home to connect to.
- Select Airbnb Listing and PIN Time to associate.
Note:
- Connect to your Airbnb listing
- Emails with PIN code will be sent to the guest between 1 to 48 hours before check-in time (configurable).
- PIN codes will only be valid between the check-in and check-out times.
- Change Check-in and Check-out time
Under [Add and Manage], select [Manage Properties] followed by the listing to view or edit its details.
Notes:
- If the access mail has not been sent, changing your check-in/check-out time via the app modifies the start and end time of the PIN codes to be shared with your guest.
- If the access mail has been sent, changing these details will only affect the next reservation.
- Changing these details on the igloohome app does not update the check-in/check-out time on the listing on the Airbnb website.
- Disconnect Airbnb
Should you prefer to generate PIN codes for your guests manually, you may disconnect your Airbnb listing from the igloohome.
- Under [Reservations], disconnect all the listings.
- Under [Account Settings], select [Disconnect with Airbnb].
Should you wish to completely disconnect your Airbnb account from your igloohome account, make sure that all your Airbnb listings have been disconnected in the above step, then go to:
Airbnb Host Website > Connected Apps > igloohome to disconnect
Audio and LED Indications
| Actions | Indications |
| Bluetooth Connection | LED Indicator flashes Blue |
| Successfully Unlocked | 4 ascending tones and LED indicator flashes Green twice |
| Successfully Locked | 1 long beep and LED Indicator flashes Green for 2 seconds |
| Low Battery Alert | 3 descending tones |
| Obstruction Alarm | 6 sets of 4 short beeps |
| Calibration complete | 1 long beep and LED Indicator shows Green |
| Unpairing | 4 descending beeps and LED Indicator flashes Blue |
| Hard Reset / Unpair | 3 descending tones |
| Successful Paired | 3 ascending tones |
Troubleshooting
Lock does not power up.
- Check that the batteries are inserted in the correct orientation and that the battery cover is securely fastened.
Lock powers up but motor is weak
- Check that the batteries are inserted in the correct orientation and that the battery cover is securely fastened.
- If issue persists, your door may be incompatible with the lock.
Lock wobbles when turning the mechanism
- Ensure the mounting plate screws are aligned and tightened.
Lock still wobbles when turning mechanism after screws were tightened.
- Use the 3M double sided tape for extra stability.
The thumbturn is difficult to turn
- Press the multi-function button and try to rotate.
- If clutch is not fully released, this might happen from time to time.
- Remove and re-install the back body.
- Perform calibration steps again.
Does the lock work with my door?
- Go through the compatibility guide.
How long will my lock last when the low battery alert appears?
- Approximately 2 months depending on the frequency of use.
How do I factory reset my lock?
- Remove battery compartment, press and hold the multi-function button for 10 seconds while re-inserting the battery compartment. Audio and LED alert will notify you of successful factory reset.
Lock does not behave as expected after calibration
- Repeat calibration steps.
For enquiries go to: igloohome.co/support
Documents / Resources
References
Download manual
Here you can download full pdf version of manual, it may contain additional safety instructions, warranty information, FCC rules, etc.
Advertisement


Need help?
Do you have a question about the Retrofit Lock and is the answer not in the manual?
Questions and answers