Advertisement
- 1 Welcome
- 2 What's Included
- 3 Specifications
- 4 Installation Guide
-
5
User Guide
- 5.1 Lock Anatomy
- 5.2 Features
- 5.3 Unlocking from the Outside
- 5.4 Unlocking from the Inside
- 5.5 Locking from the Outside
- 5.6 Locking from the Inside
- 5.7 App Onboarding
- 5.8 Managing Access in App
- 5.9 Managing Access in App
- 5.10 9V Jumpstart
- 5.11 Changing Batteries
- 5.12 Lock Behaviour
- 5.13 Airbnb Connect
- 5.14 Audio and LED Indications
- 6 Troubleshoot
- 7 Documents / Resources
Welcome
This guide will get you up and running with your igloohome Lever Mortise. In the meantime, you should follow igloohome on Facebook and Youtube!

Like us on Facebook


Visit our Youtube

As our igloohome app is frequently updated, there may be changes to this manual.
What's Included

Note:
- For doors with thickness of 35mm - 50mm, please use the shorter shaft; for doors with thickness of 50mm - 60mm, please user the longer shaft.
Specifications
| Model | igloohome Smart Lever Mortise |
| Battery Type | 8 x AA* Alkaline |
| Battery Life | Up to 18 months |
| Emergency Power | 9V Alkaline Battery |
| Operation Temp | -25°C to 55°C |
| Storage Temp | -40°C to 65°C |
| IP Rating | IP54 |
| Material | AI, Zinc Alloy, ABS |
| Weight | Net: 3.6kg, Gross: 4.2kg |
| Unlock Methods | Bluetooth, PIN Code, RFID Tags/Stickers, Multi-Function Button, Handle, Physical Keys |

* DO NOT USE: Heavy Duty, Eveready, GP, or rechargeable batteries. Duracell, Energizer and Panasonic alkaline batteries recommended. Please note that using better batteries will improve the performance and lifespan of the lock.
Installation Guide
Requirements

Mortise Assembly Length

Screw Specifications

Door Type
Left Hand Installation

Note: Hinge is on your left.
Right Hand Installation

Note: Hinge is on your right.
Preparing the Door
Items needed:

Recommended
Door and door frame material: Wood

Recommended
Gap between door and door frame: <3mm (0.01")

 If you are unsure if your door is suitable, send us web links to your door pictures to support@igloohome.co
How to use the Drill Sheet
Drilling (Door)
- Fold here before drilling holes for side
 - Step 1")
- Make sure this is aligned to the centre of door edge
 - Step 2")
 - Step 1")
 - Step 2")
Chiselling

Mark the center of the holes and then drill for accuracy.
Installation Instructions
- Determine the position of the door handle and pull until it clicks.


- Cut the key cylinder accordingly for different door thickness.
Door Thickness (mm) Notch to Snap* 35 - 40 15mm 40 - 50 10mm 50 - 60 NA
![]()
* The notch to snap serves as guideline only and might change depending on actual door conditions. - Install Mortise

- Install Outer Body

- Install Fire-Bracket
![warning]() Please tighten the screws to firmly fix the fire-proof bracket.
Please tighten the screws to firmly fix the fire-proof bracket.

- Connecting Cables

- Install Inner Body

- Install Striker on the door frame.
Ensure to chisel appropriately to the correct measurements.


Installation Confirmation
- Insert batteries then the buzzer will sound
- Lock the door by pressing and holding
![]()
- Unlock the door with
![]() 1234567890
1234567890![]()

User Guide
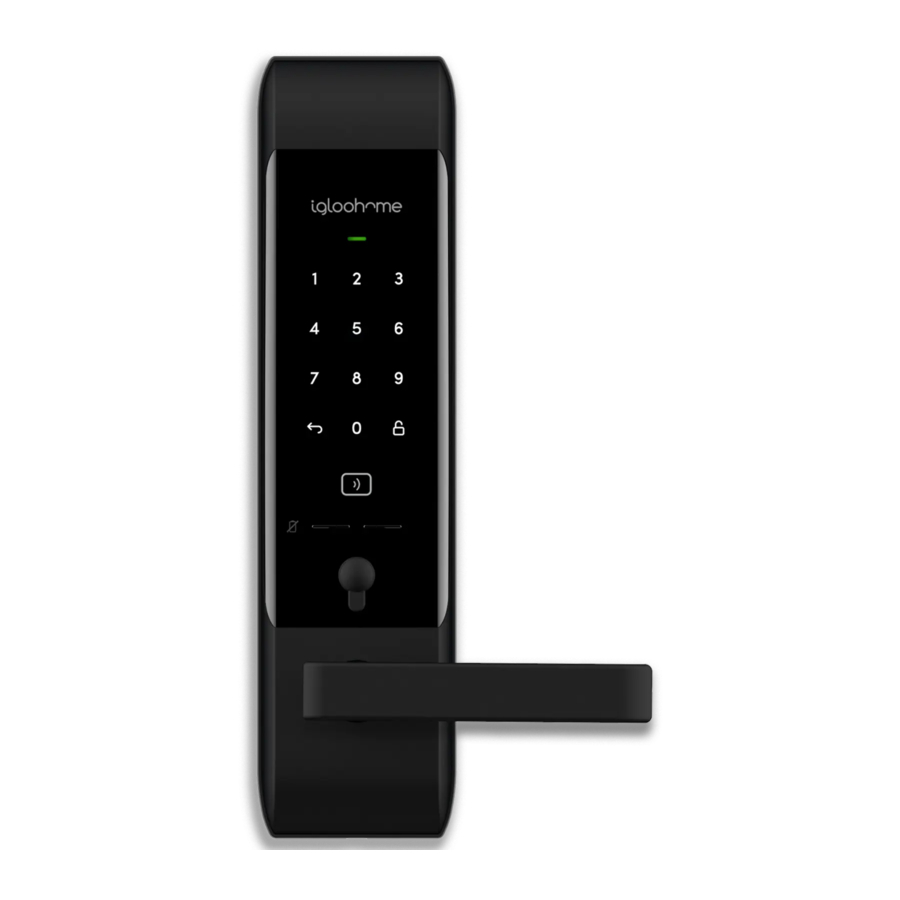
Lock Anatomy

Features
PIN / Bluetooth / Fingerprint / RFID Unlock
 | Master PIN Code The igloohome Mortise unlocks with a permanent Master PIN Code. |  | Bluetooth Master Key The igloohome Mortise unlocks with Bluetooth via the app. |
 | User PIN Code The mobile app can generate user PIN codes, with validity duration from One-Time, Permanent, Recurring or a Duration based on Date-time. |  | Bluetooth Guest Key Bluetooth keys based on duration can be generated and shared with guests. |
 | RFID The igloohome Mortise is able to register up to 100 key cards. | ||
Lock
 | Auto Re-lock The igloohome Mortise relocks automatically when door is closed. User can configure the delay or deactivate relock if they prefer to. Do note that function will only work when Sensor is installed. |  | Manual Re-lock User can press and hold the "unlock" icon on the keypad to manually lock the Mortise. |
Battery
 | Emergency Jump-Start If battery power is drained, an external 9 Volt battery can be used to provide emergency power. The 2 contact points of the battery must be aligned with the 2 contact points on the Mortise. |  | Low Battery Indicator When battery power is low (i.e. less than 20%), the red LED will pulse and there will be short beeps when the mortise locks or unlocks. The battery level will also be updated on the app during Bluetooth unlock. If battery power runs out, use the 9V jumpstart or physical key override. |
Security / Alarms
 | Tamper Alarm The lock will sound if intruders try to pry the lock from the door. |  | Obstruction Alarm Will keep ringing when the Mortise lock is unable to lock/unlock fully. This happens when the lock is low in battery, or the mortise alignment is off. If the warning sound continues, please change the batteries or close the door fully. To disable the alarm: tap on keypad, or unlock by pressing the Multi-Function button. |
 | Passage Mode Activate Passage mode via the Multi- Function Button or turning auto relock off via Bluetooth. |  | Activity Logs Entry via PIN codes and Bluetooth Key will be logged in the app. Bluetooth key access logs are updated in real-time and PIN code access logs are updated when the owner uses a bluetooth key or update logs. |
 | Security Lockout Be assured with an additional layer of security with the keypad lockout if the keypad is being tampered. User can configure number of incorrect attempts to trigger lockout. | ||
 | Intrusion Alarm The lock will sound off if intruders force open the door when the bolt is still locked |  | Masking Security Code Enter random digits before your PIN Code to reduce risk of intruders checking fingerprints. |
Others
 | Volume Control There are 6 volume levels, including mute. |
Unlocking from the Outside
- Bluetooth
- Open your igloohome app
![]()
- Tap on the "Bluetooth Unlock" button
![]()
- The status indicator will flash green twice with 4 short ascending tones once unlocked.
![]()
- Open your igloohome app
- PIN Code
- Press any button on the keypad to wake device up
![]()
- Key in a valid PIN code (with or without masking pins) followed by the "Unlock Icon"
![]()
- The status indicator will flash green twice with 4 short ascending tones once unlocked.
- Press any button on the keypad to wake device up
- RFID
- Hold the registered card and move it closer towards the "RFID icon" on the top of the Mortise
![]()
- The status indicator will flash green twice with 4 short ascending tone once unlocked.
![]()
- Hold the registered card and move it closer towards the "RFID icon" on the top of the Mortise


Unlocking from the Inside
- Handle
Manually unlock by holding the handle down.

- Multi-Function Button
Press the Multi-Function button to unlock.


Locking from the Outside
- Auto Relock
The igloohome Mortise relocks automatically when door is closed. User can configure the delay or deactivate* relock if they prefer to.
Note: Function will only work when Sensor is installed.
*Even if auto-relock is disabled, as a security feature, the mortise will still lock after 30s if it is unlocked using the multi-function button/ BT unlock and door is not opened.

- Manual Relock
Press and hold the Unlock icon on the bottom right of the keypad for 2 seconds until the status indicator will show green with a long beep.
Note: Used when Auto Relock is "Off"


Locking from the Inside
- Multi-Function Button
In the case that auto-relock function is disabled or does not work, after closing the door, user can alternatively press the Multi-Function Button to manually lock the Mortise from the inside.


App Onboarding
- Test Factory PIN Unlock
In the factory mode (before pairing), the PIN to unlock is![]() 1234567890
1234567890![]()
- Register as a Lock User
- Download igloohome from App store / Play store.
![www.apple.com]()
![play.google.com]()
- Create an account and login.
- Download igloohome from App store / Play store.
- Pairing
- Select [Add new igloohome lock]
Note: For existing users with other paired locks, go to [Configuration], select [Add Lock] and follow the instructions.
![]()
- Select [Add new igloohome lock]
- Setting Master PIN code
Before proceeding, turn on your Bluetooth and ensure that you are within Bluetooth range of the lock.
Go to [Access] and customize your [Master PIN] by editing it.


Managing Access in App
- Creating PIN codes
PIN codes can be generated on the app under [Access], create [+Access] and choose either One-Time, Permanent, Duration PIN or Recurring PIN.
Pin codes will expire if its not use within its activation period. Refer to the table below.PIN Type Use PIN within* One-Time PIN 24 hrs of generation Permanent PIN 24hrs of generation Duration PIN 24hrs from the start time Recurring PIN 24hrs from the start time
Note: Duration PIN code end times can be customised within a 28-day timeframe.
Past this timeframe, the end time will automatically be configured to the start time. - Bluetooth Guest Key
Bluetooth Guest Key can be shared with other users for mobile access. It allows your guests to unlock the igloohome smart lock via Bluetooth.
There are 3 steps to using a Shared Bluetooth Key- Under [Access], create [+Access] and choose [Bluetooth Key] under [Access Type]. Proceed to share the key after it is created.
- Guest receives the Bluetooth Key by one of these methods:
- Clicking the URL given and follow the instructions.
- Claiming Bluetooth Key under [Configuration].
- Guest can now use the Bluetooth Key under the Guest Bluetooth Key Section whenever he/she is within range of the lock.
Notes:
- The owner can revoke the Bluetooth Key in App.
- Bluetooth Key must be accepted within 1 hour generation before it expires.
Managing Access in App
- Adding Key Card
- Under [Access], select [+Access] followed by [Keycard].
- Wait until the confirmation of the lock by an audio indicator (long beep).
- Tap key card(s) on the lock to add and then rename the key card(s) on the App right away.
- Follow instructions on the app and select [Done] to complete the process.
9V Jumpstart
9V Jumpstart Feature
- Touch and hold the battery contacts against the 9V jumpstart pin on the lock and you will hear a series of beeps and the keypad will light up if the batteries are fully drained.

- While holding the 9V battery to the jumpstart, key in your PIN code on the keypad followed by the 'Unlock' icon


 Please ensure terminals of the 9V battery are in proper contact with the contact points on the lock.

Changing Batteries
- Push the battery cover upwards to slide it open.

- Insert AA Batteries
![caution]() Please use 8 AA batteries for optimal performance.
Please use 8 AA batteries for optimal performance.

- Slide the battery cover downwards to lock it in place


Lock Behaviour
- Security Lockout
After several incorrect PIN code, RFID or Fingerprint attempts, the corresponding entry method will be locked out and the security alarm will be triggered.
Note: Bluetooth, multi-function button, handle and physical key, and any other unlocking methods aside from the one locked out can be used to unlock in this modeSecurity Lockout Triggered by 5 consecutive invalid PIN or RFID or Fingerprint attempts by default (Configurable via Bluetooth) Disabled By After 1 / 5 / 10 Minutes or Any other unlocking methods Behaviour If keypad is disabled - single flash when keypad is triggered
If RFID is disabled - RFID reader will not read any RFID cardsDuration Please refer to table below. Triggered Security Alarm Security Lockout 1st Time 30 Sec 1 Min 2nd Time 60 Sec 5 Min 3rd and
Consecutive Time90 Sec 10 Min - Keypad Disabled Mode
Keypad Disabled Mode prevents others from using PIN code, RFID tag/stickers and Fingerprints to unlock when you are inside the property. It can be activated when the mortise is locked.
Note: Bluetooth, Multi-Function Button, Handle and Physical Key can be used to unlock in this mode. - Passage Mode
Passage Mode enables you to have easy access during high human traffic flow by deactivating auto relock. It can be activated when the mortise is unlocked.
Method 1: Turn off auto relock under lock settings via Bluetooth
Method 2: Holding on to the Multi-Function ButtonKeypad Disabled Mode & Passage Mode Activated by Holding on to the Multi-Function Button until 3 short ascending beeps is heard. Deactivated By Holding on to the Multi-Function Button until 3 short descending beeps are heard or
Unlocking via the Handle, Multi-function button, or BluetoothBehaviour Double flash when keypad is triggered and lock will not accept any PIN code or RFID
Airbnb Connect
- Airbnb Connect
Airbnb Connect automates the generation of PIN codes for your Airbnb guests based on their approved reservations. It costs USD$4.99 per month, but is currently on free trial.
Here are the steps to activate Airbnb Connect- Connect to your Airbnb
Under [Account Settings], select [Connect with Airbnb], then click [OK]. - Connect to Airbnb listings
Under [Reservations], click the [Add] icon to select a home to connect to. Select Airbnb Listing and PIN Time to associate.
Note:- Emails with PIN code will be sent to the guest between 1 to 48 hours before check-in time (configurable).
- PINs will only be valid between the check-in and check-out times.
- Change Check-in and Check-out time
Under [Configuration], select [Manage Properties] followed by the listing to view or edit its details.
Notes:
- Connect to your Airbnb
- If the access mail has not been sent, changing your check-in/check-out time via the app modifies the start and end time of the PIN codes to be shared with your guest.
- If the access mail has been sent, changing these details will only affect the next reservation.
- Changing these details on the igloohome app does not update the check-in/check-out time on the listing on the Airbnb website.
- Disconnect Airbnb
Should you prefer to generate PIN codes for your guests manually, you may disconnect your Airbnb listing from the igloohome home listing with the steps below.- Under [Reservations], disconnect all the listings (if any).
- Under [Account Settings], select [Disconnect with Airbnb].
Should you wish to completely disconnect your Airbnb account from your igloohome account, make sure that all your Airbnb listings have been disconnected in the above step, then go to:
Airbnb Host Website > Connected Apps > Select igloohome to disconnect
Audio and LED Indications
| Actions | Indications |
| Bluetooth Connection | Status indicator flashes Blue |
| Successfully Unlocked | Ascending 4 fast tones after unlocked and flash Green LED 2 times |
| Successfully Locked | 1 long beep after product is locked and Green LED for 2 seconds |
| Incorrect PIN | 4 short beeps and flash Red LED 2 times |
| Invalid RFID | Descending 4 fast tones |
| Obstruction Alarm | 6 sets of 4 short beeps |
| Keypad Disabled Mode Activated | Ascending 3 fast tones |
| Keypad Disabled Mode Deactivated | Descending 3 fast tones |
| Keypad Security Lockout Alarm | Low-high siren for 30 /60 / 90 seconds |
| Keypad Security Lockout Deactivated | 2 long beeps |
| Low Battery Alert | When mortise is locked or unlocked: If battery is below 20% - 2 sets of 2 short beeps with pulsing Red LED If battery is below 10% - 4 sets of 2 short beeps with pulsing Red LED |
| Tamper Alarm | Continuous long beep |
| Hard Reset / Unpair | Descending 3 slow tones |
| Pairing | Ascending 3 fast tones |
Troubleshoot
Pairing is unsuccessful
- Try with a different mobile device, using the same username and password
- Update your phone's operating system to the latest version
- Restart the Bluetooth and Internet connection on your mobile device
- Restart igloohome app on your mobile device
- Switch to a new set of batteries
Bluetooth Key is not working
- Restart the Bluetooth and Internet connection on your mobile device
- Check on the timezone of the home listing against your phone time
- Check if the Bluetooth Key is expired. It must be accepted within 1 hour of generation
- Update your igloohome app to the latest version
- Switch to a new set of batteries
Generated PIN codes do not work
- Make sure that the generated PIN codes are activated within the given hours
- Do a Bluetooth Unlock to refresh the app
- PIN codes may have been customised or expired
Keypad does not light up
- The Mortise battery is flat
- Use a 9V battery to jumpstart the lock and unlock the Mortise to replace the batteries
- Refer to9V Jumpstart
- Please unlock within 20 seconds
Unable to use a 9V battery to jumpstart the lock
- Please ensure the two pins of the battery is in contact with the 9V jumpstart pin securely while unlocking it
- Please unlock within 20 seconds
- Please ensure that the 9V battery has sufficient power
Keypad is flickering
- The Mortise is low in battery. Switch to a new set of batteries
Keypad lights up on touch only
- Check if the mortise is in keypad lockout / passage mode or security lockout mode
- Check that your lock is not muted
Re-lock is not working
- Check battery level of the lock
- Make sure you have enabled auto relock function on the app and the magnet sensor has been installed on the door frame
Slow locking / Unlocking
- The Mortise is low in battery. Switch to a new set of batteries
For enquiries go to: igloohome.co/support
Documents / Resources
References
Download manual
Here you can download full pdf version of manual, it may contain additional safety instructions, warranty information, FCC rules, etc.
Advertisement


Need help?
Do you have a question about the Lever Mortise and is the answer not in the manual?
Questions and answers