
Related Manuals for B&D ESY Shutter RASE


Summary of Contents for B&D ESY Shutter RASE
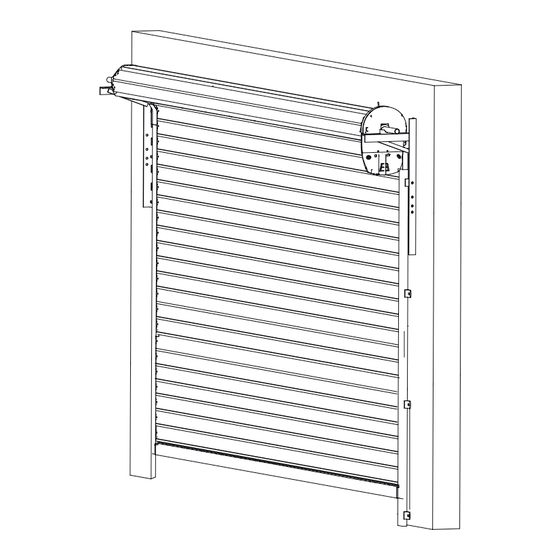
- Page 1 ESY Shutter installation instructions These instructions are intended for professional garage door installers. All references are taken from inside looking out. DOC# 165023_02 Released: 02/10/23 www.bnd.com.au...
-
Page 2: Table Of Contents
ESY Shutter Installation instructions contents 1.0 before you start 3.3 safety obstruction force test 3.3.1 testing the close cycle 1.1 safety checklist 1.2 fastener recommendations 3.3.2 testing the open cycle 1.3 preparation 3.4 coding transmitters 1.4 before installation 3.4.1 transmitter button to operate 1.4.1 requirements 3.4.2 erasing programmed codes 1.4.2 measurements... -
Page 3: Before You Start
ESY Shutter Installation instructions 1.0 before you start 1.1 safety checklist This B&D ESY Shutter is designed and tested to provide security, attractive appearance and smooth , low effort operation provided it is installed and operated in strict accordance with the following safety warnings. Failure to comply with the following instructions may result in death, serious personal injury or property damage. - Page 4 ESY Shutter Installation instructions CAUTION: LACERATION: MUSCULAR STRAIN • Wear appropriate PPE (Dyneema cut off gloves) and keep • Practice correct lifting techniques when required to lift the hands well clear of pinch points. shutter. • Follow instructions explicitly, particularly installation of some parts of the shutters, as the unrolled •...
-
Page 5: Fastener Recommendations
ESY Shutter Installation instructions 1.2 fastener recommendations for fitting shutters length of WARNING! The installer diameter material fastener type(s) fastener GUIDE must select and use or type (see note) fasteners appropriate to the material into which New Hollow Brick HRD-VGK or HGK-VGS •... -
Page 6: Preparation
ESY Shutter Installation instructions 1.3 preparation WARNING! If you need to remove an old shutter prior to installing a B&D shutter ensure to: • Roll the curtain up and secure curtain around the middle. • Use correct lifting techniques and machinery. •... - Page 7 ESY Shutter Installation instructions 1.4.2 measurements continued... Fig: 1.4.2 Fig: 1.4.3 dimension table Minimum Minimum Recommended Lintel to Recommended Width of Sideroom Sideroom Headroom bracket Backroom Guide Door Opener Side Plain Side Door height Door width Drum Model Axle to Size (mm) (mm)
-
Page 8: Specifications
ESY Shutter Installation instructions 1.5 specifications Shutter must be well balanced and able to be operated by hand, as per warranty conditions and standard AS/NZS 4505:2012 Shutter Technical ESY Shutter Opener Technical GDO-12RAS Hiro Specifications (RASE) Specifications (GDO-12V2RAS) Drum Type: Welded spiral steel tube (raw finish) Rated voltage range 230V - 240V... -
Page 9: Parts Checklist
ESY Shutter Installation instructions 1.6 parts checklist Fig: 1.5.1 REGISTRATION CARD ESY SHUTTER RASE GDO-12RAS HIRO OPENER GDO-12V2RAS ITEM DESCRIPTION ITEM DESCRIPTION ROLLED SHUTTER GDO-12 DRIVE UNIT BRACKETS, LEFT AND RIGHT HANDED WIRED PE3V1 EASYBEAM SHUTTER GUIDES LEFT AND RIGHT HANDED PE BEAM MOUNTING KIT SMALL PARTS BAG CONTAINING 4 BUTTON TRANSMITTERS... -
Page 10: Installation
ESY Shutter Installation instructions 2.0 installation 2.1 install first bracket dimension table height width (mm) (mm) up to 2000 2001 - 3000 RASE up to 4300 3001 - 4000 4001 - 4600 Fig: 2.1.1 a) Use above diagrams Fig 2.1.1 and 2.1.2 for head and sideroom clearances. -
Page 11: Mounting The Opener
ESY Shutter Installation instructions 2.3 mounting the opener a) Carefully raise the shutter off the ground to waist height, ensuring the drum is balanced. b) Open the opener box and check the drive gear rotates freely, by pulling the string handle down (there will be a click) to disengage opener. -
Page 12: Install The Guides And Safety Beams
ESY Shutter Installation instructions guide clearance 2.5 install the guides and safety beams 3 - 5 mm 2.5.1 positioning the guides slats Guides must be correct length. The guide stop should be water level and in line with the bottom of the lintel for aluminum bottom rail installation. -
Page 13: Aligning The Transmitter And Receiver
ESY Shutter Installation instructions 2.5.4 aligning the transmitter and receiver a) Wire the PE Beams as per Wiring RECEIVER TRANSMITTER Diagram (Fig. 2.5.4). b) Power up the opener with the safety beams connected. The green LED on the transmitter should turn ON to indicate power is present. -
Page 14: Adjusting Spring Tension
ESY Shutter Installation instructions 2.8 adjusting spring tension WARNING! Ensure that pipe wrench is fitted correctly to the axle and if it is gripped onto the To decrease axle do not underestimate the tension in the spring when undoing the clamps spring tension CAUTION: THIS ADJUSTMENT REQUIRES 2 PERSONS TO COMPLETE. -
Page 15: Automation Setup
ESY Shutter Installation instructions 3.0 automation setup 3.1 setting limits 3.1.1 limit positions S E T T I N G L I M I T S When setting the Close limit, ensure the position is when the door makes rst contact with the ground. -
Page 16: Clearing The Shutter Limit Positions
ESY Shutter Installation instructions NOTE: If unhappy with the speed or travel limit setting, restart this procedure by clearing the shutter limit positions as per below first. 3.1.2 clearing the shutter limit positions 3.1.3 reprofiling the shutter C L E A R I N G T H E D O O R L I M I T P O S I T I O N S R E - P R O F I L I N G T H E D O O R Re-pro ling is a simple way of re-learning the travel S T E P O N E... -
Page 17: Safety Obstruction Force Test
ESY Shutter Installation instructions 3.3 safety obstruction force test WARNING! Take care when testing or adjusting the Safety Obstruction Force. Excessive force may cause SERIOUS PERSONAL INJURY and/or PROPERTY DAMAGE. WARNING! If the shutter fails these tests, put the opener into manual mode, only operate the shutter by hand and call for service. -
Page 18: Erasing Programmed Codes
ESY Shutter Installation instructions till all three LED’s are lit Press repeatedly S T E P F O U R S T E P F I V E 3.4.2 erasing programmed codes To exit E R A S I N G A L L T R A N S M I T T E R C O D E S G D O - 1 2 R A S coding S T E P O N E S T E P T W O... -
Page 19: Operation Instructions
ESY Shutter Installation instructions 4.0 operation instructions 4.1 opener safety & security MANUAL RELEASE 4.1.1 the shutter CAN NOT be used when: a) There is a locking device installed. b) There is a power failure and batteries are not charged. WARNING! When operating the manual release (while the door is open) the door may fall rapidly due to weak or broken... -
Page 20: User Operating Controls
ESY Shutter Installation instructions 4.2.2 user operating controls Button Function 1. BLUE DOWN ARROW Close Button 2. RED STOP/SET Stop / Set Button 3. GREEN UP ARROW Open Button 4. MODE Mode Selection Button 4.3 shutter status indicators Shutter Status Indicators OPEN LED (green) CLOSE LED (blue) STOP (red) -
Page 21: Troubleshooting Guide For Opener
ESY Shutter Installation instructions 4.4 troubleshooting guide for opener Symptom Possible cause Remedy The opener does not work Garage shutter in poor condition e.g. Check the shutter’s operation (Section 2.7) from the transmitter springs may be broken The opener does not have power Plug a device of similar voltage (e.g. -
Page 22: After Installation Care
ESY Shutter Installation instructions 5.0 after installation care 5.1 service checklist WARNING! Failure to maintain your shutter Preventative servicing of your shutter and opener, is just as voids the warranty on your shutter opener. important as servicing your car. Much like the engine of your car, your shutter is made up of numerous moving parts designed to lift and lower your door safely and efficiently. -
Page 23: Battery Replacement
ESY Shutter Installation instructions 5.2 Battery Replacement C H A N G I N G A B A T T E R Y Battery Type: 1 x CR2032. S T E P O N E Light Status Battery Solid Check Light Status Table Flashing Replace... -
Page 24: Care For Your Esy Shutter
ESY Shutter Installation instructions 5.4 care for your ESY Shutter spring tension Your B&D ESY Shutter has been manufactured from galvanised or powder coated steel, which is one of the It is natural for springs to lose tension over time. When spring best paint films commercially available today. -
Page 25: Appendix
ESY Shutter Installation instructions 6.0 appendix A - adjustment mode parameters A D J U S T M E N T M O D E I N S T R U C T I O N S S T E P O N E Remove controls cover One of the word LED’s till Spanner... -
Page 26: B - Setting The Pet Mode Position
ESY Shutter Installation instructions B - setting the PET Mode position S E T T I N G T H E P E T M O D E P O S I T I O N When activated, PET mode drives the door to a preset position from the close position, therefore allowing a pet or parcel to go under the door. -
Page 27: D - Setting Limits Via Transmitter
ESY Shutter Installation instructions D - setting limits via transmitter The GDO-12RAS Hiro has the ability to set travel limits using a transmitter, allowing free movement around the garage to better Button 1 Button 2 assess the desired limit positions. In order to use a transmitter, it must (Inch Open) (Set) first have at least one of its buttons coded to the shutter controller. -
Page 28: E - Additional Transmitter Functions
ESY Shutter Installation instructions E - additional transmitter functions E.1 transmitter button to the courtesy light E.3 transmitter button to operate PART Mode C O D I N G R E M O T E F O R C O U R T E S Y L I G H T C O D I N G R E M O T E F O R P A R T M O D E S T E P O N E S T E P T W O... -
Page 29: F - Optional Extended Battery Backup
ESY Shutter Installation instructions F - optional extended battery backup a) To mount battery backup pack onto the wall, use the battery pack as template to mark where to drill holes as per Fig F.1. Pre-drill holes and affix to wall with appropriate screws. WARNING! After Step (b) the opener may become active (even when power is off).
Need help?
Do you have a question about the ESY Shutter RASE and is the answer not in the manual?
Questions and answers