Leica EM GP2 Operating Manual
Hide thumbs
Also See for EM GP2:
- User manual (3 pages) ,
- Standard operation protocol (19 pages) ,
- Instructions for use manual (60 pages)
Table of Contents
Advertisement
Quick Links
Advertisement
Table of Contents

Related Manuals for Leica EM GP2


Summary of Contents for Leica EM GP2
- Page 1 From Eye to Insight OPERATING MANUAL EM GP2 Version 11/17...
- Page 2 Important Note Leica reserves the right to change technical specifications as well as manufacturing processes without prior notice. Only in this way is it possible to continuously improve the technology and manufacturing techniques used to provide our customers with excellent products.
- Page 3 EM GP2 Operating Manual Leica EM GP2 Serial Number: Date of purchase: For the instrument serial number, please refer to the name type label on the back of the instrument! Please read this instruction manual carefully before operating the instrument.
- Page 4 Leica reserves the right to change technical specifications and manufacturing processes without prior notice. Only in this way, Leica can continuously improve the technology and techniques used to provide its customers with excellent products.
-
Page 5: Table Of Contents
Table of Contents 1 Introduction ....................1 1.1 Product Identification ................1 1.2 Field of Application and Intended Use ............1 1.3 Qualification of Operating Personnel ............2 1.4 Symbols and Warnings ................2 1.5 General Safety Information ............... 3 1.6 ... - Page 6 5 Operation ....................22 5.1 Switching on and User Interface ............. 22 5.2 Parameters ..................... 24 5.2.1 Environment Parameters ..............24 5.2.2 Load Specimen Parameters ............27 5.2.3 Blot Parameters ................29 5.2.4 Plunge / Transfer Parameters ............34 5.3 Programs ....................36 5.3.1 ...
- Page 7 6.2.2 Performing the Update ..............59 6.3 Cleaning and Upkeep ................61 6.3.1 Cleaning the Humidifier Tank ............61 7 Disposal ...................... 63 7.1 Decommissioning ................... 63 7.2 Disposal ....................63 8 Troubleshooting ..................64 8.1 About this Manual ................... 64 8.2 ...
-
Page 9: Introduction
A-1170 Vienna, Austria www.leica-microsystems.com Field of Application and Intended Use This product, the EM GP2, an automatic plunge freezer, is a dedicated cryo sample preparation system for cryo electron microscopy. It was designed and built according to the following European directives: ... -
Page 10: Qualification Of Operating Personnel
Additionally, users in charge of the product’s upkeep (when authorized Leica service engineers are not required) and/or performing additional technical but non- operational tasks (e.g. work area set-up, transportation, decommissioning, and disposal) must be accordingly qualified. -
Page 11: General Safety Information
(Section 3), work area conditions (Section 4), and decommissioning and disposal (Section 7). The EM GP2 was tested in accordance to IEC/EN 61010-1 and EN 61326-1. It complies with the European Machinery (2006/42/EC), EMC (2014/30/EU) and RoHS (2011/65/EU) directives (Sections 1.2 and 10). -
Page 12: Safety Measures Regarding Nitrogen
To avoid the above-mentioned hazards, ensure that the laboratory room is always well ventilated. In case of power outage, provide additional sources of ventilation (e.g. opening doors and windows). Additionally, it is recommended to use an oxygen sensor to constantly monitor oxygen levels. Operating Manual EM GP2 Version 11//2017 Page 4... -
Page 13: Safe Storage
’s boiling point (-196°C) is lower than liquid oxygen’s (-183°C). Check the colour of LN : a faintly bluish colour indicates a high percentage of liquid oxygen. Liquid oxygen presents additional hazards, as it can cause vigorous burning. Operating Manual EM GP2 Version 11//2017 Page 5... -
Page 14: Equipment And Handling
Simply use an open flannel cloth (h) to protect your hands from the cold. Gloves should only be used to handle dry and cold parts and are unsuitable for handling. Figure 1 – PPE when handling LN Operating Manual EM GP2 Version 11//2017 Page 6... - Page 15 Use cuff less trousers if wearing slip-on sandals Protect your hands with open flannel cloths Insert warm objects into LN carefully After skin or eye contact rinse with water and contact a specialist Operating Manual EM GP2 Version 11//2017 Page 7...
-
Page 16: Safety Measures Regarding Ethane And Propane
This product’s secondary cryogen container has a volume of 2.5 ml. When working with ethane and propane, use adequate Personal Protective Equipment (PPE). The same kind of equipment required to handle LN can be used to handle liquid ethane and propane (Section 1.6.3). Operating Manual EM GP2 Version 11//2017 Page 8... - Page 17 Wear boots if trousers cover the gap around them Use cuff less trousers if wearing slip-on sandals Protect your hands with open flannel cloths After skin or eye contact rinse with water and contact a specialist Operating Manual EM GP2 Version 11//2017 Page 9...
-
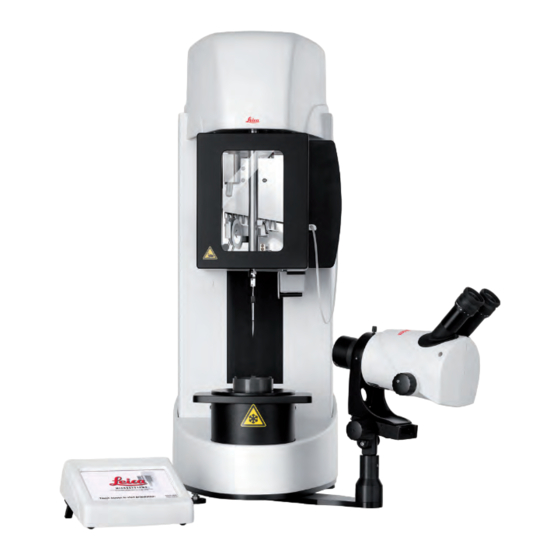
Page 18: Product Description
Forceps with forceps adapter Viewing system (optional) Moveable ring for contamination protection Freezing chamber with secondary cryogen and cryo transfer container Secondary cryogen liquefier Cryo transfer container Foot switch (optional) Touch panel Operating Manual EM GP2 Version 11//2017 Page 10... - Page 19 The EM GP2 is a dedicated cryo-preparation system for plunge freezing cryo- fixation of thin samples on EM grids. The instrument was designed to make the preparation of vitreous frozen thin films straightforward and reproducible. All processes are controlled via the touch panel where actual and set parameters can be viewed and the system can be set up according to the user’s needs.
-
Page 20: Dimensions And Weight
Dimensions and Weight The following technical drawing describes the dimensions of the EM GP2. 2.2.1 Product Dimensions The EM GP2 is delivered in one box with the following dimensions and weight: 650 mm Width: 1030 mm Depth: 700 mm ... -
Page 21: Stereomicroscope
The dimensions of the basic unit with an installed stereomicroscope are indicated in the following drawing: 675 mm (Furthermost side position) Max Width: 805 mm (Furthermost front position) Max Depth: Operating Manual EM GP2 Version 11//2017 Page 13... -
Page 22: Consumption And Emissions
2.4.1 Constructive Protective Measures The EM GP2 contains a protective case (housing), separating the user from the electrical and mechanical components that are only accessible to authorized Leica service engineers. Openings for air flow are protected. These protective components must be in place during operation. -
Page 23: Informative Protective Measures
This operating manual – with the provided descriptions of residual hazards herein – and the safety signals placed on the product are regarded as informative protective measures and shall be kept as such for further reference. The EM GP2 contains the following pictograms and safety signals. -
Page 24: Type Label
Type Label The type label is located on the rear side of the product, above the mains supply switch and cable connectors. See Section 9 for all technical specifications. Year Serial Number Operating Manual EM GP2 Version 11//2017 Page 16... -
Page 25: Transportation And Storage
In cases when the device needs to be kept un-operational for a prolonged period, clean the humidifier tank (Section 6.3.1) and store the EM GP2 in a room with a temperature between +5 and +35°C (ideally +21 to +24°C) and a maximum relative humidity of 55% (ideally around 40%). -
Page 26: Installation
+21 and +24°C) and relative humidity from max. 55% (ideally around 40%). The room must be ventilated, dry, free of dust and other contaminants, and illuminated. Do not install the EM GP2 in area with strong air draught. Do not operate the EM GP2 in outside environments. -
Page 27: Unpacking
The packing material is designed explicitly for the EM GP2 and shall be retained in case the instrument needs to be transported in the future. The product can sustain damage if it is not transported in the original packing. Store the packing material on a dry environment. -
Page 28: Assembly
Level the instrument by adjusting the four adjustable feet (1) Connect the touch panel to the respective plug at the rear of the EM GP2 (2) Optionally, connect the foot switch to the round plug (3) ... -
Page 29: Accessories
Accessories The main outfit of the EM GP2 consists of the basic instrument with a touch panel and an accessories kit as shown in the next figure. During the installation process, the authorized Leica service engineer will corroborate the complete delivery of these accessories and initial consumables. -
Page 30: Operation
LN container. These steps are described in detail in Section 5.4. Operating Manual EM GP2 Version 11//2017 Page 22... - Page 31 3 Functional keys, with which special screens or functions can be called, e.g. rotation of the grid around a vertical axis or chamber illumination on/off. 4 Warnings and error messages. 5 Name and status of the current program. Operating Manual EM GP2 Version 11//2017 Page 23...
-
Page 32: Parameters
Press “Chamber Temperature – Set” to change the current value on the key pad (between 4.0 and 60.0 °C with 1.0 °C steps) and “OK” to confirm. Operating Manual EM GP2 Version 11//2017 Page 24... - Page 33 Generally, low humidity to promote evaporation yielding thinner ice is not recommended. Operating Manual EM GP2 Version 11//2017 Page 25...
- Page 34 (melting points: -183°C for ethane, -188°C for propane). This point can be adjusted prior to plunging and may vary from one gas supply to another, depending on its quality. Operating Manual EM GP2 Version 11//2017 Page 26...
-
Page 35: Load Specimen Parameters
The “Load Specimen” screen controls the vertical 180° rotation of the forceps holding the grid before and after applying the specimen through the ports on the left or right side. This rotation allows a flexible workflow for both left- and right- handed operators. Operating Manual EM GP2 Version 11//2017 Page 27... - Page 36 (“pre-blotting time”, 0 s to 600 s, 0.1 s steps). This waiting time can be useful to allow adsorption of the specimen to the support film in a controlled environment, typically 0 to 60 s are used. Operating Manual EM GP2 Version 11//2017 Page 28...
-
Page 37: Blot Parameters
The horizontal position of the grid used for blotting can be defined by pressing “Horizontal blot position – no sensor – Set”. If the environmental chamber is in the raised position, a warning will be displayed that the chamber needs to be lowered. Operating Manual EM GP2 Version 11//2017 Page 29... - Page 38 The vertical position of the grid relative to the filter paper while blotting can be set starting from the main blotting menu (page 29) by pressing “Set” for the “vertical blot position”. Operating Manual EM GP2 Version 11//2017 Page 30...
- Page 39 (due to the high humidity in the environmental chamber) or bending of the grid, this point standardises the distance from the filter paper to the grid, provided that the sample volume and spreading of the liquid are kept constant. Operating Manual EM GP2 Version 11//2017 Page 31...
- Page 40 Select “Additional move – Set” from the main blotting menu to get to the setup screen. Operating Manual EM GP2 Version 11//2017 Page 32...
- Page 41 3 µl limit required by the sensor. To enable this mode, click “multiple blotting” in the blot parameters screen. Operating Manual EM GP2 Version 11//2017 Page 33...
-
Page 42: Plunge / Transfer Parameters
180° position can be selected by pressing the “Set” button next to the blot numbers. In the above example, the EM GP2 will blot three times in the home position and three times in the 180° position. The maximum number of blots (home and 180°... - Page 43 To facilitate the transfer of the grid after plunging or to remove excess liquid secondary cryogen, the grid can be slightly lifted out of the cryogen after freezing (“transfer position”). Entirely depending on the user’s personal preference, the EM GP2 allows to Completely skip the transfer position (“Skip transfer position” enabled) Automatically advance to the transfer position (“Skip transfer position”...
-
Page 44: Programs
Programs Programs are used to save and recall all experiment/sample-specific settings of the EM GP2 as described in the previous section. Up to 20 programs can be saved in the instrument’s memory, these settings are preserved when the instrument is switched off. -
Page 45: Editing Programs
“Copy”. Now, select the storage space you want to overwrite with the program or press “Main” to return to the main screen. NOTICE Copying Programs The program originally on the storage location selected to copy to will be lost. Operating Manual EM GP2 Version 11//2017 Page 37... -
Page 46: Deleting Programs
Pick up a fresh filter paper ring (Whatman™ #1), preferably with gloves or forceps, and place the metal ring over it. Holding both together, place them well centred onto the magnetic mount in the environmental chamber. Operating Manual EM GP2 Version 11//2017 Page 38... - Page 47 The counter is automatically reset to zero when the instrument is switched on as it is assumed that a new filter paper will be set in at that point (warning message at start up). Operating Manual EM GP2 Version 11//2017 Page 39...
-
Page 48: Humidifier
Luer™ lock and open the valve (valve shown in closed position on top, open on bottom). Then press the syringe piston slowly but steadily to fill in the water. Not included in the delivery Operating Manual EM GP2 Version 11//2017 Page 40... - Page 49 After filling, close the valve, remove the syringe, and fix the tube on the clip on the rear side of the humidifier cover. Operating Manual EM GP2 Version 11//2017 Page 41...
-
Page 50: Emptying The Drip Tray
As the liquid level here is not monitored, it should be emptied regularly: Pull out the drip tray to the right, discard of the condensate, and re-insert it to the original position. Operating Manual EM GP2 Version 11//2017 Page 42... -
Page 51: Freezing Chamber And Cool-Down
Now pour liquid nitrogen (LN ), directly into the EM GP2 Dewar using a Dewar or similar. It will take around 1.8 litres LN to cool the Dewar and fill it to 100%. - Page 52 At 0% Dewar filling level, the cooling of the secondary cryogen cannot be ensured any longer. Either refill with immediately or dispose of the secondary cryogen and bake out the EM GP2. A warning will sound when the temperature of the secondary cryogen rises above -100 °C and starts to evaporate.
-
Page 53: Filling The Secondary Cryogen
(ethane or propane). To prevent contamination, keep this tubing as short as possible. Insert the gas liquefier in the chamber over the secondary cryogen container while cooling down the EM GP2 with LN and wait until the temperature of the cryogen container drops to or close to the set value. -
Page 54: Freezing A Grid
Freezing a Grid For cryo specimen preparation and sample loading into the microscope, only work with clean and dry (Leica EM CTD) tools to avoid contamination of the specimen, and only approach the frozen specimen with pre-cooled tools (no boiling in LN... - Page 55 The snap-lock forceps have a quick release mechanism for rapid loading and easy unloading. The forceps fit onto the EM GP2 in only one direction to maintain the orientation of the grid (the side with the holey support film). The position during mounting is the “home”...
-
Page 56: Lower Chamber
During movement of the environmental chamber, a “STOP” button will appear on the touch panel. Pressing this button will freeze the movement. To continue, the workflow must be reset via the “LOAD FORCEPS” button. Operating Manual EM GP2 Version 11//2017 Page 48... -
Page 57: Adjust Parameters
Open the side port of the environmental chamber and dispense a 3 - 5 µl fluid droplet onto the grid. Close the side port immediately to maintain a stable atmosphere. Operating Manual EM GP2 Version 11//2017 Page 49... -
Page 58: Blotting
“BLOT” again. A timer for the blot time(s) is also shown. If a post-blot delay has been programmed, a timer will be displayed as well. Operating Manual EM GP2 Version 11//2017 Page 50... -
Page 59: Freezing
Freezing If “automatically plunge after blotting” is selected in the parameters (section 5.2.4, page 34), the EM GP2 will automatically plunge the grid into the secondary cryogen after blotting (and the elapse of the optional post-blot delay). If this option is not enabled, the user must press the “PLUNGE” button in the workflow list of the main screen or press the foot switch to trigger plunging. -
Page 60: Transferring A Cryo-Grid Box
Cover the grid box cryo transfer container with its lid, attach the pre-cooled M4 cryotool and lift the container out of the freezing chamber into an additional Dewar filled with LN waiting next to the instrument. Operating Manual EM GP2 Version 11//2017 Page 52... -
Page 61: Shutting Down And Bake Out
Dispose of the used blotting paper and leave the door of the environmental chamber open. On completion of the cryo work, the EM GP2 must be baked out to drive off any and moisture which may cause problems on the next use by freezing up moving parts or contaminating the specimen. - Page 62 LN level and the temperature of the environment. During the bake-out cycle, surfaces in the environmental chamber and the Dewar can become very hot. Touching these surfaces might result in burns. Operating Manual EM GP2 Version 11//2017 Page 54...
- Page 63 The instrument will not power down automatically. Before switching off the system with the main switch at the back, wait until the chamber arrived at the lowest position. Operating Manual EM GP2 Version 11//2017 Page 55...
-
Page 64: Settings
Dewar can be reduced to approx. 1/3. The check boxes in the lower right part of the “Process” tab allow to enable/disable this slow-down for the down and the up movements separately. Operating Manual EM GP2 Version 11//2017 Page 56... -
Page 65: Tab "System
These files are intended to be used by service technicians for failure analysis. Please export them and send them to your service technician if asked to do so. The “Update” and “Service” buttons will be explained in the next section. Operating Manual EM GP2 Version 11//2017 Page 57... -
Page 66: Maintenance And Repairs
Maintenance and Repairs Service Menu The EM GP2 has a Service button under the Settings menu (Section 5.8.2) which allows entering the Service menu. Access to this menu is password-protected and restricted to authorized Leica service engineers. Thus, user access to the Service menu is prohibited and considered as not intended usage (Section 1.2). -
Page 67: Performing The Update
To perform the software update, press the “Settings” button on the main screen. Afterwards, press the “Update” button. Connect the US-Stick with the right folder structure on the rear side of the panel. Operating Manual EM GP2 Version 11//2017 Page 59... - Page 68 After updating the “User Interface”, the system will restart automatically. After restarting, enter the Update screen and – if necessary – continue with “Controller CH” and “Controller DW”. Restart the system once more after finishing updating. Operating Manual EM GP2 Version 11//2017 Page 60...
-
Page 69: Cleaning And Upkeep
Cleaning and Upkeep Keep the EM GP2 clean by ensuring the chamber’s interior is free of dust and other contaminants. To reduce contamination, it is recommended to use gloves when handling in the interior of the chamber! Before cleaning, switch off and unplug the EM GP2 from the mains power supply. - Page 70 The system can then be cleaned with 70% ethanol and reassembled in the reverse order shown above. When reconnecting the water tank, make sure the two electrical connections fit into their sockets. Operating Manual EM GP2 Version 11//2017 Page 62...
-
Page 71: Disposal
Disposal Decommissioning To prepare the EM GP2 for decommissioning, empty the humidifier tank (Section 6.3.1) and drip tray (Section 5.4.3), and remove any leftover cryogen liquid from the LN Dewar and secondary cryogen containers. If required, perform a bake-out (Section 5.7) until the device is completely free of moisture. Afterwards, turn off the device and unplug it from the power supply. -
Page 72: Troubleshooting
Warranty The EM GP2 is covered by a warranty according to the sales conditions. If functional errors should occur or if the components of the system sustain damage that is subject to warranty coverage during the warranty period, the manufacturer will repair or replace the faulty components following examination thereof. -
Page 73: Warnings And Errors List
Warnings and Errors List The following list contains – sorted by the reference code on the first column– all possible warning and error messages displayed by the EM GP2, whereby Warnings (coded WXXXX) refer to situations needing certain actions by the ... - Page 74 EM GP2 – Errors and Warnings Type / Code Message Further Information Decision The chamber movement was Shown after pressing “STOP” stopped. Press <OK> to Warning during chamber movement. W1005 <OK>/<Cancel> continue with the chamber <OK> resumes movement. movement. Shown on the editor screen;...
- Page 75 EM GP2 – Errors and Warnings Type / Code Message Further Information Decision Shown when loading a new Modifications in program program without saving changes number ## - (program name) in the actual program. Before Warning W1016 <Yes>/<No> not saved. Do you want to save loading the new program, <Yes>...
- Page 76 EM GP2 – Errors and Warnings Type / Code Message Further Information Decision <OK> start initialization blotter If the issue persists, contact a motor. service engineer. The blotter is in an undefined Blotter axis is not initialized. state; remove any obstacles in Error <OK>...
- Page 77 EM GP2 – Errors and Warnings Type / Code Message Further Information Decision Rotation axis initialization failed. The forceps rotation motor could Could not reach end switch. not initialise; remove any Error E5001 <OK>/<Cancel> <OK> start initialization rotation obstacles and press <OK> to motor.
-
Page 78: Technical Data
(test condition: 22 °C environmental temperature, humidity < 55 %) DEWAR Dewar Volume Dewar Temperature -196 °C Dewar bake-out Temperature Max. +110°C Consumption ~ 1 l/h flow 50%, Dewar covered with lid, secondary cryogen temperature -180°C Operating Manual EM GP2 Version 11//2017 Page 70... - Page 79 Secondary Cryogen Container 0 to -196 °C Temperature Secondary Cryogen Container 2.5 ml Volume ADDITIONAL DATA Noise Level < 60 dB (A) Tilting Angle > 10 ° Degree of Protection IP 20 Operating Manual EM GP2 Version 11//2017 Page 71...
- Page 81 Person authorised to compile the technical file: Dr. Paul Wurzinger, Hernalser Hauptstrasse 219, A-1170 Vienna, Austria Vienna, 01/11/2017 Dr. Paul Wurzinger, Prokurist Leica Mikrosysteme GmbH · Hernalser Hauptstrasse 219 · A-1170 Wien T +43 1 48899 0 · F +43 1 48899 350 CONNECT www.leica-microsystems.com...
- Page 82 CONNECT WITH US! Leica Mikrosysteme GmbH | Vienna, Austria T +43 1 486 8050-0 | F +43 1 486 8050-30 www.leica-microsystems.com...
Need help?
Do you have a question about the EM GP2 and is the answer not in the manual?
Questions and answers