Table of Contents
Advertisement
Advertisement
Table of Contents

Subscribe to Our Youtube Channel
Related Manuals for Leica EM TXP


Summary of Contents for Leica EM TXP
- Page 1 Leica EM TXP Operating Manual Version 16214032 10/2010...
- Page 2 Important Note Leica reserves the right to change technical specifications as well as manufacturing processes without prior notice. Only in this way is it possible to continuously improve the technology and manufacturing techniques used to provide our customers with excellent products.
- Page 3 Leica EM TXP Operating Manual Leica EM TXP Serial Number: Date of purchase: For the instrument serial number, please refer to the name type label on the back of the instrument! Please read this instruction manual carefully before operating the instrument.
-
Page 5: Table Of Contents
1. Safety instructions ........................4 2. Description..........................5 3. Design and principle of operation ..................6 4. Installation of the Leica EM TXP .................... 7 4.1 Unpacking the instrument ....................7 4.2 Installation of the stereo microscope ................. 8 4.2.1 If the instrument is equipped with S6 stereo microscope: ........... 8 4.2.2 If the instrument is equipped with M80 with objective adaptor: ........ - Page 6 10.3 Diamond miller......................... 39 10.3.1Surfacing of ductile materials and hard polymers............39 10.4 Sample holders........................ 40 11. Maintenance......................... 41 11.1 Replacing the fuse ......................41 11.2 Replacing the tubes of the peristaltic pump..............41 Page 2 Operating Manual Leica EM TXP 10/10...
- Page 7 Symbols in this manual and their meaning: Attention, take extra care! Important information. Page 3 Operating Manual Leica EM TXP 10/10...
-
Page 8: Safety Instructions
The angle of the pyramid is adjusted with the lever (3). For milling and sawing only, a setting between 0 and 30 is recommended. Higher angle values can lead to a dangerous and destructive contact between specimen holder and tool (depending on the protruding length of the sample). Page 4 Operating Manual Leica EM TXP 10/10... -
Page 9: Description
(E-W movement) 7.1 lever for auto E-W movement lubricant/cooling system adjustment mechanism 10 hose connection of the extraction unit 11 mains switch and electrical connections Page 5 Oper ating Manual Leica EM TXP 10/10... -
Page 10: Design And Principle Of Operation
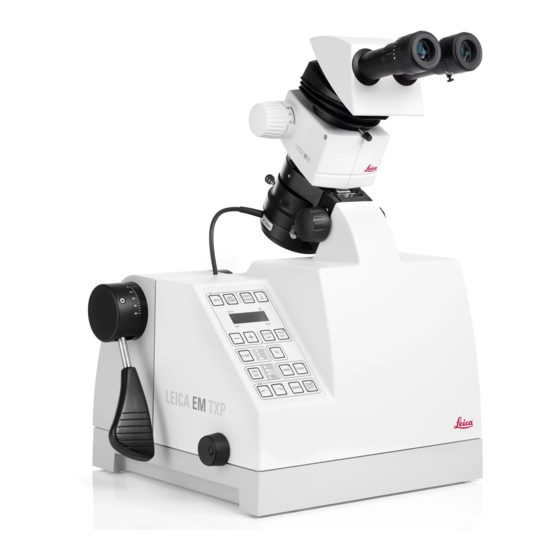
Investigation of the prepared surface can be done without removing the sample. The EM TXP is a preparation unit with variable speed from 300 to 20 000 rpm, with an integrated stereo microscope and ring LED illuminator. A pivot arm and adjustment assembly holds the specimen carrier for maximum orientation. -
Page 11: Installation Of The Leica Em Txp
Installation of the Leica EM TXP Unpacking the instrument Unfold the four lateral walls (1) from the outer carton. Remove separate packaging of the stereo microscope and accessories. Unfold the lateral wall (2) and remove plate (3). Two persons should lift the instrument out of the box using carton handles (4). -
Page 12: Installation Of The Stereo Microscope
Screw in the objective adaptor into the M80 carrier. Insert objective in the objective adaptor. Place the ergo-wedge and the binocular tube onto the M80 carrier. Insert stereo microscope and illuminator in the same manner as described above. Page 8 Oper ating Manual Leica EM TXP 10/10... -
Page 13: If The Instrument Is Equipped With M80 And Moveable Objective Adaptor
4.2.4 Eyepieces Insert the eyepieces into the binocular tubes of the stereo microscope. Make sure the eyepiece with the reticule is inserted in the side of your dominant eye. Page 9 Operating Manual Leica EM TXP 10/10... -
Page 14: Electrical Connections (Rear Side Of The Instrument)
11.2 The switched outlet (11.2) is provided to supply mains voltage from the wall outlet to the Leica extraction and filtration unit only! Connecting any other vacuum cleaner could destroy the instrument. Other vacuum cleaners have to be connected directly to the wall outlets. -
Page 15: Back Light Illumination
Remove protective cover from the miller. When using the glass slide holder (optional) the miller can be pulled out by 4mm in order to mill samples with a thickness less than 4mm. Page 11 Operating Manual Leica EM TXP 10/10... -
Page 16: Inserting The Cut-Off Wheel Or Arbor For Polishing Foil Carrier
Adaptor for specimen holder Insert the adaptor into the adjustment mechanism of the pivot arm and lock it with the locking screw using the Allen key (9.1). Page 12 Operating Manual Leica EM TXP 10/10... -
Page 17: Angle Adjustment Adaptor (Optional)
The specimen holder is inserted in one of the adaptors and locked with the locking screw. The adjustment mechanism (9) of the pivot arm permits centring of the specimen into the middle of the field of view (chapter 7.4.) Page 13 Operating Manual Leica EM TXP 10/10... -
Page 18: Installing The Lubricant/Cooling System
(EMPTY will be displayed on the LCD display on the control panel). If the sensor is disconnected the instrument will run (when using other suspensions). Page 14 Operating Manual Leica EM TXP 10/10... -
Page 19: Attaching The Polishing Foil Onto The Carrier
For hard and soft material (e.g. gold wire bonding on Si) the use of SiC foils on steel carrier subsequent a diamond past applied on the neoprene cloth is recommended. Page 15 Operating Manual Leica EM TXP 10/10... -
Page 20: Description Of The Control Panel
TIME count down value with the +/- button while the LED is blinking. Set advance indication to zero. Freeze advance indication. Page 16 Operating Manual Leica EM TXP 10/10 Page 16 Operating Manual Leica EM TXP 10/10... - Page 21 Active if lever for auto E-W move ment Button to set the cutting (polishing) window. (7.1) is pulled out. Spindle moves to the right (west) and to the left (east) side by pressing the corresponding button. Page 17 Operating Manual Leica EM TXP 10/10...
-
Page 22: Settings
~ 2 200 rpm aluminium oxide foil ~ 1 000 rpm neoprene cloth 300 rpm Above values can be adjusted according to the sample; they are guide values only. Page 18 Operating Manual Leica EM TXP 10/10... -
Page 23: Lubricant Flow Setting
0.025 to 0.05 mm/sec target approaching with 10µm steps with diamond disc cutter: ~ 0.3mm/sec. polishing: ~ 0.35mm/sec Above values can be adjusted according to the sample; they are guide values only. Page 19 Operating Manual Leica EM TXP 10/10... -
Page 24: Count Down Setting
(LED is constantly illuminated). To activate the force regulation just press F button less than one second. The limit can also be changed during the polishing process by pressing F button longer than one second. Page 20 Operating Manual Leica EM TXP 10/10... -
Page 25: Cutting Window Setting
At the end position, the spindle retracts 10µm when using the distance count down and continues approach. Hence, the end position for sawing must be set after the outer edge of the sample in order to avoid collision between sample and cut-off wheel. Page 21 Operating Manual Leica EM TXP 10/10... -
Page 26: Light Menu
Full ring light ii. Half of the ring light iii. Two diagonal segments iv. One segment The intensity can be set in the light menu by pressing + or – button. Page 22 Operating Manual Leica EM TXP 10/10... - Page 27 To leave the light menu press the CLEAR button. The position of the selected segment(s) can be changed by pressing the light button. The actual position is indicated on the display if F is not activated. Page 23 Operating Manual Leica EM TXP 10/10...
-
Page 28: Milling A Specimen
Milling a specimen Switching on the instrument The instrument is switched on (and off) using the switch (11.3) on the rear side of the instrument. 11.3 Page 24 Operating Manual Leica EM TXP 10/10... -
Page 29: Clamping The Specimen Block
(9.3) until the locking pin snaps into one of the slots. The locking pin is spring loaded and will snap in automatically as soon a slot is in the correct position. Page 25 Operating Manual Leica EM TXP 10/10... - Page 30 Clamp the alignment mechanism by turning the clamping ring (9.4) counter clockwise. Unlatch the locking pin (9.2) by moving it to its rest position. Page 26 Operating Manual Leica EM TXP 10/10...
-
Page 31: Milling The Cutting Face
(3.1) into the front face observation position (indication 60). Additionally, the surface quality will be improved by cooling the miller. In this case disconnect the hose of the extraction unit. Page 27 Operating Manual Leica EM TXP 10/10... -
Page 32: Producing A Pyramid Or A Sloping Face
It is not necessary to trim the cutting face with the 90° click stop position of ring (9.3), although we recommend this. The specimen may be rotated any amount so that trapezoids or any other shapes can be produced. Page 28 Operating Manual Leica EM TXP 10/10... -
Page 33: Distance Determination
In this position the location of the area of interest can be observed perpendicular to the cutting face or sample edge. Accurate approach to the area of interest can be performed after swivelling back the specimen pivot arm to the processing position (indication 0). Page 29 Operating Manual Leica EM TXP 10/10... -
Page 34: Distance Measurement
Swivel the pivot arm to the front face observation (chapter 7.4.). Place stage micrometer onto the specimen holder (without specimen) use plasticine or similar for fixing or use the glass slide holder offered by Leica. Select the magnification with which you will later want to take measurements (the highest value will provide measurements that are more accurate). -
Page 35: Distance Measurement
(indication 0) to its end stop. The measured value can than be removed by advancing the tool correspondingly. One click stop of the feed hand wheel advances the tool according the selected step size. Page 31 Operating Manual Leica EM TXP 10/10... -
Page 36: Sawing/Polishing Sample Preparation Examples
Insert the specimen into the flat specimen holder and roughly align the target parallel to the jaws of the holder. Clamp the specimen with the Allen key. Insert specimen holder in the adaptor (chapter 4.10.) Page 32 Operating Manual Leica EM TXP 10/10... - Page 37 Align the specimen parallel to the reticule line either manually (by opening the clamping screw of the holder) or by using the vertical set screw of the angle adjustment adaptor (chapter 4.9.) Measure the distance to the target (chapter 8.) Page 33 Operating Manual Leica EM TXP 10/10...
- Page 38 Retract the spindle about 10µm Set the cutting window (chapter 6.7.) Start point in overlapping position Select 1µm step advance Press START button longer than one second (AUTO LED is on) Page 34 Operating Manual Leica EM TXP 10/10...
- Page 39 10µm. As soon as the gold wire becomes visible change, to the 9µ diamond foil followed by 6µm, 3µm and 1µm (if necessary to 0.5µm as well). Page 35 Operating Manual Leica EM TXP 10/10...
-
Page 40: Example Results
Polymer cord from a tyre: Sample was embedded (for support). The surface was smoothed with a diamond miller at 20 000 rpm (cooled with water) prior to a 3µm and 1µm aluminium oxide foil polishing process. Page 36 Operating Manual Leica EM TXP 10/10... -
Page 41: Slicing
Once the first side is prepared remove the sample from the holder Take the SEM stub or an aluminium rod to support the sample and insert it in an appropriate holder Page 37 Operating Manual Leica EM TXP 10/10... - Page 42 Take into account the layer thickness of the glue which reduces the actual thickness of the sample. Use the HOLD function when replacing the tool (foils) 20µm slice of a gold wire bonding on IC with conductive layers Page 38 Operating Manual Leica EM TXP 10/10...
-
Page 43: Useful Hints
0.5µm and 1µm. A surface finish produced in this way allows the use of 3µm followed by 1µm (and if necessary 0.3µm) aluminium oxide foils afterwards, instead of higher grade foils. Page 39 Operating Manual Leica EM TXP 10/10... -
Page 44: Sample Holders
Glass slide holder for 1”x3” (25x76mm) glass slides o/n 16702831 used to prepare samples on a glass slide with the tungsten carbide or diamond miller. Page 40 Operating Manual Leica EM TXP 10/10... -
Page 45: Maintenance
attach left tube to the spout and insert right tube into the lubricant bottle Page 41 Operating Manual Leica EM TXP 10/10... - Page 46 Hernalser Hauptstrasse 219 A-1170 Wien, Austria declare in exclusive responsibility that the product erklären in alleiniger Verantwortung, dass das Produkt déclarons sous notre seule responsabilité que le produit Model LEICA EM TXP Modell LEICA EM TXP modèle LEICA EM TXP Type/Typenbezeichnung/type...
- Page 48 www.leica-microsystems.com...
Need help?
Do you have a question about the EM TXP and is the answer not in the manual?
Questions and answers