Table of Contents

Related Manuals for Leica EG1150 H


Summary of Contents for Leica EG1150 H
- Page 1 Instructions for Use Leica EG1150 H Paraffin Embedding Station Leica EG1150 H V 2.6, English 07/2016 Order No.: 14 0388 81101 RevI Always keep this manual with the instrument. Read carefully before working with the instrument.
- Page 3 Issued by: Leica Biosystems Nussloch GmbH Heidelberger Str. 17 - 19 D-69226 Nussloch Germany Phone: +49 (0)62 24 143-0 Fax: +49 (0)6224 143-268 Internet: http://www.LeicaBiosystems.com Assembly contracted to Leica Microsystems Ltd. Shanghai Leica EG1150 H – Paraffin Embedding Station...
-
Page 4: Table Of Contents
Table of contents Important Information ..........................5 Symbols in the text and their meanings ....................5 Intended use of instrument ......................... 6 Qualification of personnel ........................... 6 Instrument type ............................. 6 Safety ................................7 Safety notes ..............................7 Warnings ............................... 8 Integrated safety devices ........................... -
Page 5: Important Information
Exceeding a concerning in vitro diagnostics (IVD) defined acceleration (g value) destroys medical devices. the surface tension of the liquid in the interior of the tube. This causes the indicator tube to change color. Leica EG1150 H – Paraffin Embedding Station... -
Page 6: Intended Use Of Instrument
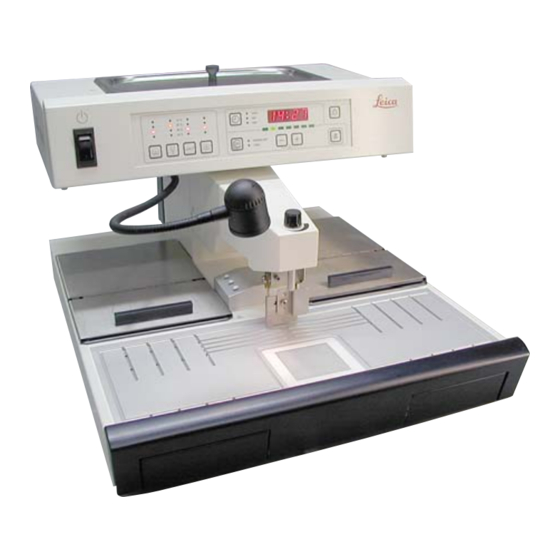
Important Information 1.2 Intended use of instrument The Leica EG1150 H is a modern paraffin embedding station with microprocessor control system. It is designed for embedding histological tissue specimens in molten paraffin for use in pathol- ogy laboratories and only for the following tasks: •... -
Page 7: Safety
The protective devices on the instrument and its accessories must not be removed or modified. Only service personnel qualified by Leica may repair the instrument and access the instru- ment's internal components. -
Page 8: Warnings
Safety 2.2 Warnings The safety devices installed in this instrument by the manufacturer only constitute the basis for accident prevention. Operating the instrument safely is, above all, the responsibility of the owner, as well as the designated personnel who operate, service or repair the instrument. To ensure trouble-free operation of the instrument, make sure to comply with the following instructions and warnings. -
Page 9: Integrated Safety Devices
In this case, the standby switch jumps to the position "0" = Off. Note that the only way the user has for complete disconnection from the power supply is disconnection of the power plug. Leica EG1150 H – Paraffin Embedding Station... -
Page 10: Instrument Components And Specifications
Instrument Components and Specifications 3.1 Technical data General data Approvals: The instrument-specific approval marks are located on the rear panel of the instrument next to the type plate. Voltage of power supply: 100-120 V, 50/60 Hz 230-240 V, 50/60 Hz Power consumption: 1100 VA Protection class... -
Page 11: Overview - Instrument Components
Work area illumination switch with lid Dispenser Cassette tray Cassette tray Forceps holder Work area Embedding mold tray Embedding mold tray Paraffin Cooling spot collection tray right Paraffin collection tray left Fig. 2 Leica EG1150 H – Paraffin Embedding Station... -
Page 12: Instrument Specifications
Instrument Components and Specifications Instrument rear view Secondary fuses Secondary F1-F3 fuses F4-F5 Heat sink Port for power cord Port for foot switch Sliding elements Fig. 3 3.3 Instrument specifications • Paraffin reservoir with a capacity of 3 liters. • The paraffin flow is activated by means of a height-adjustable, pivotable clip - activated either manually by the mold or a foot switch (optional). -
Page 13: Instrument Setup
1. Remove the packing strap and the adhesive tape (1). 2. Remove the carton lid (2). 3. Lift up and remove the accessories (3) and inside cover (4). 4. Remove the outer carton wall (5). Fig. 4 Leica EG1150 H – Paraffin Embedding Station... -
Page 14: Location Conditions
Instrument Setup Fig. 5 5. In order to lift the instrument (6) take hold of Important! it only at the lower housing base in the front Lifting the instrument by the dispenser and rear (arrow in the detail for Fig. 5) and lift (7) or paraffin reservoir (8) can cause it off of the bottom pad and out. -
Page 15: Delivery Range
2 fuses T 6.25 A, 6 x 32 14 6000 01482 1 Instructions for Use bundle Leica EG1150 H (Instructions for Use & language CD) 14 0388 81001 The country specific power cord needs to be ordered separately. Please find a list of all power cords available for your device on our website www.LeicaBiosystems.com within the product... -
Page 16: Necessary Assembly Work
Instrument Setup 4.4 Necessary assembly work Install the following accessories and make the appropriate adjustments to make the instrument ready for use: • Install accessories. • Adjust instrument feet if necessary. • Install magnifier (optional). • Connect foot switch (optional). •... - Page 17 Instrument Setup Installing the accessories Fig. 6 Leica EG1150 H – Paraffin Embedding Station...
-
Page 18: Optional Accessories
Instrument Setup 4.5 Optional accessories Magnifying glass The magnifying glass provides a magnified view of the work area. When properly adjusted, an enlarged view of the dispenser and cooling spot is available. Fig. 7 Installing the magnifying glass • On the dispenser (5) a tap hole (1) is provided, which is closed with a nylon screw (2). -
Page 19: Electrical Connection
(3) on the rear of the in- connecting port (5) on the rear of the instru- strument. ment. • Plug the power cord into the wall outlet. • Tighten the screws (6) of the plug. Leica EG1150 H – Paraffin Embedding Station... -
Page 20: Operation
A built-in filtering screen prevents any particles contained in the paraffin from getting in the par- affin block. Recycled paraffin may NOT be used in the Leica EG1150 H due to the danger of contamination. Dispenser (2) The dispenser is heated separately. The tem- perature setting of the dispenser and paraffin reservoir is coupled. - Page 21 Forceps holder (5) The removable forceps holder under the dis- penser can accommodate up to 6 forceps. Fig. 11 The forceps holder is constantly heated to approximately 70 °C. Risk of burning! Leica EG1150 H – Paraffin Embedding Station...
- Page 22 Operation Paraffin collection tray (8) Two indirectly-heated paraffin collection trays for excess paraffin are located under the work surface. The paraffin collection tray must be emptied daily. To prevent contami- nation, do not reuse paraffin collect- ed in this tray. If the instrument is operated without the paraffin collection trays there is risk of burning.
- Page 23 (18) on the control panel and on/off button (19) on the lamp head suc- cessively. It is recommended to turn the LED lamp on/off through the button (19) on the lamp Fig. 13 head during daily operation. Leica EG1150 H – Paraffin Embedding Station...
- Page 24 Operation The foot switch (22) actuates the mag- Foot switch (22) optional net valve of the dispenser. It must be connected as described in Chapter 4.6. The plug of the foot switch MUST be screwed to the socket. Otherwise hot paraf- fin can escape, even if the switch is not activated.
-
Page 25: Switching The Instrument On
• Fill the paraffin reservoir with paraffin. Prior to leaving the factory, the Leica EG1150 H is tested thoroughly under laboratory condi- tions. For this reason, you will find a small quantity of clean, hardened paraffin. You can work with this paraffin without any problem. -
Page 26: Control Panel Functions
Operation 5.3 Control panel functions The control panel beside the standby switch (8) consists of a foil keyboard with push buttons, LEDs and a single-line display. It is divided into two control areas: temperature setting and display and instrument control and programming. Temperature control Instrument control and and display... -
Page 27: Operating Modes
The timer is disabled if the end time is before the start time. For example, start time: 08:00 and end time: 06:00. In 24-hour mode, activate enhanced mode (see 5.6) to acceler- ate the melting process after replenishing solid paraffin. Leica EG1150 H – Paraffin Embedding Station... -
Page 28: Time-Program Control
Operation 5.5 Time-program control The value shown in the display must be set to the current local time to ensure the correct operation of the time-program control. Setting the time • Press the CLOCK button as many times as required until the green "TIME" LED lights up. - Page 29 If the programmed values are to be effective on the following days (the instrument is operational at the programmed time and switches off automatically when the end time is reached), the standby mode must be active --> press ON/OFF. Leica EG1150 H – Paraffin Embedding Station...
-
Page 30: Instrument Heater
Operation Setting temperature values 5.6 Instrument heater The temperatures for the instrument's four heat- ing areas can be adjusted separately from 55 °C to 70 °C in 5 K increments. When setting the temperature, please observe the paraffin manufacturer's specifications for the maximum per- missible temperature. - Page 31 The enhanced mode can be switched off at any time by pressing and holding the same key com- bination. Deactivation of the on-demand heater is also confirmed by all four target value LEDs lighting up. Fig. 23 Leica EG1150 H – Paraffin Embedding Station...
-
Page 32: Maintenance And Cleaning
Maintenance and Cleaning 6.1 Cleaning the instrument Do not use xylene for cleaning. Xylene vapors are heavier than air and can ignite at a consider- able distance from the source of heat. A fire hazard exists! To avoid scratching the surface of the instrument only the plastic spatula that is supplied with it should be used for cleaning –... -
Page 33: Maintenance Instructions
Only Leica service technicians are authorized to open the instrument for maintenance and repair work. The Leica EG1150 H is very low maintenance but please observe the following points to ensure the instrument’s reliability. • Clean the instrument with care daily. -
Page 34: Troubleshooting
Leica EG1150 H. If a problem cannot be remedied by following the instructions in this chap- ter, please contact your Leica technical service center. For further instructions, please refer to Chapter 8. The table below lists the most common problems that may occur as well as possible causes and remedies. - Page 35 Paraffin drops when valve is shut. the magnetic switch defective. Non-homogeneous paraffin - Air bubbles in dispenser at start - Keep dispenser open at maxi- flow (e.g. air pockets). of operation mum flow for a period of time. Leica EG1150 H – Paraffin Embedding Station...
- Page 36 Troubleshooting Problem Possible cause Corrective action 5. Illumination does not work. - Button on the head of the lamp - Press the On/Off button on the has not been pressed. head of the lamp. - Bulb defective. - Ask technical service to re- place the lamp.
-
Page 37: Changing A Fuse
1 - Peltier element of the cooling spot and work area illumination. 2 - Heating for forceps holder and dispenser. 3 - Control electronics. 4 - Heating for work top and cassette tray, right. 5 - Heating for paraffin reservoir and cassette tray, left. Leica EG1150 H – Paraffin Embedding Station... - Page 38 Troubleshooting Select the correct spare fuse On the back there are five dif- ferent fuse holders (Fig. 24). This marking (2A) on the fuse and the labeling next to the fuse holder on the rear of One spare fuse must be se- the instrument MUST agree! lected from the five spare fuses available that has the...
-
Page 39: Warranty And Service
Leica Biosystems Nussloch GmbH guarantees that the contractual product delivered has been subjected to a comprehensive quality control procedure based on the Leica in-house testing standards, and that the product is fault- less and complies with all technical specifications and/or characteristics warranted. -
Page 40: Decontamination Certificate (Master)
Dear Customer, Any product that is to be returned to Leica Biosystems or serviced on site, must be cleaned and decontaminated in the appropriate manner. Since it is not possible to decontaminate for prion diseases, such as CJD, BSE, CWD etc., equipment exposed to specimens containing prion diseases cannot be returned to Leica Biosystems for repair. - Page 41 Place one copy in the unit prior to packaging, or hand it over to the service engineer. Customer assumes all responsibility for the immediate return shipment of articles sent to Leica without proper decontamination documentation. If you have any further questions, please call your local Leica organization.
- Page 42 Notes Instructions for Use V 2.6 RevI – 07/2016...
- Page 44 Leica Biosystems Nussloch GmbH Heidelberger Strasse 17-19 D- 69226 Nussloch Tel.: +49 - (0) 62 24 - 143 0 Fax: +49 - (0) 62 24 - 143 268 Web: www.LeicaBiosystems.com...
Need help?
Do you have a question about the EG1150 H and is the answer not in the manual?
Questions and answers