Table of Contents
Advertisement
Advertisement
Table of Contents

Related Manuals for Trojan POWER GYM 2.0


Summary of Contents for Trojan POWER GYM 2.0
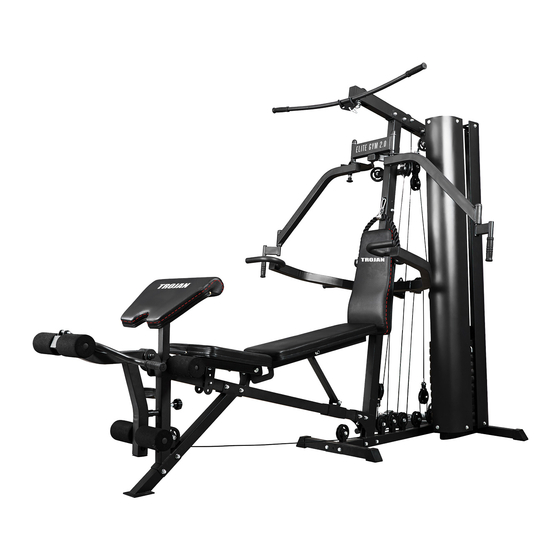
- Page 1 POWER GYM 2.0 COMPLETE BODY STRENGTH HOME GYM WORKOUT & TONING USER MANUAL CAUTION READ ALL PRECAUTIONS AND Visit facebook.com/trojanhealth INSTRUCTIONS IN THIS MANUAL BEFORE USING THIS EQUIPMENT. www.trojanhealth.co.za KEEP THIS MANUAL FOR FUTURE REFERENCE. www.instagram.com/trojanhealth...
-
Page 2: Table Of Contents
INDEX IMPORTANT SAFETY INSTRUCTIONS It is the sole responsibility of the purchaser of Trojan products to read the owner’s manual, warning labels and instruct • Important Safety Instructions ________________________________ all individuals, on proper usage of the equipment. Understanding each and every warning to the fullest is important. -
Page 3: Important Safety Instructions
• Do not use or permit use of any equipment that is damaged, or has worn or broken parts. For all Trojan equipment Home Gym provides a convenient and simple method to begin your assault on getting your body in shape and use only replacement parts supplied by Trojan. -
Page 4: Hardware & Tools List
HARDWARE & TOOLS LIST HARDWARE & TOOLS LIST INSTRUCTIONS FOR ASSEMBLY • Before you start to assemble, please check the hardware packaging to make sure all parts are included. • Each step has its own packet of bolts and nuts (look for sticker indicating what step the packet will be used for). •... -
Page 5: Parts List
PARTS LIST PARTS LIST Description Description Description Seat Frame Base Cable Clip Lat Bar Cap Stabilizer Foot Plate Bolt (M10 x 63 mm) Upright Cable Pivot Bolt Set (M10 x 64 mm) Top Frame Arm Pin Screw (M10 x 25 mm) Pivot Frame Full Guard Thin Inner Cap (25 mm x 40 mm) -
Page 6: Exploded Drawing
EXPLODED DRAWING EXPLODED DRAWING 65 54... -
Page 7: Assembly Steps
ASSEMBLY STEPS ASSEMBLY STEPS STEP 3: 1. PREPARATION STEP 3 Attach the Weight Guide (21) and the Base (1) to • Before assembling make sure that you will have enough space around the item. the Stabilizer (2) with 2 Bolts (M10 x 68 mm) (71), 2 •... - Page 8 ASSEMBLY STEPS ASSEMBLY STEPS STEP 5: STEP 5 STEP 7: STEP 7 Attach the Front Leg (7) to the Base (1) with 2 Slide the 2 Weight Bumpers (27) onto the Carriage Bolts (M8 x 58 mm) (87) and 2 Locknut (M8) Weight Guides (21).
- Page 9 ASSEMBLY STEPS ASSEMBLY STEPS STEP 9: STEP 9 Attach the Leg Bumper (60) to the Front Leg (7) with a STEP 12: ARM ASSEMBLY Self-tapping Screw (M4 x 25 mm) (69). STEP 12 Attach the 2 Arm Pins (40) to the Pivot Frame (5) NOTE: Make sure that the end of the Leg Bumper (60) is with 2 Self-tapping Screws (M4.2 x 19 mm) (49).
- Page 10 ASSEMBLY STEPS ASSEMBLY STEPS STEP 14: STEP 16: STEP 14 STEP 16 Apply grease to an Bolt (M10 x 80 mm) (67) and to 2 Identify the 2 V-pulleys (46) the nine Thick Pulleys Arm Bushings (44). (48) and the 2 Thin Pulleys (47). Attach the Left Arm (10) to the Pivot Frame (5) with Route the Arm Cable (54) over a V-pulley (46).
- Page 11 ASSEMBLY STEPS ASSEMBLY STEPS STEP 20: STEP 20 STEP 18: See the CABLE DIAGRAM. The threaded end of the STEP 18 Low Cable (53) is smaller than the threaded end of Route the Arm Cable (54) over V-pulley (46). the High Cable (55). Attach the V-pulley (46), a Cable Trap (50) and 2 Full Route the Low Cable (53) through the Leg Lever (8) Guards (41) to the Upright (3) with an Bolt (M10 x 63...
- Page 12 ASSEMBLY STEPS ASSEMBLY STEPS STEP 23: STEP 23 Route the Low Cable (53) over a Thick Pulley (48). STEP 26: STEP 26 Attach the Thick Pulley (48) and 2 Half Guards (43) See the CABLE DIAGRAM. Identify the High Cable to the Double U-bracket (63) with an Bolt (M10 x 45 (55).
- Page 13 ASSEMBLY STEPS ASSEMBLY STEPS STEP 28: STEP 28 STEP 31: Wrap the High Cable (55) under a Thick Pulley (48). STEP 31 Attach the Thick Pulley (48), a Cable Trap (50), and Thread an Nut (M12) (84) all of the way onto the High 2 Half Guards (43) to the upper hole in the U-bracket Cable (55).
- Page 14 ASSEMBLY STEPS ASSEMBLY STEPS STEP 35: STEP 35 STEP 33: STEP 33 Attach a Shroud Support (19) and the top of the Left Shroud (17) to the left side of the Top Frame (4) with Orient the Seat (15) so that the narrow end (E) is in the indicated location.
- Page 15 ASSEMBLY STEPS ASSEMBLY STEPS High Cable (55) STEP 37: STEP 37 Attach the Curl Pad (14) to the Curl Post (13) with 2 Screws (M6 x 16 mm) (62). Arm Cable (54) STEP 38: Make sure that all parts have been properly tightened. The use of the remaining parts will be explained in ADJUSTMENT, beginning on page 30.
-
Page 16: Adjustment Steps
ADJUSTMENT STEPS ADJUSTMENT STEPS CHANGING THE WEIGHT SETTING CONVERTING THE ARMS To change the setting of the weight stack, insert a To use the Arms (9, 10) as press arms, insert the Weight Pin (26) under the desired Weight (22). Arm Pins (40) into the holes in the Pivot Frame (5) Insert the Weight Pin so that the bent end touches and the Arms as shown. - Page 17 ADJUSTMENT STEPS ADJUSTMENT STEPS WEIGHT RESISTANCE CHART USING THE CURL PAD The chart below shows the approximate weight resistance at each exercise station. The numbers in the left column To use the Curl Pad (14), first remove the Round Inner refer to the 12.5-lb.
-
Page 18: Fitness Tips & Techniques
• Monitor your pulse frequently. The exercise routine that is performed on the Trojan Power Gym 2.0 Home Gym will develop your whole body. The targeted muscle groups are the chest, shoulders, back, legs and arms. It will also condition the circulatory •... -
Page 19: Warm Up & Cool Down
CLEANING WORKOUT GUIDELINES The Trojan Power Gym 2.0 Home Gym can be cleaned with a soft cloth and mild detergent. Do not use Each workout should include the following 3 parts: abrasives or solvents on plastic parts. Please wipe your perspiration off the Trojan Power Gym 2.0 Home Gym after each use. -
Page 20: Year Limited Warranty
2 years from the date of purchase. Call the Trojan Call Centre on 0861 Trojan (0861 876526) to log the faulty product (under warranty or out of warranty). Customers residing outside South Africa can contact us on +27 10 206 4405.
Need help?
Do you have a question about the POWER GYM 2.0 and is the answer not in the manual?
Questions and answers