Table of Contents

Subscribe to Our Youtube Channel
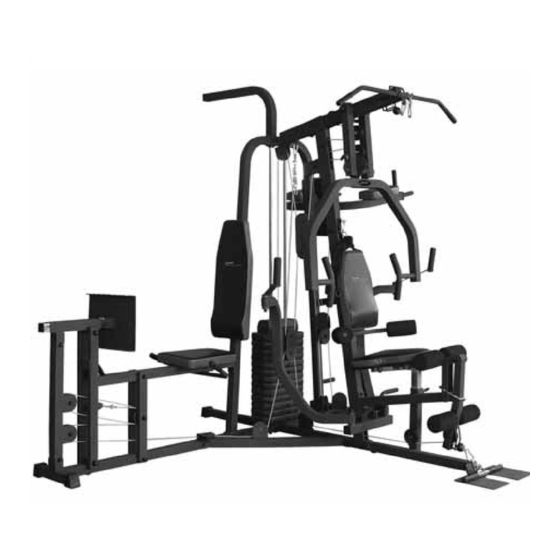
Related Manuals for Trojan POWER STATION 600


Summary of Contents for Trojan POWER STATION 600
- Page 1 TROJAN ® MY SPACE MY TIME POWER STATION 600 H O M E G Y M HOME GYM CARE INSTRUCTIONS AND ASSEMBLY MANUAL CAUTION READ ALL PRECAUTIONS AND INSTRUCTIONS IN THIS MANUAL BEFORE USING THIS EQUIPMENT KEEP THIS MANUAL FOR...
-
Page 2: Table Of Contents
SAFETY INSTRUCTIONS PRE ASSEMBLY CHECK LIST PARTS LIST HARDWARE LIST ASSEMBLY STEPS FITNESS TIPS AND TECHNIQUES CONDITIONING GUIDELINES WARM-UP AND COOL-DOWN EXERCISE PROGRAM 10. FREQUENTLY ASKED QUESTIONS 11. EXPLODED DRAWING 12. TROJAN 1 YEAR LIMITED WARRANTY 13. TROJAN REPAIRS PROCEDURE... -
Page 3: Safety Instructions
2. Keep children and pets away from this equipment at all times. 3. The TROJAN POWER STATION 600 is able to handle a max user weight (120kg) and stack weight (68kg) 4. The TROJAN POWER STATION 600 should be used by only one person at a time. -
Page 4: Pre Assembly Check List
2. PRE ASSEMBLY CHECK LIST Thank you for choosing the TROJAN POWER STATION 600. We take great pride in producing this quality product and hope it will provide many hours of quality exercise to make you feel better, look better and enjoy life to its fullest. -
Page 5: Parts List
3. PARTS LIST (3)TOP (2)MAIN (1)REAR FRAME BASE BASE FRAME FRAME (8L)LEFT (8R)RIGHT (7)FRONT REAR REAR UPRIGHT UPRIGHT UPRIGHT (4)LEFT (5)RIGHT (6)PRESS PRESS PRESS FRAME FRAME (14)RIGHT (15)LEFT (13)BACK (10)FOOT (11)SEAT (12)SEAT CONNECT CONNECT REST PLATE SUPPORT FRAME FRAME FRAME SUPPORT FRAME (20)LEG... - Page 6 PARTS LIST (37)CHAIN (35)FOAM ROLL (36)RECTANGLE (38)LONG (39)BIG 2PCS 2PCS PATCH CHAIN PIVOT 4PCS SHAET (44)POP PIN (45)CHAIN (40)PIVOT (41)BLACK (42)PULLEY (43)LONG 3PCS HOOK SHAFT BALL PIN HOOK POP PIN 8PCS (46)PULLEY (47)SQUARE (50)50X50mm (49)50X75mm (51)45X45mm (48)ROUND 25PCS END CAP SQUARE DONUT SQUARE...
- Page 7 PARTS LIST (110)SEAT (111)SEAT (112)LEG (113)LEG (109) BASE FRAME SUPPORT SUPPORT PRESS EXTENSION FRAME 1PC POST 2PCS EXTENSION TOP FRAME FRAME 1PC (114)LEG (115)FOOT (116)FOOT (117)HANDLE PLATE EXTENSION PLATE 1PC FRAME 1PC CONNECT ADJUSTABLE FRAME 1PC FRAME 1PC (121)DOUBLE (118)CONNECT (119)SEAT (120)BACKREST PULLEY...
-
Page 8: Hardware List
4. HARDWARE LIST (91)M6x8mm SCREW 2PCS (72)3/8"x4-1/4" HEX BOLT 1PC (73)3/8"x3-7/8" HEX BOLT 1PC (96)M10x25mmSCREW 2PCS (74)3/8"x3-3/4" HEX BOLT 2PCS (80)3/8"x2" HEX BOLT 14PCS (75)3/8"x3" HEX BOLT 29PCS (81)M8X40mm HEX BOLT 2PCS (76)3/8"x2-7/8" HEX BOLT 2PCS (82)3/8"x1" HEX BOLT 1PC (97)M8X30mm HEX BOLT 2PCS (77)3/8"x2-1/2"... - Page 9 HARDWARE LIST (83)3/8" LOCKNUT (84)1/2" LOCKNUT (85)5/8" LOCKNUT (99)8mm WASHER (98)M8 LOCKNUT 62PCS 8PCS 4PCS 20PCS 14PCS (86)3/8" WASHER (87)1/2" WASHER (88)5/8" WASHER (106)WASHER 8PCS 124PCS (T3.0X 13X 32) (135)M10X25 (134)M8x16mm HEX BOLT 2PCS HEX BOLT 6PCS (89) WASHER (90)BIG WASHER (T3.0X 47X 26) (T3.0X 38X 13.5) 4PCS (136)M8x63mm HEX BOLT 6PCS...
-
Page 10: Assembly Steps
5. ASSEMBLY STEPS STEP 01 • Insert Base Frame (109) and Connect Base Frame (124) into ends of Rear Base Frame (1). • Insert Foot Plate (10) into Main Base Frame (2). • Attach Side Base Frame (129) and Main Base Frame (2) to Rear Base Frame (1) using 2 3/8”X3” Hex Bolts (75) 4 3/8”... - Page 11 ASSEMBLY STEPS STEP 02 • Install two Chrome Tubes (9) into holes of Rear Base Frame (1). • Slide two Round Donuts (48) down Chrome Tubes (9). • Slide 14 pcs Weight Plates (26) and Weight Selection Rod (28) down Chrome Tubes (9) •...
-
Page 12: Washers (86) 2-3/8"
ASSEMBLY STEP STEP 03 • Attach two Steel Bushings (59) to top of Chrome Tubes (9) using 2-M6x8mm Screws (91). • Attach left/right Rear Upright (8L, 8R) to Rear Base Frame (1) using 4- 3/8”X3” Hex Bolts (75) 8-3/8” Washers (86) 4-3/8”... -
Page 13: Assembly Step
ASSEMBLY STEP STEP 04 • Attach left/right Connect Frame (15, 14) to Top Frame(3) using Pivot Shaft (40) 6-little Oil Bushings (61) 2-5/8” Wash- ers (88) 2-5/8” Locknuts (85). 2-5/8” plastic Dome Caps (104) • Attach Press Arm (6) to ends of left/right Connect Frame (15, 14) using big Pivot Shaft (39) 2-Copper Bushings (62) 2-5/8”... - Page 14 ASSEMBLY STEP Step 05 • Attach Bracket Support (16) and Seat Support Frame (11) to Front Upright (7) using 1- 3/8”x3-3/4” Hex Bolt (74) 1-3/8”x3-7/8” Hex Bolt (73) 1-3/8”x1” Hex Bolt (82) 5-3/8” Washers (86) 2-3/8” Locknuts (83). • Attach Seat Support Frame (11) 3/8”X3-3/4” Hex Bolt 3/8”X3-7/8” Hex Bolt (73) 1-3/8”X1” Hex Bolt (82) •...
- Page 15 ASSEMBLY STEP STEP 06 • Attach Butterfly Mount (19) to Front Upright (7) using 2-1/2”x3-1/4” Hex Bolts (92) 4-1/2” Washers (87) 2-1/2” Lock- nuts (84). • Attach left/right Press Frame (4, 5) to Butterfly Mount (19) using 4-Copper Bushings (62) 2-Big Washers (90) 2-1/2” Locknuts (84).
- Page 16 ASSEMBLY STEP STEP 07 • Attach Hand Bar (17) to Front Upright (7) using 2 3/8”x3” Hex Bolts (75) 4-3/8” Washers (86) 2-3/8” Locknuts (83). • Press two Big Foam Rolls (32), Round Caps (60) onto Ends of Hand Bar (17). •...
- Page 17 ASSEMBLY STEP STEP 08 • Rotate Upper Cable (70) as shown. • Install Pulley no. 1, 2, 4, 6 to unit using 4-3/8”x2-1/2” Hex Bolts (77) 8-Middle Bushings (67) 8-3/8” Washers (86) 4-3/8” Lock Nuts (83). • Install Pulley no 7, 8 to unit using 2-3/8”x2” Hex Bolts (80) 4-3/8” Washers (86) and 2-3/8” Locknuts (83) •...
- Page 18 ASSEMBLY STEP Step 09 • Rotate Adjustable Cable (133) as shown. • Install Pulley no. 22 to unit using 1-3/8”x2-1/2” Hex Bolts (77) 2-Middle Bushings (67) 2-3/8” Washers (86) 1-3/8” Locknut (83) • Install Pulley no. 23, 24, 25 to unit using 3-3/8”x2” Hex Bolts (80) 6-3/8” Washers (86) 3-3/8” Locknuts (83). •...
-
Page 19: Fitness Tips And Techniques
6. FITNESS TIPS AND TECHNIQUES AEROBIC EXERCISE Aerobic exercise is any sustained activity that sends oxygen to your muscles via your heart and lungs. Aerobic exercise improves the fitness of your lungs and heart - your body’s most important muscle. Aerobic exercise fitness is promoted by any activity that uses your large muscle -arms, legs, or buttock, for example. -
Page 20: Conditioning Guidelines
7. CONDITIONING GUIDELINES How you begin your exercise program depends on your physical condition. If you have been inactive for several years, or are severely overweight, you must start slowly and increase your time on the equipment; a few minutes per workout. Initially, you may be able to exercise only for a few minutes in your target zone, however, your aerobic fitness will improve over the next six to eight weeks. -
Page 21: Warm-Up And Cool-Down
8. WARM-UP AND COOL-DOWN WORKOUT GUIDELINES Each workout should include the following three parts: A warm-up, consisting of 5 to 10 minutes of stretching and light exercise. A proper warm-up increases your body tem- perature, heart rate, and circulation in preparation for exercise. Training zone exercise, consisting of 20 to 30 minutes of exercising with your heart rate in your training zone. -
Page 22: Exercise Program
THE WORKOUT The Warm Up Always warm up thoroughly before each workout session to help minimise the risk of injury. Warm up on any Trojan exercise bike or treadmill or any other similar machine. Weekly Routine Perform a weight training routine 3 times per week, ensuring a day of rest and recovery between sessions. - Page 23 EXERCISE PROGRAM Reps and Sets Repetitions (Reps) is the term used to denote the number of consecutive times a certain movement is repeated without a break, while Sets denotes how many times you should repeat that exercise in a training session e.g. 3 sets of 10 reps means you should perform 10 reps for 1 set, have a break and then repeat another 2 sets.
- Page 24 EXERCISE PROGRAM START POSITION FINISH POSITION SEATED BENCH PRESS Sit with your back against the support. Grip the handlebars under the butterfly arms and press the bars away from your body. Return the bars in a controlled manner to the start position SEATED FLYS Sit with your back against the sup- port.
- Page 25 EXERCISE PROGRAM START POSITION FINISH POSITION LOW ROW Use the Low Pulley and the Short Bar. Sit with your feet against foot brace, with your knees slightly bent. Lean backwards keeping your lower back straight, and pull the bar towards your stomach. Return the bar in a controlled man- ner to the start position.
-
Page 26: Leg Extension
EXERCISE PROGRAM START POSITION FINISH POSITION VERTICAL KNEE RAISE With your back against the support and your arms on the pads, bring your knees up towards your stomach. Return in a controlled manner to the start position SEATED LEG PRESS Place feet against foot plate. -
Page 27: Frequently Asked Questions
10. FREQUENTLY ASKED QUESTIONS Q1. How do I maintain my cables? The cables work in conjunction with the pulleys. When assembling the unit; make sure not to over tighten the pulleys. The pulleys are meant to move freely. Before your workout; make sure all the cables are lined up correctly on the pulleys. Q2. -
Page 28: Exploded Drawing
11. EXPLODED DRAWING 1575-28... -
Page 29: Trojan 1 Year Limited Warranty
12. TROJAN 1 YEAR LIMITED WARRANTY Masstores (Pty)Ltd (“the Supplier”) hereby provides a limited warranty to the original purchaser of this product (“the Consumer”) that this product will be free of manufacturing defects in materials and workmanship which under normal,... - Page 30 The Consumer does not need to return the product to the store. The Consumer shall phone the Trojan hotline on 0861 Trojan (0861 876 526) and the Supplier’s authorized agent will at its discretion either repair the item at the Consumer’s residence or collect and repair the item at their premises.
-
Page 31: Trojan Repairs Procedure
13. TROJAN REPAIRS PROCEDURE 1. Procedure for repairs Should you experience any faults or breakdowns on your Trojan equipment, please adhere to the following procedure to have the fault rectified speedily and professionally. • Do not return the product to the store* Call 0861 Trojan (0861 876526) to log the faulty product (under warranty or out of warranty) •... - Page 32 1575-32...
Need help?
Do you have a question about the POWER STATION 600 and is the answer not in the manual?
Questions and answers
Where can i buy parts and accessories of a trojan home gym 600