Trojan POWER STATION 400 User Manual
Hide thumbs
Also See for POWER STATION 400:
- Instruction and assembly manual (19 pages) ,
- User manual (31 pages)

Related Manuals for Trojan POWER STATION 400


Summary of Contents for Trojan POWER STATION 400
-
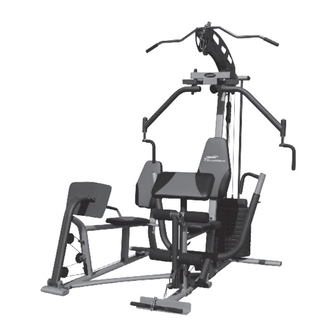
Page 1: Home Gym
CAUTION READ ALL PRECAUTIONS AND INSTRUCTIONS IN THIS MANUAL BEFORE USING THIS EQUIPMENT. KEEP THIS MANUAL FOR FUTURE REFERENCE. POWER STATION 400 HOME GYM USER MANUAL Visit facebook.com/trojanhealth www.trojanhealth.co.za... -
Page 2: Table Of Contents
INDEX • Safety Instructions ______________________________________________ 3 • Pre Assembly Check List __________________________________________ 5 • Hardware & Tools List ____________________________________________ 6 • Parts List ______________________________________________________ 10 • Exploded Drawing _ ______________________________________________ 13 • Assembly Steps _________________________________________________ 14 • Fitness Tips & Techniques _ _________________________________________ 27 • Conditioning Guidelines __________________________________________ 28 • Warm Up & Cool Down _________________________________________ 29 • Frequently Asked Questions _______________________________________ 30 • 1 Year Limited Warranty __________________________________________ 31 • Repairs Procedure _ ______________________________________________ 32... -
Page 3: Safety Instructions
SAFETY INSTRUCTIONS It is the sole responsibility of the purchaser of Trojan products to read the owner’s manual, warning labels and instruct all individuals, on proper usage of the equipment. Understanding each and every warning to the fullest is important. If any of these instructions or warnings are unclear, please contact our Trojan Call Centre on 0861 TROJAN (0861 876526), within the Republic of South Africa. - Page 4 SAFETY INSTRUCTIONS INSPECTION • Do not use or permit use of any equipment that is damaged or has worn or broken parts. For all Trojan equipment use only replacement parts supplied by Trojan. • Always make sure that all nuts and bolts are tightened prior to each use.
-
Page 5: Pre Assembly Check List
PRE ASSEMBLY CHECK LIST Thank you for choosing the Trojan Power Station 400 Home Gym. We take great pride in producing this product and hope it will provide many hours of quality exercise to make you feel better, look better and enjoy life to its fullest. Yes, it’s a proven fact that a regular exercise program can improve your physical and mental health. -
Page 6: Hardware & Tools List
HARDWARE & TOOLS LIST #22 CURL BAR #23 SINGLE PULLEY BRACKET #20 FOAM ROD #21 LAT BAR 1PC 2PCS (LONG) 1PC 10318... - Page 7 HARDWARE & TOOLS LIST #31 WEIGHT PLATE 10PCS #67 OIL BUSHING Ø44 X Ø39.4 X Ø19.1 X 12 MM 4PCS #68 OIL BUSHING Ø50 X Ø44 X Ø12.8 X 12 MM #66 OIL 2PCS BUSHING 12PCS #69 OIL BUSHING Ø44 X Ø39.4 X Ø25.6 X 12 MM 4PCS 10318...
- Page 8 HARDWARE & TOOLS LIST #70 HEX BOLT #71 HEX BOLT #72 HEX BOLT #73 HEX BOLT #74 HEX BOLT 3/8” X 3-3/8” 3/8” X 4-1/4” 3/8” X 2-1/2” 3/8” X 1-1/4” 3/8” X 2” 2PCS 2PCS 2PCS 2PCS 16PCS #75 HEX BOLT #76 HEX BOLT #77 HEX BOLT #78 HEX BOLT #79 HEX BOLT...
- Page 9 HARDWARE & TOOLS LIST #105 BUSHING #117 OIL BUSHING #116 BACKREST #118 HEX Ø38 MM X 32 #119 HEX BOLT #120 HEX BOLT CUSHION (LEG BOLT M8 X 25.4 X 19 MM 3/8” X 4” M8 X 45 FRAME) 1PC X 20 MM 2PCS 2PCS 2PCS...
-
Page 10: Parts List
PARTS LIST Part Description Qty Part Description Main Base Weight Plate Rear Base Weight Base Plate Vertical Post Weight Selection Pin Guide Rod Top Beam Elliptical End Cap 30 X 70 mm Butterfly Extension Plastic Bushing Left Butterfly Arm Square End Plug 50 X 50 mm Right Butterfly Arm Oval End Plug 40 X 80 mm Seat Cushion Support... - Page 11 PARTS LIST Part Description Qty Part Description Taper Bumper Washer M8 Plate Washer 3/8" Upper Cable Washer 1/2" Low Cable Washer 5/8" Butterfly Cable Washer T3.0 X Ø11 X Ø36 mm Oil Bushing Hex Bolt 3/8" X 4-1/8" Oil Bushing Ø44 X Ø39.4 Washer T3.0 X 13 X 32 mm X Ø19.1 X 12 mm Oil Bushing Ø50 X Ø43.9.4...
- Page 12 PARTS LIST Part Description Seat Cushion (Leg Frame) Backrest Cushion (Leg Frame) Oil Bushing Ø38 X Ø32 X Ø25.4 X 19 mm Hex Bolt M8 X 20 Hex Bolt 3/8" X 4" Hex Bolt M8 X 45 Hex Bolt 3/8’ X 4-3/8” Hand Tube 155 mm Square Bumper Allen Bolt M10 X 25 mm...
-
Page 13: Exploded Drawing
EXPLODED DRAWING 10318... -
Page 14: Assembly Steps
ASSEMBLY STEPS • Unpack the carton and place all the parts on the floor, carefully removing all packaging. • Check that all the required parts are in the box. • When assembling, first assemble all nuts and bolts loosely, then tighten them up once the entire gym is assembled. -
Page 15: Vertical Post 1
ASSEMBLY STEPS STEP 3: • Lift the Top Plate (30) and Weight Selection Rod (29) up, and then slide the 10 Weight Plates (31) into place, one at a time. • Insert the Weight Selection Pin (33) into the desired Weight Plates. •... - Page 16 ASSEMBLY STEPS STEP 4: • Attach the Bench Press Arm (13) to the Main Base (1) using one Pivot Shaft Ø19 X 280 mm (84), two Washers 5/8” (92), two Lock Nuts 5/8” (87) and two Plastic Dome Caps 5/8” (43). •...
-
Page 17: Butterfly Extension 1
ASSEMBLY STEPS STEP 6: • Attach the Butterfly Extension (6) to the Vertical Post (3) using two Hex Bolts 3/8” x 3-3/4” (78), four Washers 3/8” (90) and two Lock Nuts 3/8” (85). • Insert the shaft of the Left Butterfly Arm (7) through the Left Adjustable Plate (15) and secure to the Butterfly Extension (6) using one... - Page 18 ASSEMBLY STEPS STEP 7: • Thread the Upper Cable (63) through the pulley brackets of the unit. • With the Upper Cable (63) in the groove of the Pulley (54), install Pulley B with two Pulley Brackets (104) into the bracket of the Top Beam (5) using one Hex Bolt 3/8”...
- Page 19 ASSEMBLY STEPS STEP 8: • Thread the Butterfly Cable (65) through the brackets of unit. • Attach one end of Butterfly Cable (65) to the Right Adjustable Plate (16) using one Hex Bolt 3/8” X 1-1/4” (73), one Washer 3/8” (90) and one Lock Nut 3/8”...
- Page 20 ASSEMBLY STEPS STEP 9: • First, remove two Hex Bolts 3/8” X 4-3/8” (121) and four Washers 3/8” (90) and two Lock Nuts 3/8” (85) from the Main Base (1) and Vertical Post (3). • Attach the Arc Base Connect Tube (107) to the Main Base (1) and Vertical Post (3) using two Hex Bolts 3/8”...
- Page 21 ASSEMBLY STEPS STEP 10: • Attach the Right Hand Bar (109) and the Left Hand Bar (110) to the Leg Frame (106) using two Hex Bolts 3/8” X 4-1/8”(94), four Washers 3/8” (90) and two Lock Nuts 3/8” (85). • Attach the Leg Support (108) to the Leg Frame (106) using one Shaft Ø25 X 119 mm (113), two Allen Bolts...
-
Page 22: Seat Support Post 1
ASSEMBLY STEPS STEP 11: • Thread the Low Cable (64) through brackets as shown on the next page. • With the Low Cable (64) in the groove of Red Pulley (53), install Pulley (H) into the Leg Extension (11) using one Hex Bolt 3/8” x 2-1/2” (72), two Bushings Ø13 X T1.0 X 11 mm (98), two Washers 3/8” (90) and one Lock Nut 3/8”... -
Page 23: Curl Bar (
ASSEMBLY STEPS • With the Low Cable (64) in the groove of Pulley (54), install the Pulley (T) with two Pulley Brackets (104) into the bracket of the Leg Support (108) using one Hex Bolt 3/8” x 2” (74), two Washers 3/8”... - Page 24 ASSEMBLY STEPS STEP 12: • Attach the Backrest Cushion (28) to the Vertical Post (3) using two Hex Bolts M8 x 42 mm (82) and two Washers M8 (89). • Attach the Seat Cushion (27) to the Seat Cushion Support (9) using four Hex Bolts M8 X 16 mm (81) and four Washers M8 (89).
-
Page 25: Arm Curl Cushion 1
ASSEMBLY STEPS STEP 13: • Attach the Arm Curl Cushion (26) onto the Arm Curl Frame (12) using two Hex Bolts M8 X 16 mm (81) and two Washers M8 (89). • Insert the Arm Curl Frame (12) into the Seat Support Post (10) with the Pop Pin. •... -
Page 26: Seat Cushion 1
ASSEMBLY STEPS STEP 14: • Attach the Back Adjust Tube (114) into the Leg Frame (106) and lock in place with the Pop Pin. • Attach the Backrest Cushion-Leg Frame (116) onto the Back Adjust Tube (114) using two Hex Bolts M8 X 20 mm (118) and two Washers M8 (89). -
Page 27: Fitness Tips & Techniques
Always consult your physician before beginning any exercise program. MUSCLE CHART TROJAN POWER STATION 400 HOME GYM The exercise routine that is performed with the Trojan Power Station 400 Home Gym will develop the whole body. These muscle groups are highlighted on the muscle chart below. Trapezius... -
Page 28: Conditioning Guidelines
CONDITIONING GUIDELINES How you begin your exercise program depends on your physical condition. If you have been inactive for several years, or are severely overweight, you must start slowly and increase your time on the equipment; a few minutes per workout. Initially, you may be able to exercise only for a few minutes in your target zone, however, your aerobic fitness will improve over the next six to eight weeks. -
Page 29: Warm Up & Cool Down
WARM UP & COOL DOWN WORKOUT GUIDELINES Each workout should include the following three parts: A warm-up: 5 to 10 minutes of stretching and light exercise. A proper warm-up increases your body temperature, heart rate, and circulation in preparation for exercise. Training zone exercise: 20 to 30 minutes of exercising with your heart rate in your training zone. (Note: During the first few weeks of your exercise program, do not keep your heart rate in your training zone for longer than 20 minutes). -
Page 30: Frequently Asked Questions
FREQUENTLY ASKED QUESTIONS Q1. How Do I Maintain My Cables? The cables work in conjunction with the pulleys. When assembling the unit, make sure not to over-tighten the pulleys. The pulleys are meant to move freely. Before your workout, make sure all the cables are lined up correctly on the pulleys. Q2. -
Page 31: Year Limited Warranty
The Consumer does not need to return the product to the store. The Consumer should call the Trojan Call Centre on 0861 TROJAN (0861 876526) and the Manufacturer’s authorised agent will at its discretion either repair the item at the Consumer’s residence or collect and repair the item at their premises. -
Page 32: Repairs Procedure
Do not return the product to the store.* • Call the Trojan Call Centre on 0861 TROJAN (0861 876526) to log the faulty product (under warranty or out of warranty). • The operator or technical advisor will try identify the fault, and will book a service team call out.
Need help?
Do you have a question about the POWER STATION 400 and is the answer not in the manual?
Questions and answers
I need a power supply for my Trojan velocity 400. Do you know where I can find one.I **** in Vanderbijlpark.