
Related Manuals for inVENTer aV200 ALD


Summary of Contents for inVENTer aV200 ALD
- Page 1 Installation instructions aV200 ALD ventilation device without heat recovery www.inventer.de...
-
Page 2: Table Of Contents
® Safety instructions ......................5 The copyright to this document remains with the manufacturer. Rights to all content and images: © inVENTer GmbH 2022. System overview: aV200 ALD ventilation device ..............7 Construction ........................8 All trademarks used in this document are the property of their respective manufacturers and are Function ......................... -
Page 3: User And Safety Instructions
Intended use Safety and warning instructions The aV200 ALD exterior wall air outlet is used to allow exterior air to flow in according to The safety and warning instructions in these installation instructions have a uniform structure and DIN 18017-3 and DIN 1946-6 in residential devices and supplements the extract air device. -
Page 4: System Overview: Av200 Ald Ventilation Device
A minimum distance of 1.2 m must be maintained between adjacent air openings. The aV200 ALD exterior-wall air outlets are used are used to provide outside-air ventilation in res- (, page 11). -
Page 5: Construction
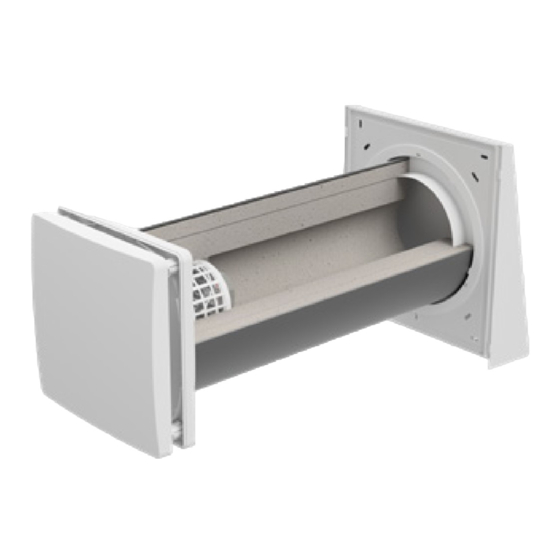
ALD Extract air area Flex Zero WPH Supply air Extract air area area Figure 1: Overview of aV200 ALD Standard ventilation device Components 1 Exterior closure 6 ISO coarse filter (G1) [pre-installed] aV200 ALD 1a) Flex Zero WPH base plate... -
Page 6: Preparing For Installation
• Observe the minimum distance of 1.2 m to adjacent air openings. 1,2 m – 0,75 y 1,2 m • The aV200 ALD must not be covered by 1,2 m cabinets or protruding constructions. The outdoor air must be able to flow in freely. -
Page 7: Position Of The Wall Opening
Position of wall opening Position of Simplex wall installation system ≥ 150 Figure 4: Scale drawing of aV200 ALD wall opening (interior view) with Flex Zero weather protection hood 1 Wall opening (Fig. 4, left) contour Simplex wall installation system (Fig. 4,... -
Page 8: Dimensional Drawings Of Components
R-D200x495 wall sleeve (745) 495 (745) Ø200 Flex Zero weather protection hood 23 – 88 Flair Zero ALD inner cover Standard variant: with render, insulation, masonry and plaster Open aV200 ALD ventilation device | Installation instructions aV200 ALD ventilation device | Installation instructions... -
Page 9: Installation And Assembly
3 f: Interior wall fixing material 4 Insert filter cartridge 4 a: Filter cartridge 4 b: ISO coarse dust filter (G1) 1) WPH = Weather protection hood IC = Inner cover aV200 ALD ventilation device | Installation instructions aV200 ALD ventilation device | Installation instructions... -
Page 10: Installing The Wall Sleeve
• Before foaming the free space between the wall sleeve and masonry, insert Styrofoam discs. ► Align the two lateral fastening elements of the wall sleeve horizontally. TICS = Thermal insulation composite system aV200 ALD ventilation device | Installation instructions aV200 ALD ventilation device | Installation instructions... -
Page 11: Installing The Exterior Closure Of The Standard Ventilation Device Variant
Outer boreholes (blue arrow): Masonry. ø 8 mm Inner boreholes (green arrow): Simplex. ► Drill the four holes with Ø 8 mm, min. 50 mm deep. aV200 ALD ventilation device | Installation instructions aV200 ALD ventilation device | Installation instructions... - Page 12 Position the abutting surfaces (red arrow) in the upper section of the wall sleeve (ap- prox. 12 o'clock [upper fixing element]). The Flex Zero weather protection hood is installed. aV200 ALD ventilation device | Installation instructions aV200 ALD ventilation device | Installation instructions...
- Page 13 Inventin. The sound insulation lining made from Inventin is inserted. The sound insulation lining is inserted. aV200 ALD ventilation device | Installation instructions aV200 ALD ventilation device | Installation instructions...
-
Page 14: Install The Flair Zero Ald Inner Cover
NOTICE: IF the base plate of the inner cover is twisted, the inner cover panel can- Check: The inVENTer logo is located at the not be fitted correctly! bottom right. • The position arrow on the inner cover base... -
Page 15: Technical Data
Article numbers of the exterior closure variants in the separate installation instructions of the respective exterior cover Special variant: consisting of aluminium, with increased salt resistance aV200 ALD ventilation device | Installation instructions aV200 ALD ventilation device | Installation instructions... -
Page 16: Troubleshooting
Outside Germany, the national guarantee provisions of the country in which the system is sold apply. Please contact the distributor for your country. Warranty: inVENTer GmbH provides a five-year warranty for the wall sleeve. This covers premature product wear. Guarantee and warranty claims: Further information about the guarantee is available at www.inventer.de/garantie. - Page 17 GmbH Ortsstraße 4a 07751 Löberschütz Germany www.inventer.de Subject to modifications. No liability for printing errors. Item number: 5012-0062 Version: 1.0 – 11/2022...
Need help?
Do you have a question about the aV200 ALD and is the answer not in the manual?
Questions and answers