Advertisement
Quick Links
Advertisement

Related Manuals for NCR 7358-K708


Summary of Contents for NCR 7358-K708
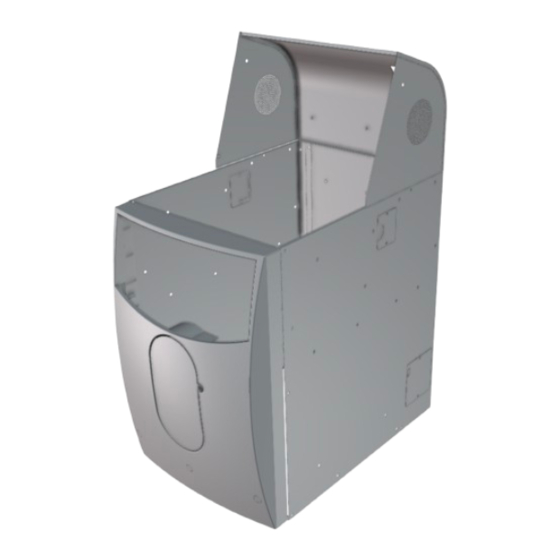
- Page 1 Kit Instructions Color Skin Upgrade (Walmart Medium Gray) 7358-K708 Issue A...
- Page 2 NCR, therefore, reserves the right to change specifications without prior notice. All features, functions, and operations described herein may not be marketed by NCR in all parts of the world. In some instances, photographs are of equipment prototypes. Therefore, before using this document, consult with your NCR representative or NCR office for information that is applicable and current.
-
Page 3: Revision Record
Revision Record Issue Date Remarks Nov 2019 First Issue... - Page 4 Color Skin Upgrade (Walmart Medium Gray) This publication provides procedures for installing a Color Skin (Walmart Medium Gray) to any of the following SelfServ Checkout units: • NCR SelfServ™ Checkout (7350) • NCR SelfServ™ Checkout (7350) R6 Lite • NCR FastLane SelfServ™ Checkout (7358)
-
Page 5: Kit Contents
Color Skin Upgrade (Walmart Medium Gray) Kit Contents Part Number Description 497-0526797 Kit - Color Skin Upgrade - WM Medium Gray 795-0108628 Panel - core left side (WM Medium Gray) 795-0108528 Panel - core right side (WM Medium Gray) - Page 6 Color Skin Upgrade (Walmart Medium Gray) Part Number Description 795-0114928 Weldment - Core skin (WM Medium Gray) 006-8611286 Screw - 8-32 x .375" Phillips Pan Head, Captive External Tooth Washer, Trivalent Coating (10 pcs) 795-0133728 Panel - Core - Rear Access (WM Medium Gray) 006-8611143 Nut Keps, 8-32, Steel, Blue Zinc (5 pcs) 795-0258528...
-
Page 7: Installation Procedures
Depending on Bagwell configuration, refer to 7358- K111/K112/K113 Bagwell Upgrade Kit Instructions. Coupon Printer Removing Coupon Printer Shelf page 6. Shelf Basket Shelf For more information, refer to NCR FastLane SelfServ™ Checkout (7358) R6L Plus Hardware Installation Guide (BCC5- 0000-5263). Tri–Light/Lane Do the following: Light Pole and •... - Page 8 Assembly • Installing Tri–Light/Lane Light Assembly page 31. c. Basket Shelf For more information, refer to NCR FastLane SelfServ™ Checkout (7358) R6L Plus Hardware Installation Guide (BCC5- d. Coupon Printer 0000-5263). Shelf e. Bagwell Depending on Bagwell configuration, refer to 7358- K111/K112/K113 Bagwell Upgrade Kit Instructions.
- Page 9 Color Skin Upgrade (Walmart Medium Gray) Removing Coupon Printer Shelf To remove the Coupon Printer Shelf, loosen all two (2) screws securing the Printer Shelf to the SelfServ Checkout unit. Note: The Coupon Printer Shelf is mounted above the Basket Shelf on the side of the SelfServ Checkout unit.
- Page 10 1. Turn off the R6L Plus software and hardware systems. For more information, refer to "General Operational Procedures" section of NCR SelfServ™ Checkout (7360) Hardware Service Guide (B005–0000–2378). 2. Remove the screw securing the Tri–Light/Lane Light Assembly to the Tri–Light /Lane Light pole.
- Page 11 Color Skin Upgrade (Walmart Medium Gray) Tri–Light/Lane Light with Camera Assembly...
- Page 12 Color Skin Upgrade (Walmart Medium Gray) 3. Lift the Tri–Light/Lane Light Assembly and then disconnect the cables. Tri–Light/Lane Light Assembly...
- Page 13 Color Skin Upgrade (Walmart Medium Gray) Tri–Light/Lane Light with Camera Assembly Note: The assembly has cable ties that provide strain relief for the connectors. Cut these cable ties before disconnecting the connectors.
- Page 14 Color Skin Upgrade (Walmart Medium Gray) Removing Tri–Light/Lane Light Pole To remove the Tri–Light/Lane Light pole, follow these steps: 1. Remove the existing Tri–Light/Lane Light assembly, if necessary. For more information, refer to Removing Tri–Light/Lane Light Assembly on page 7. 2. Remove two screws securing the pole to the unit. 3.
- Page 15 Color Skin Upgrade (Walmart Medium Gray) Removing Cosmetic Door Bumper To remove the bumper from the Cosmetic Door, follow these steps: 1. Remove three (3) ⅟₄ – 20 flat head screws to detach the bumper from the Cosmetic Door, as shown in the image below. 2.
- Page 16 Color Skin Upgrade (Walmart Medium Gray) Removing Core Cabinet Bumpers To remove the Core Cabinet Bumpers from the Core Cabinet, follow these steps: 1. Detach the Rear Core Bumpers by removing two (2) screws and spacers from each Bumper, as shown in the image below.
- Page 17 Color Skin Upgrade (Walmart Medium Gray) 2. Detach the Side Core Bumper from the Core Cabinet by removing the (2) screws and spacers, as shown in the image below. Note: For a No-Bag configuration, a Side Core Bumper is installed on each side of the SelfServ Checkout.
- Page 18 Color Skin Upgrade (Walmart Medium Gray) Removing Plastic Door Fascia To remove the Plastic Door Fascia, remove the ten (10) 8–32 pan head screws securing the Plastic Door Fascia to the Cosmetic Door.
- Page 19 Color Skin Upgrade (Walmart Medium Gray) Removing Core Hood To remove the Core Hood, follow these steps: 1. Open the Upper Cabinet Door. 2. Remove the Scanner/Scale to access the nuts securing the Core Hood to the Tower Cabinet. 3. Remove the two (2) screws securing the sides of the Core Hood to the Tower Cabinet, as shown in the image below.
-
Page 20: Removing Rear Panel
Color Skin Upgrade (Walmart Medium Gray) Removing Rear Panel To remove the Rear Panel, remove the six (6) screws securing the panel to the Core Cabinet frame, as shown in the image below. -
Page 21: Removing Side Panels
Color Skin Upgrade (Walmart Medium Gray) Removing Side Panels To remove the Side Panels from the Core Cabinet, follow these steps: 1. Remove four (4) screws from the back of the Core Cabinet frame, as shown in the image below. - Page 22 Color Skin Upgrade (Walmart Medium Gray) 2. Remove the five (5) screws securing the right side panel to the Core Cabinet. Note: Do not remove the cable access covers from the panel. 3. Remove the five (5) screws securing the left side panel to the Core Cabinet. Note: Do not remove the cable access covers from the panel.
-
Page 23: Installing Side Panels
Color Skin Upgrade (Walmart Medium Gray) Installing Side Panels To install the Side Panels to the Core Cabinet, follow these steps: 1. Secure the left side panel to the Core (Cabinet) using five (5) screws, as shown in the image below. 2. - Page 24 Color Skin Upgrade (Walmart Medium Gray) 3. Secure both left and right side panels to the Core Cabinet frame using four (4) screws, as shown in the image below. 4. Install core access covers on the side panels using two (2) flat head screws, as shown in the image below.
- Page 25 Color Skin Upgrade (Walmart Medium Gray) 5. Install the large access cover panel to the side panel using two (2) screws, as shown in the image below. Note: Depending on the orientation of the SelfServ Checkout unit, the large access cover panel should be installed on the panel opposite to the Bagwell area.
- Page 26 Color Skin Upgrade (Walmart Medium Gray) Installing Rear Panel To install the Back Panel, secure the Back panel to the Core Cabinet using six (6) screws, as shown in the image below.
- Page 27 Color Skin Upgrade (Walmart Medium Gray) Installing Core Hood To install the Core Hood, follow these steps: 1. Open the Upper Cabinet Door, if necessary. 2. Position the Core Hood onto the Tower Cabinet. Ensure that the five (5) studs are inserted into the holes of the Tower Cabinet, as shown in the image below.
- Page 28 Color Skin Upgrade (Walmart Medium Gray) Installing Cosmetic Door Fascia To install the Plastic Door Fascia, secure the Plastic Door Fascia to the Cosmetic Door using ten (10) 8–32 pan head screws, as shown in the image below.
- Page 29 Color Skin Upgrade (Walmart Medium Gray) Installing Core Cabinet Bumpers To install the bumpers on the Core Cabinet, follow these steps: 1. Install the Side Core Bumper by doing the following: Note: For a No-Bag configuration, a Side Core Bumper is installed on each side of the SelfServ Checkout.
- Page 30 Color Skin Upgrade (Walmart Medium Gray) 2. Install the Rear Core Bumpers by doing the following: a. Insert a bumper spacer into each hole. b. Align the Rear Core Lower Bumper holes with the corresponding bumper spacer and then secure using two 1/4–20 flat head screws as shown in the image below. c.
- Page 31 Color Skin Upgrade (Walmart Medium Gray) Installing Cosmetic Door Bumper To install the Cosmetic Door Bumper, follow these steps: 1. Remove the three (3) plastic plugs from the Plastic Door Fascia. 2. Do the following: a. Insert three (3) clear zinc bumper spacers into each hole on the Plastic Door Fascia.
- Page 32 Color Skin Upgrade (Walmart Medium Gray) Installing Tri–Light/Lane Light Pole To install the Tri–Light/Lane Light pole, follow these steps: 1. Insert the Tri–Light/Lane Light cable extender through the Tri–Light/Lane Light pole. Tip: To make routing the cable extender through the pole easier, first attach a weight (for example, a large bolt) to a long piece of string and drop the weighted end of the string through the Tri–Light/Lane Light pole (starting at the top-end).
- Page 33 Color Skin Upgrade (Walmart Medium Gray) 3. Secure the pole to the Upper Cabinet using two screws. 4. Install the Tri–Light/Lane Light assembly.
- Page 34 Color Skin Upgrade (Walmart Medium Gray) Installing Tri–Light/Lane Light Assembly To install the Tri–Light/Lane Light assembly, follow these steps: 1. Install the Tri–Light/Lane Light pole. For more information, refer to Installing Tri– Light/Lane Light Pole on page 29. 2. Connect the Tri–Light/Lane Light assembly cable with the cable extender in the pole.
- Page 35 Color Skin Upgrade (Walmart Medium Gray) 3. Orient the Trilight/Lane Light assembly so that the Lane Light faces the front of the unit. 4. Insert the Tri–Light/Lane Light assembly into the Tri–Light/Lane Light pole. Ensure that the pole holes are aligned.
- Page 36 Color Skin Upgrade (Walmart Medium Gray) 5. Secure the Tri–Light/Lane Light assembly to the pole with a screw. 6. Run the ADD utility to ensure device is updated with the latest firmware.
Need help?
Do you have a question about the 7358-K708 and is the answer not in the manual?
Questions and answers